Category CARPENTRY

Building codes governing handrails and guardrails

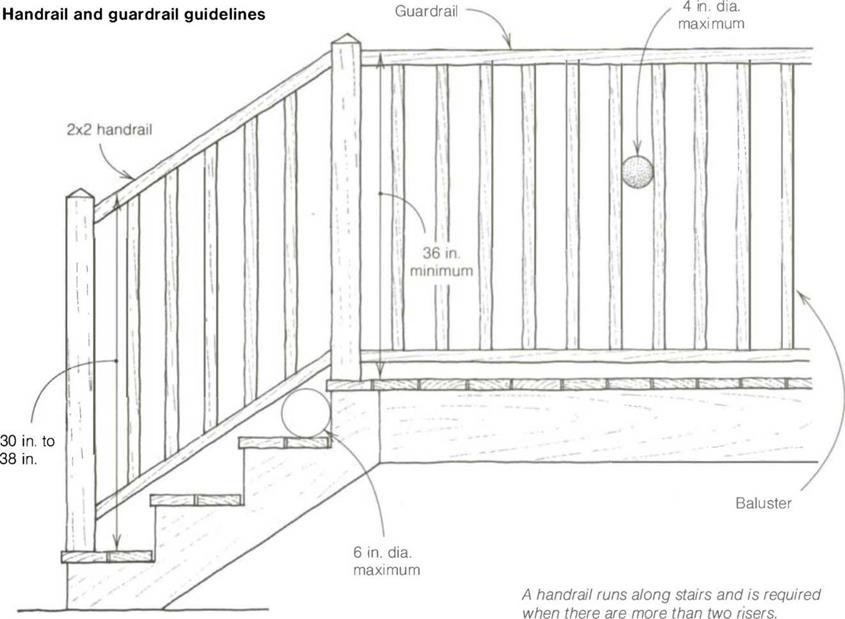
• Every stair over three risers needs at least one handrail.

• Stairs 44 in. wide need a handrail on each side.

• Locate the handrail 30 in. to 38 in. vertically off the nose of the stair tread.

• Diameter of the railing must be 1 V2 in. to 2 in. for easy grasp.

• Leave a 11/г-іп. gap between the rail and wall on enclosed stairs.

• Extend the rail the full length of the stairs.

• Minimum guardrail height on landings or decks must be from 36 in. to 42 in.

• Balusters (uprights between handrail and treads or landings) must run vertically so that children can’t climb on them.

• Spacing between balusters should not be more than 4 in. so that children can’t squeeze through.

Building codes governing handrails and guardrails

Building codes governing handrails and guardrails

A simple outdoor handrail or guardrail for stairs and decks can be made of naturally rot-resistant wood, such as cedar or redwood, or pressure-treated wood. (Photo by Dean Della Ventura.)


Building an exterior guardrail

Often, a handrail becomes a guardrail, enclosing an upper area like a landing or a deck. Like stairs and handrails, guardrails can be built using numerous designs and materials, but because they protect people from falling, they need to be safe and solidly built.

A guardrail design that I’ve often used for decks and balconies has a simple but classic look and can easily be modified—with fancy balusters, for example—for different situations (see the photo above). Although I prefer to work with cedar or redwood for these structures, here on the wet Oregon coast, we frequently use pressure – treated wood.

First, set 4×4 vertical posts every 8 ft. or so in the floor structure to hold the guardrail, notching and bolting these posts securely. Cut the posts 39 in. long, then cut and attach 2x4s laid flat about 3 in. above the floor deck between these posts. After nailing another 2×4 flat on top of the posts, cut 2×2 balus­ters at 40У2 in., predrill them, and screw them vertically to the 2x4s with 3-in. deck screws. Plan your spacing so that there is no more than a 4-in. gap between each baluster.

Once the balusters are in place, cut and attach a 2×6 flat on top of the upper 2×4, which makes the total railing height 42 in. If you attach the upper 2×6 rail to the 2×4 from the underside, there won’t be any penetrations to allow moisture into the rail, and it will look better.

HANDRAILS

Handrails and guardrails come in many shapes, sizes, and materials. Like a seat – belt on a car, they are necessities for safety, but they can also be the highlight of a set of stairs (see the photo on the facing page). So not only do they need to look good, but they also need to be designed safely and built solidly, what­ever their style or material.

Stairs are the most dangerous part of a house, and most building codes address stair and handrail design to some extent (see the sidebar on p. 170). A safe handrail is a key part of a safe stairway, whether it is a simple rail mounted on the wall with brackets or an elaborate balustrade (a horizontal rail with evenly spaced uprights that extend down to the stair treads).

Building a simple handrail

Elaborate balustrades can be expensive to build, and their installation is outside the scope of this book. But a safe and

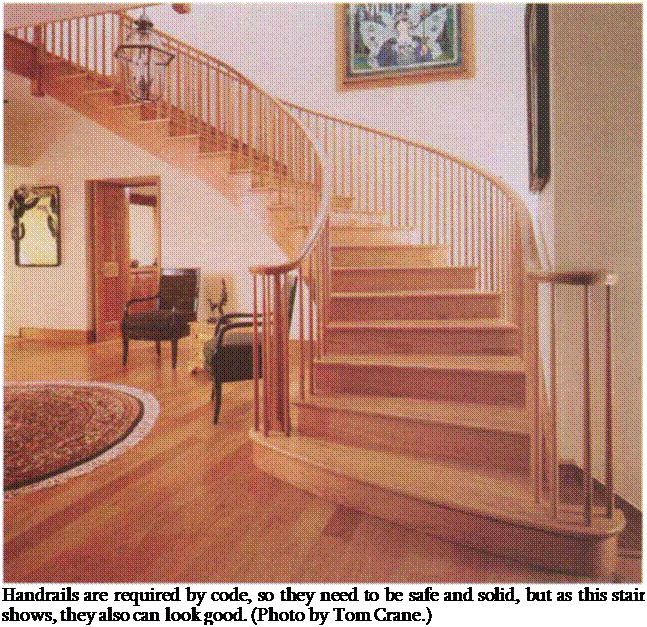
Подпись: Handrails are required by code, so they need to be safe and solid, but as this stair shows, they also can look good. (Photo by Tom Crane.)

sturdy handrail like the one that follows isn’t difficult to build and can do the job just as well. Depending on the particular style of stairs I’m building, I sometimes use this sturdy, easy-to-use and inexpen­sive design.

To begin, run a row of scrap 2×10 blocks up the stair slope when framing the stairs. Nail them in the walls between the studs so that their center is about 34 in. above the stair nosing. After the drywall has been hung, come back and snap a chalkline above the stairs exactly where the handrail will be placed, typi­cally between 30 in. and 38 in. above the nosing of the stair. Then drill a 5/s-in.- or 3A-in.-diameter hole near the top and bottom of the stairs and about every
3 ft. between, going through drywall and into the blocking directly along the line. Cut off б-in. pieces of 5/s-in. or 3/4-in. hardwood dowel (depending on the size of the holes) and glue them firmly in the holes.

After the walls have been finished, cut the dowels to length at about 2 Vi in. Next, get a long piece of 2×2 handrail (straight-grained Douglas fir or clear pine works well) and round the corners, sanding it smooth. Then hold the rail in position next to the dowels and mark it for drilling (a helper is handy for this step). Drill 1-in.-deep holes into the rail, apply glue, and tap the rail onto the dowels, being sure to leave it 1V2 in. away from the wall.

Cutting and installing risers and treads

If the stairs are going to be covered with carpet, the treads and risers can be cut from scrap material leftover from sheathing. I use at least 5/s-in. plywood or oriented strand board (OSB) for the risers and 3/нп. plywood for treads.

Scrap material can be ripped to width on a table saw or with a circular saw (care­fully following a chalkline or using a ripping guide).

These rough treads and risers can also be covered with a fine, finished hard­wood to give the stairs a custom look. Often, this is done later, when the house is nearly finished. To help you get a perfect fit, use a stair-tread gauge, a tool that fits from wall to wall, adjusts to fit out-of-square skirtboards, and gives you the exact length and shape of the tread or riser. Finish treads often have a nosing (174-in. maximum over­hang by code) that projects out over the edge of each tread. I think that 174 in. is excessive because it is too easy to catch your toe on it as you go up the stairs, so I prefer no more than a 7/s-in. overhang.

Rough risers and treads don’t have to be the exact width when they’re being cov­ered by carpet. In fact, it’s better to cut them a bit narrow to eliminate the possi­bility that they will touch at the back side and create a squeak, which can happen when wood rubs against wood. And who needs squeaky stairs, especially if you’re trying to sneak in late at night? So for stairs with 774-in. risers and 10-in. treads, rip the risers to 77s in. and the treads to 97/s in. Cut them to the width of the rough stairway, or 36 in. long in this case.

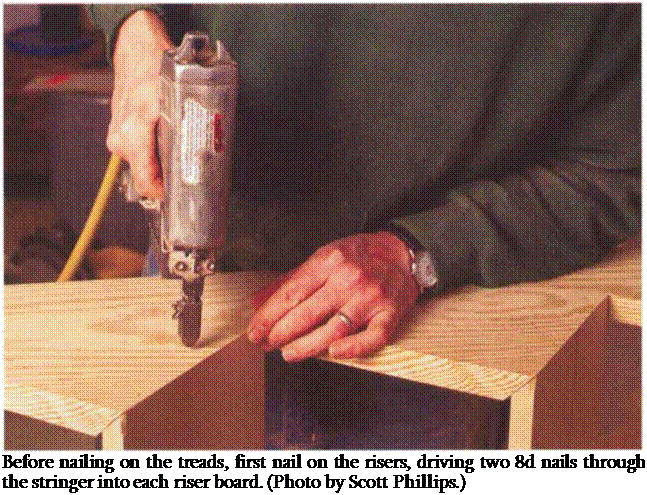
Risers are nailed on first (see the photo on p. 168). The first riser usually has to be ripped an extra 3/4 in. narrower than

Подпись: Before nailing on the treads, first nail on the risers, driving two 8d nails through the stringer into each riser board. (Photo by Scott Phillips.)

the rest to compensate for the dropped stringer. Starting at the bottom, drive two 8d nails through the riser board into each stringer. Put the next riser in the same way, halfway up, to help straighten the stringers. Then go back to the bottom and nail on the rest of the risers.

When fastening the treads, use lots of construction adhesive between the treads and the stringers to help prevent squeaks that can develop as the wood dries out and nails loosen up. For extra insurance, secure the treads with deck screws, which are less likely to pull out than nails. Start at the bottom, run a generous bead of adhesive on the stringers and on the riser edge and secure each board as you go with three 8d nails or screws per stringer. When all the treads are on, try out the stairs. Finally, take a moment to admire the safe, easy access you have built to the next floor.

Attaching stringers

Because a stairway is often asked to bear considerable weight, stringers need to be securely attached at top and bot­tom. There are several ways to attach a stringer to an upper landing, deck, or floor system (see the drawing at right). Whichever method you choose, the first step is to measure down on the face of the landing header one riser height (7[9]A in. in this example) and carefully mark a level line across the header where the stringers will land. Think again about finish floors at this point. Remember what will cover the stair treads and the landing, and make adjustments to ensure that every step will be the same once all finish treads and floor coverings are installed.

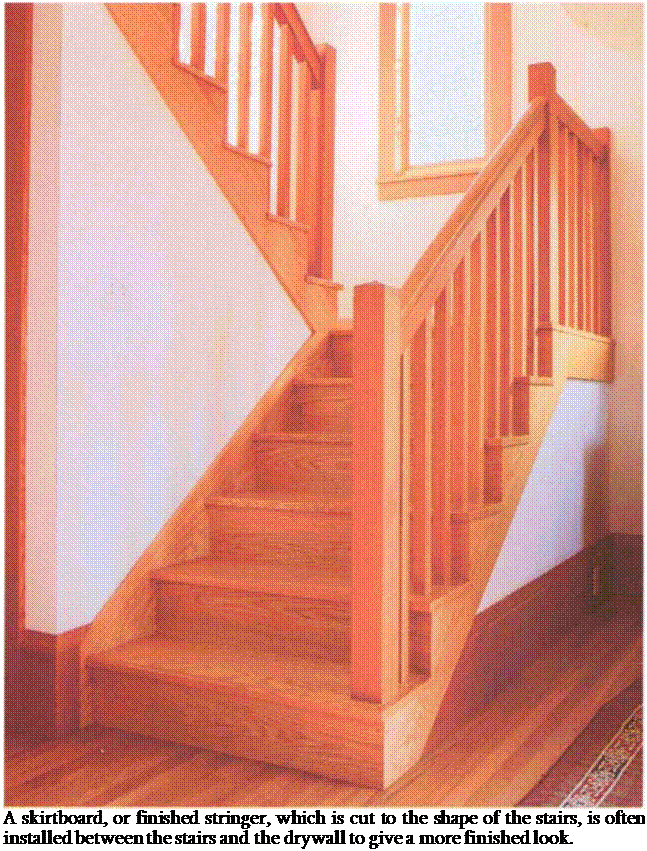
Подпись: A skirtboard, or finished stringer, which is cut to the shape of the stairs, is often installed between the stairs and the drywall to give a more finished look.

nailing in the second and third stringer in the same way. This set of stairs should be strong enough to hold people mov­ing a refrigerator.

Another easy method for securing stringers at the top is with 2×6 or 2×8 metal joist hangers. Just make a horizon­tal cut about 1 Vi in. deep on the back of the stringer to house the bottom of
the hanger. Nail the hanger to the stringer, place the stringer on the line below the landing and nail the hanger into the header.

A third method, using a hangerboard, also works well on exterior stairs because it can be left exposed. Take a piece of 5/s-in. or 3/4-in. plywood (use exterior-grade, pressure-treated plywood
for exterior stairs) and cut it about 1 5 in. wide and as long as the width of the stairs (36 in. normally). Nail the hanger – board to the face of the header joists, flush with the top of the landing. It should hang down no lower than the bottom of the stringer. Then strike a line on the board, down one riser height (71/4 in. for this stair). Hold the stringer to the line and secure it with nails or screws driven in through the back of the hangerboard.

With the stringers secure at the top, cut a 2×4 kicker as wide as the total width of the rough stairway (36 in. in this case) for the bottom of the stairs. Slip it into the notches on the front end of the stringers and fasten it to the floor. Then toenail the stringers to the kicker.

When setting stringers, remember to leave a bit more than Vi in. between the stringer and the wall framing so that drywall can easily slip between the stringers and the wall. Otherwise, some­body has to cut the shape of the stairs in the drywall to fit the stringer.

Skirtboards

Before nailing in the stair parts, a 1x skirtboard is often installed between walls and stringers (see the photo on the facing page). This piece of trim (often a 1×12) protects drywall from being dented by shoe kicks or vacuum cleaners. To cut the skirtboard, first snap a chalkline above the nose of the treads 3 in. or 4 in. and measure its length. Mark a plumb cut on the top of the skirtboard and a level cut at the bottom by using the 774-in. and 10-in. layout on the framing square (just as the top and bot­tom cuts on the stringers were laid out). Of course, be sure to leave enough room between the rough stringers and wall framing to accommodate the thickness of both the drywall and the skirtboard.

Cutting stringers

Take a moment to check that your lay­out is correct before cutting out all the notches on the stringers. I make two cuts—the horizontal (or level) cut that rests on the floor and the vertical (or plumb) cut that nails to the top header joist. The stringer should fit snugly at both top and bottom, and all the tread lines should be level. Sometimes, espe­cially on concrete, the floor may not be dead level, which can cause the heel (back side) of a stringer to hit the con­crete first and open up a gap at the toe
(front). This results in an increase in the amount of rise on the first step up. If the floor is uneven, you’ll either have to scribe a line across the bottom of the tread and make the cut so that the stringer fits snugly to the floor or shim the heel when the front hits first.

This basic unnotched stringer is fre­quently used for exterior stairs. I attach metal or wood cleats to the tread lines of the two side stringers and set them in place. Then heavy treads cut from 2x or even 3x material can be fixed to the cleats. Exterior stairs shrink and swell a lot, and it seems that every time a person

uses them, a nail tends to work loose. That’s why I prefer using treated wood with bolts and deck screws rather than nails to hold exterior stairs together.

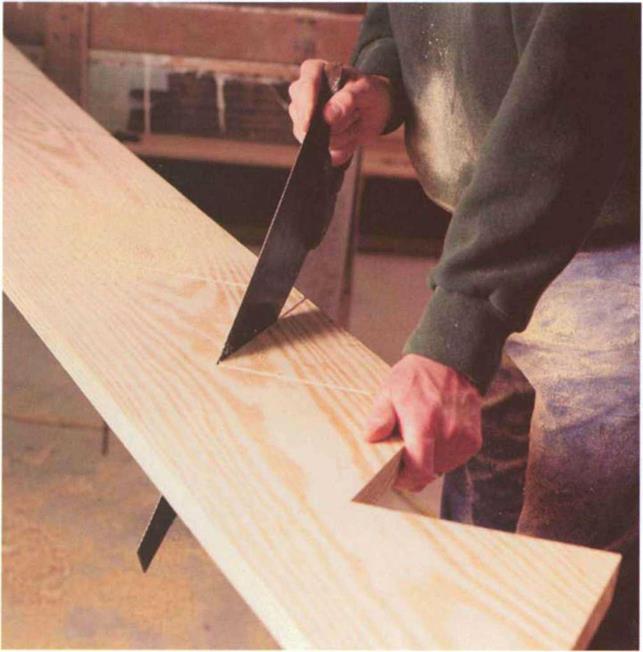
When cutting out the tread and riser lines on a stringer, start at the bottom and cut all the treads. Then turn around and cut all the risers. I to do it this way because it sets up a rhythm and is less tiring than switching back and forth. Stringers that will not be exposed and that will be supported by a wall can be overcut with a circular saw. Or you can finish the cut with a jigsaw or handsaw (see the photo below). If you overcut, be

Cutting stringers

The notch in the rough stringers can be overcut with a circular saw. If the stringers are exposed, finish the cut with a handsaw or jigsaw. (Photo by Scott Phillips.)


Cutting stringerscareful not to cut any more than is needed to remove the tread-riser notch, or you can seriously weaken a stringer.

Once the first stringer has been cut and checked for fit, it becomes your pattern. If the uncut stringer stock has any crown to it, turn it up. Then lay the pattern exactly on top of the other stringers and mark accurately along all the treads and risers with a sharp carpenter’s pencil. Carefully make the remaining cuts, and you’re ready to build the stairs.

Dropping the stringer

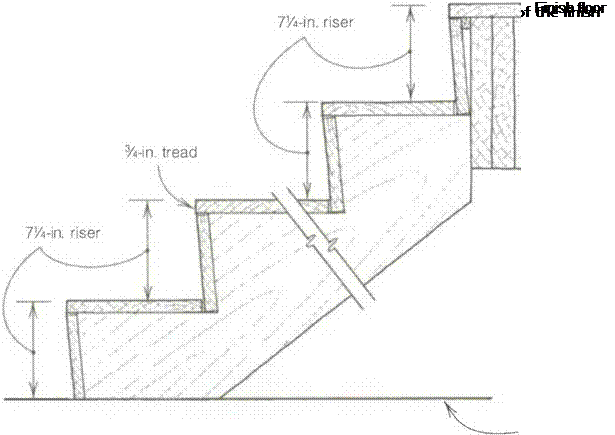
A simple adjustment often needs to be made at the bottom of the stringer to keep the first riser the same height as the rest, because if you nail а 3/нп. board to the first tread, for example, the step increases to 8 in. from JVa in. (see the drawing on the facing page). This is important for safety, because all risers need to be the same height. So subtract the thickness of the finish tread from the bottom of the stringer.

There are many different variations on this detail. If the subfloor is to be car­peted and treads sheathed with 3/ип.

Dropping the stringer

plywood and finished with 3/нп. hard­wood, the stringer has to be dropped by 1Vi in. for every riser to be the same. If the stair is nailed to the subfloor and both treads and subfloor will be covered with 3/4-in. hardwood, nothing has to be done. If the subfloor is sheathed with 3/4-in. hardwood and treads with 3/нп. plywood and 3/s-in. hardwood, drop the stringers by 3/s in. Again, you need to know the exact thickness of the finish floor and tread material before you can frame the stairs.

To help secure the bottom of the stair, lay out a notch for a 2×4 on the bottom front of the first riser. Just take a scrap of 2×4, hold it flush with the outside
corner of the first riser, and scribe around it. This notch will rest on a 2x kicker that is secured to the floor (see the drawing on p. 157).

Calculating individual risers and treads

Once you’ve determined the total rise of a set of stairs, you can calculate exactly how many steps are needed to get to the second floor and how high each step will be. The total rise for a typical two-story house with 8-ft. walls (accounting for plates, studs, and joists) is often around 109 in., so I use this number in my calculations. Just remem­ber that the first point in building any set of stairs is to measure the actual total rise accurately.

Some codes allow an individual riser to be up to 8 in. high. This is too steep for most of us and makes going up the
Подпись:

stairway like climbing a mountain. But people tend to take shallow steps two at a time, which can be just as uncomfort­able and dangerous. The angle of a set of stairs needs to be close to 35°, so wherever possible, I like to build stairs with a 7-in. rise and an 11-in. tread, which experience (and building codes) tells me is a safe and comfortable set of stairs for most people.

Divide 109 in. by 7 in. (the height of a normal step) and the result is 15.57 in. Because there can’t be a partial step, round the result to a whole number to get the number of risers needed. If you divide the rise (109) by 1 5, you get 7.26, or 71/4 in., which is an acceptable rise. If you divide 109 by 16, you get a rise of 6.81 in., which is probably a little too shallow.

An 11-in.-wide tread makes for safer stairs. But if you increase each tread by 1 in., you increase the total run by 14 in. or 1 5 in., depending on the number of treads. That’s okay if you have enough room to build a longer set of stairs. But like most things in carpentry, there is always more than one way to go. As you’ll see, a 10-in. tread can be extended to 11 in. with no increase in the total run. So let’s lay out and cut this 14-tread stair with 10-in.-wide treads and 1 5 risers that are 7Ул in. high. Because stairs have one less tread (14) than risers (15), the total run of these stairs will be 140 in. The upper landing takes the place of the last tread.

Laying out stringers

Treads and risers are supported by diagonal wooden members called stringers, carriages, or horses. As noted, finish interior stairs are normally at least 36 in. wide, a width that requires three stringers. You aren’t penalized for exceeding code, however, and I like to use four stringers when the material is available. This ensures that the stairs won’t feel bouncy.

The majority of rough stair stringers for a full-flight set of stairs are cut from 1 6-ft. or 18-ft. 2x12s. Pick out three or four good stringers that are straight and free of large knots and place them on sawhorses. I prefer a wood like Douglas fir for interior stair stringers because of its strength. I use pressure-treated wood for exterior stringers because they resist insect and moisture damage.

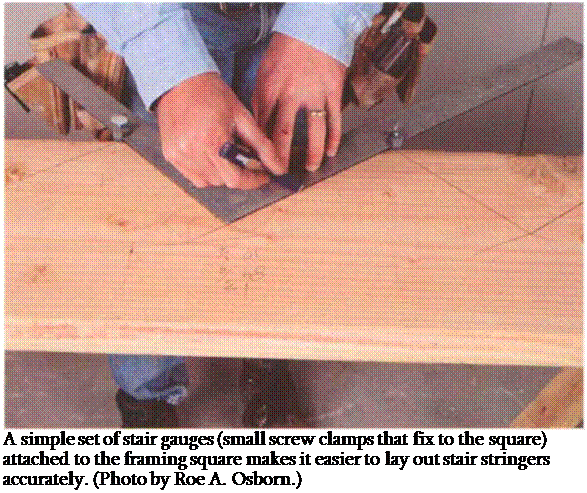
I use a framing square for stringer lay­out, and a simple set of stair gauges (small screw clamps that attach to the square) makes it easier (see the photo above). Screw one gauge at 71A in. (the unit rise) on the tongue, or narrow part, of the square, and the other gauge at 10 in. (the unit run) on the blade, or wider part. Begin the layout at the bot­tom end of the stringer with the blade downward. Mark across the top of the square with a sharp pencil and label this riser #1. Slide the square up and mark the next riser #2, and so on. Take your time and work accurately, making sure

Calculating individual risers and treads

that each time you slide the square, you have the tread mark directly on the last riser mark so that each tread and riser are the same (see the drawing above).

I once built a set of stairs without using stair gauges. In the middle of the stringer, I made a mistake and laid out a riser at 8 in. instead of 7 in. Easy enough to do. I set the stringers and sheathed the treads and risers. When I walked up the completed stairs, I tripped on the 8-in. riser. I had the pleasure of building this set of stairs twice. Codes do allow for a bit of variation though. Even stairs don’t have to be built to perfection.

Riser height can vary up to Vie in. from step to step, for example.

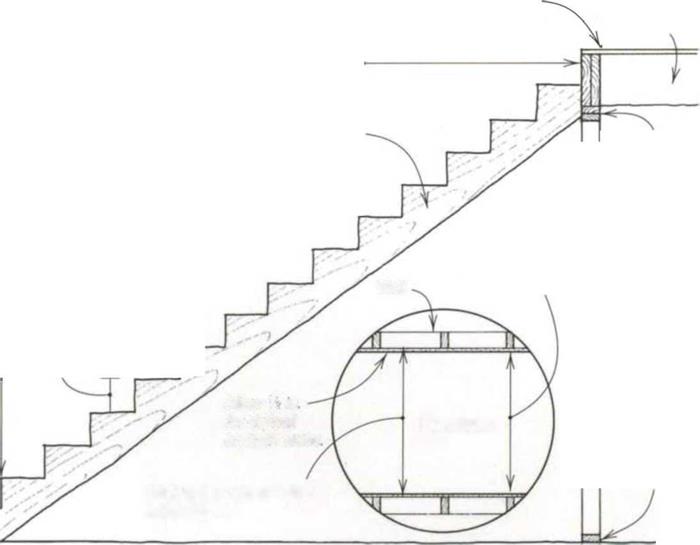
Often the stringer is attached to the upper floor system, one step below the level of the upper landing (see the draw­ing on p. 1 60). This means that the step to the landing makes the 15th riser, so lay out 14 risers on the stringer. Once the risers and treads have been marked on a stringer, finish with a level mark at the bottom of the first riser and a plumb mark at the end of the last tread (see the drawing above).

Now give the stringer a 1 – in. back cut to make the treads 11 in. rather than 10 in. wide. This back cut doesn’t change the total run, but it does change the look of the stairs by tipping the riser back and providing a wider (and safer) tread. Back cut the risers by slipping the riser gauge down the blade until the tongue of the square rests 1 in. in from where the riser mark meets the tread mark. Remark all the risers, making them slant back. The uppermost tread needs to be extended 3A in. to allow for a riser board to be nailed against the landing header (see the drawing on the facing page).
Determining total rise and run

One of the most important parts of stairbuilding is to determine the total rise, or vertical distance between finish floors that are connected by a stairway (see the drawing on p. 160). While figur­ing the distance between the two floors is simple, a problem can arise because stairs are usually built before the finish floors are in place. So the measurements are actually taken from rough floor to rough floor but must account for the finish floor material at both the top and bottom.

I once built several stairs in an apartment house, not realizing that the plans called for ІУ2-ІП. lightweight fire-resistant con­crete on the upstairs landings. I was called back to explain why every riser was 7 in. except the last, which became 8У2 in. once the concrete was poured. The next day I tore out the stairs and started over.

There are other problems when figuring total rise, especially for exterior decks and remodeling. Usually when I measure total rise, I hook my tape on the upper floor, pull it straight down to the lower floor, and read the measurement. But remember that the first tread lands a set number of horizontal feet away from the last tread. What’s more, the floor or the ground between these two points may be sloping considerably. So for accuracy, carefully level straight out from

111/2-in. (2×12) joist

%-in. subfloor


130-in. stairwell opening


Determining total rise and run

Подпись: 3-in

Total number of risers: 15 Total number of treads: 14

Stringer

921/4-in.

wall

stud

plates


Finished stair width 36 in


10-in. tread


Wall


6-ft. 8-in. headroom


7/4-in. riser


109-in. total rise from finish floor to finish floor


Allow V? in for drywall on both sides


Plan view


1У2-ІП.

bottom

plate


Stairwell rough opening width: 37 in.

140-in. total run (14 10-in. treads)

the upper floor landing to a point directly over the lower landing before making the total rise measurement.

Unlike the total rise, which is a fixed number, the total run, or horizontal dis­tance, can vary for a given set of stairs (see the drawing). This is important because treads can be made narrower or wider to allow the stairway to fit into the allotted space. While most straight – flight stairs run about 12 ft. on the level, the number of treads and their width determine the exact total run. If each tread is 10 in., for example, and the stair has 14 treads, then 10 in. x 14 = 140 in. for a total run of 11 ft. 8 in.

STRAIGHT-FLIGHT STAIRS

Stairs and the stringers that support them come in different shapes and styles. Some stringers have a simple plumb cut at the top and a level cut at the bottom, with fixed cleats in between to hold the treads. Most stringers have notches cut in them where treads and risers are attached. Stringers that sit between walls and are hidden from view are called closed stringers. When they are exposed—and usually finished—they are called open stringers.

Like the gable roof discussed in Chapter 6, the straight-flight stairs covered in this chapter are basic and simple. At the same time, the skills necessary to build
them are common to all stairs, no matter how complex they may seem. Once you know how to build a set of straight-flight stairs, you have the basic rise-run information you need to build other types.

Framing the stairwell

The first concern of stairbuilding is the stairwell (see the drawing on p. 157). Because they have to be wide enough for the stair structure and long enough for adequate headroom, stairwells take up a considerable amount of square footage. Most of us know what it’s like to go up a narrow set of stairs, especially one with inadequate lighting. It’s worse yet when you have to duck your head to

STRAIGHT-FLIGHT STAIRS

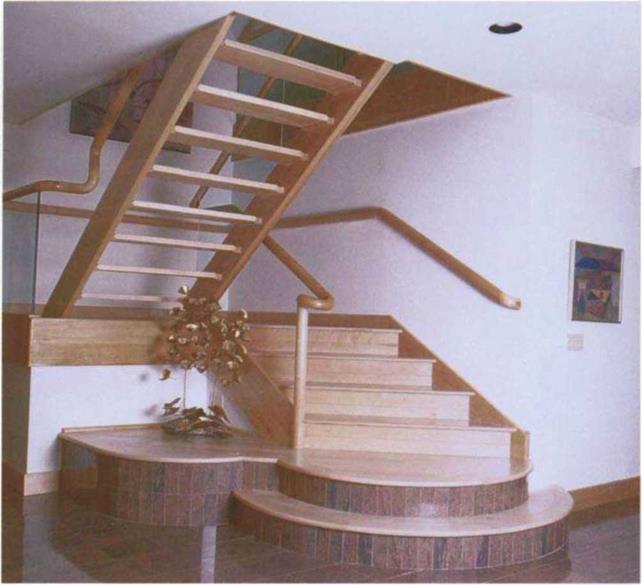
This seemingly complex stair of glass and maple is actually made up of simple elements. (Photo by Scott McBride.)


miss hitting the front edge of a stairwell. So for comfort and safety, codes require most stairs to be at least 3 ft. wide and have at least б ft. 8 in. of headroom along the total length of the stair.

When I can, I like to make stairs even wider than 3 ft., because more than people (like pianos and furniture) will be moved up and down. The average straight-flight stair will fit easily into a stairwell that is a minimum of 371/г in. wide and about 130 in. long. (To frame this opening, see Chapter 5.)

Seemingly minor details can have an impact on stairs. I’ve built stairs that fit between walls that were sheathed with Унп. plywood, covered by VHn. drywall, and had а 3/нп. skirtboard (stair trim) along each stringer. This meant that the rough opening had to be 391Л in. wide instead of 37V2 in. Also, I like to leave an extra У2 in. so that all the stair parts fit easily in place. If you don’t notice these details until the framing is complete and it’s time to build stairs, you’ll have to redo a lot of work to make it right.

Carpenters laying out the house frame also need to leave adequate room for landings. Because it’s dangerous to open a door and immediately face a step down, building codes require a landing at the top and bottom. Many stairs have landings midflight, where you can stop to rest or make a turn and proceed in another direction. Landings have to be at least the same width and depth as the stairs, which means 36-in.-wide stairs require a landing that is at least 36 in. by 36 in. square. When snapping lines on the floors, building walls and laying out stairwells, remember that these clearances are finish require­ments, so account for finish wall thicknesses (typically Уг-іп. drywall) on each side. This way you don’t wind up with a landing that is 35 in. by 35 in. and not up to code.

Landings in the middle of stairs play no part in determining the total rise. They’re figured as if they were large treads. They do make the total run longer, so if a landing falls midflight, seven risers up, for example, its height above the floor will be seven times the height of a riser. If the riser height is 7-in., the landing should be built at 49 in.

STARS

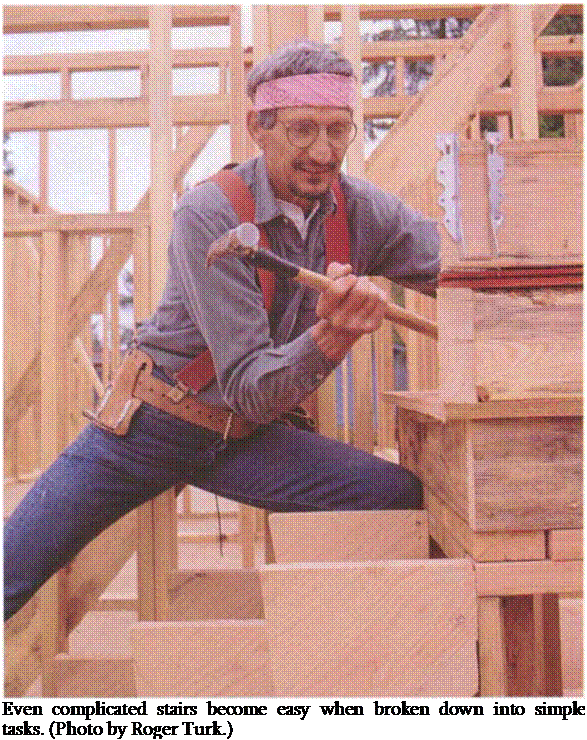
Подпись: Even complicated stairs become easy when broken down into simple tasks. (Photo by Roger Turk.)

Stairs, like roofs, come in many different styles and shapes. There are straight stairs, L-shaped or U-shaped stairs, winders (stairs that change direction over the course of several steps), and even circular stairs. They can be as basic as treads attached to a couple of stringers or as ornate as a double-helix beauty that spirals upward toward the sky. From the simple to the complex, every stair has the same basic purpose: to get us safely from one level to another.

What’s more, every stair uses the same basic layout principles. So building stair­ways, like framing roofs, is actually quite easy to understand if you break the job down into simple tasks. In fact, you don’t need many special skills or tools to build most stairs. What you will need to know are the names of stair parts, the codes regulating stairs so that they’re safe for people to use, and a bit of math to calculate the number and size of steps. This knowledge, coupled with the ability to use a framing square to lay out the stair stringers, will allow you to cut and assemble the stair parts into a strong and durable stairway that is safe and comfortable to use. (To learn basic stair vocabulary and codes, see the side – bar on the facing page.)

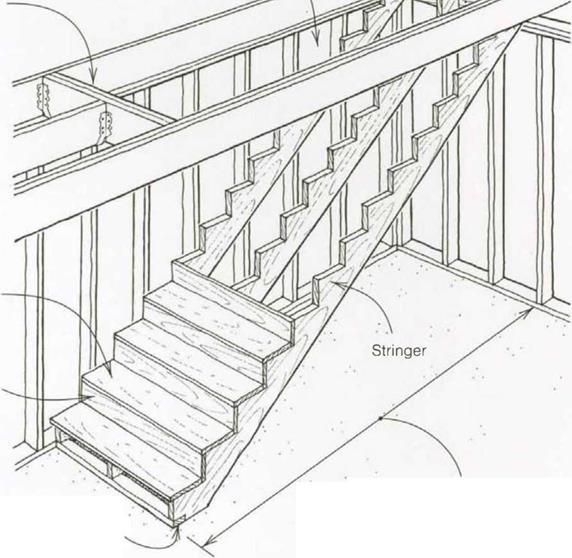
Stairwell The hole in a floor through which a stair passes on its way from one level to the next.

Headroom The vertical distance from stair treads to ceiling joists. Must be at least 6 ft. 8 in.

Stringers The wooden members that run diagonally and support the treads and risers (also called carriages and horses). Three are required for most 3-ft.-wide stairs.

Riser The vertical part of a step. For safety, keep this figure near 7 in.

Tread The horizontal portion of a step (where you set your foot). Each tread needs to be at least 10 in. wide.

Landing A level place at the top and bottom of stairs (can also be a platform separating stairs).

Total rise The distance a set of stairs travels verti­cally from one finish floor level to the next.

Total run The total horizontal distance of a set of stairs from first tread to last.

Kicker A 2×4 secured to the floor that helps hold the bottom of the stair stringer in place.

Straight-flight stairs

Blocking


Stairwell


Header joists


Tread


Riser


Total run


Kicker


Landing


STARS