Cutting stringers
Take a moment to check that your layout is correct before cutting out all the notches on the stringers. I make two cuts—the horizontal (or level) cut that rests on the floor and the vertical (or plumb) cut that nails to the top header joist. The stringer should fit snugly at both top and bottom, and all the tread lines should be level. Sometimes, especially on concrete, the floor may not be dead level, which can cause the heel (back side) of a stringer to hit the concrete first and open up a gap at the toe
(front). This results in an increase in the amount of rise on the first step up. If the floor is uneven, you’ll either have to scribe a line across the bottom of the tread and make the cut so that the stringer fits snugly to the floor or shim the heel when the front hits first.
This basic unnotched stringer is frequently used for exterior stairs. I attach metal or wood cleats to the tread lines of the two side stringers and set them in place. Then heavy treads cut from 2x or even 3x material can be fixed to the cleats. Exterior stairs shrink and swell a lot, and it seems that every time a person
uses them, a nail tends to work loose. That’s why I prefer using treated wood with bolts and deck screws rather than nails to hold exterior stairs together.
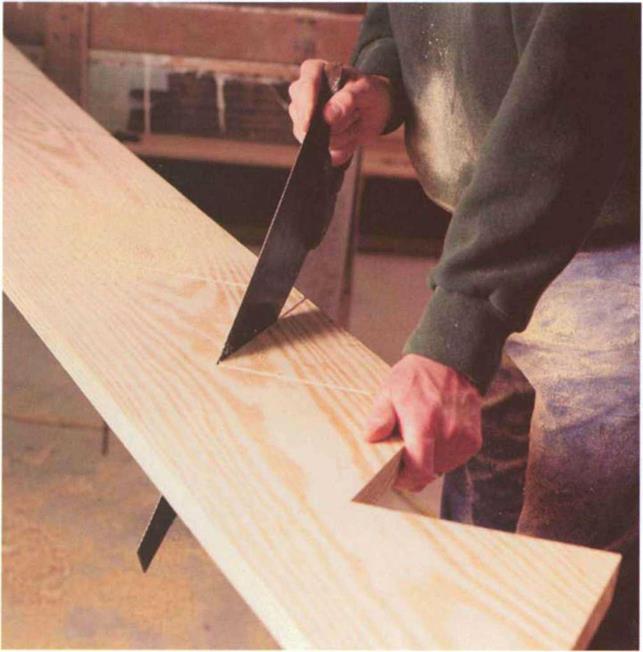
When cutting out the tread and riser lines on a stringer, start at the bottom and cut all the treads. Then turn around and cut all the risers. I to do it this way because it sets up a rhythm and is less tiring than switching back and forth. Stringers that will not be exposed and that will be supported by a wall can be overcut with a circular saw. Or you can finish the cut with a jigsaw or handsaw (see the photo below). If you overcut, be
|
 careful not to cut any more than is needed to remove the tread-riser notch, or you can seriously weaken a stringer.
Once the first stringer has been cut and checked for fit, it becomes your pattern. If the uncut stringer stock has any crown to it, turn it up. Then lay the pattern exactly on top of the other stringers and mark accurately along all the treads and risers with a sharp carpenter’s pencil. Carefully make the remaining cuts, and you’re ready to build the stairs.


Leave a reply