Cutting and installing risers and treads
If the stairs are going to be covered with carpet, the treads and risers can be cut from scrap material leftover from sheathing. I use at least 5/s-in. plywood or oriented strand board (OSB) for the risers and 3/нп. plywood for treads.
Scrap material can be ripped to width on a table saw or with a circular saw (carefully following a chalkline or using a ripping guide).
These rough treads and risers can also be covered with a fine, finished hardwood to give the stairs a custom look. Often, this is done later, when the house is nearly finished. To help you get a perfect fit, use a stair-tread gauge, a tool that fits from wall to wall, adjusts to fit out-of-square skirtboards, and gives you the exact length and shape of the tread or riser. Finish treads often have a nosing (174-in. maximum overhang by code) that projects out over the edge of each tread. I think that 174 in. is excessive because it is too easy to catch your toe on it as you go up the stairs, so I prefer no more than a 7/s-in. overhang.
Rough risers and treads don’t have to be the exact width when they’re being covered by carpet. In fact, it’s better to cut them a bit narrow to eliminate the possibility that they will touch at the back side and create a squeak, which can happen when wood rubs against wood. And who needs squeaky stairs, especially if you’re trying to sneak in late at night? So for stairs with 774-in. risers and 10-in. treads, rip the risers to 77s in. and the treads to 97/s in. Cut them to the width of the rough stairway, or 36 in. long in this case.
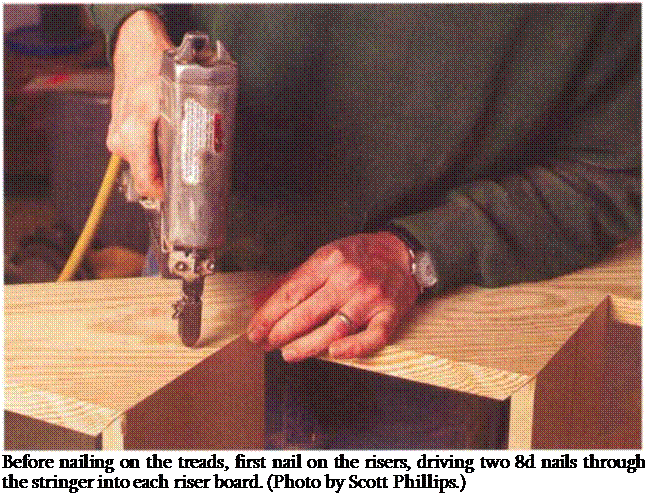
Risers are nailed on first (see the photo on p. 168). The first riser usually has to be ripped an extra 3/4 in. narrower than
 |
the rest to compensate for the dropped stringer. Starting at the bottom, drive two 8d nails through the riser board into each stringer. Put the next riser in the same way, halfway up, to help straighten the stringers. Then go back to the bottom and nail on the rest of the risers.
When fastening the treads, use lots of construction adhesive between the treads and the stringers to help prevent squeaks that can develop as the wood dries out and nails loosen up. For extra insurance, secure the treads with deck screws, which are less likely to pull out than nails. Start at the bottom, run a generous bead of adhesive on the stringers and on the riser edge and secure each board as you go with three 8d nails or screws per stringer. When all the treads are on, try out the stairs. Finally, take a moment to admire the safe, easy access you have built to the next floor.


Leave a reply