Attaching stringers
Because a stairway is often asked to bear considerable weight, stringers need to be securely attached at top and bottom. There are several ways to attach a stringer to an upper landing, deck, or floor system (see the drawing at right). Whichever method you choose, the first step is to measure down on the face of the landing header one riser height (7[9]A in. in this example) and carefully mark a level line across the header where the stringers will land. Think again about finish floors at this point. Remember what will cover the stair treads and the landing, and make adjustments to ensure that every step will be the same once all finish treads and floor coverings are installed.
 |
nailing in the second and third stringer in the same way. This set of stairs should be strong enough to hold people moving a refrigerator.
Another easy method for securing stringers at the top is with 2×6 or 2×8 metal joist hangers. Just make a horizontal cut about 1 Vi in. deep on the back of the stringer to house the bottom of
the hanger. Nail the hanger to the stringer, place the stringer on the line below the landing and nail the hanger into the header.
A third method, using a hangerboard, also works well on exterior stairs because it can be left exposed. Take a piece of 5/s-in. or 3/4-in. plywood (use exterior-grade, pressure-treated plywood
for exterior stairs) and cut it about 1 5 in. wide and as long as the width of the stairs (36 in. normally). Nail the hanger – board to the face of the header joists, flush with the top of the landing. It should hang down no lower than the bottom of the stringer. Then strike a line on the board, down one riser height (71/4 in. for this stair). Hold the stringer to the line and secure it with nails or screws driven in through the back of the hangerboard.
With the stringers secure at the top, cut a 2×4 kicker as wide as the total width of the rough stairway (36 in. in this case) for the bottom of the stairs. Slip it into the notches on the front end of the stringers and fasten it to the floor. Then toenail the stringers to the kicker.
When setting stringers, remember to leave a bit more than Vi in. between the stringer and the wall framing so that drywall can easily slip between the stringers and the wall. Otherwise, somebody has to cut the shape of the stairs in the drywall to fit the stringer.
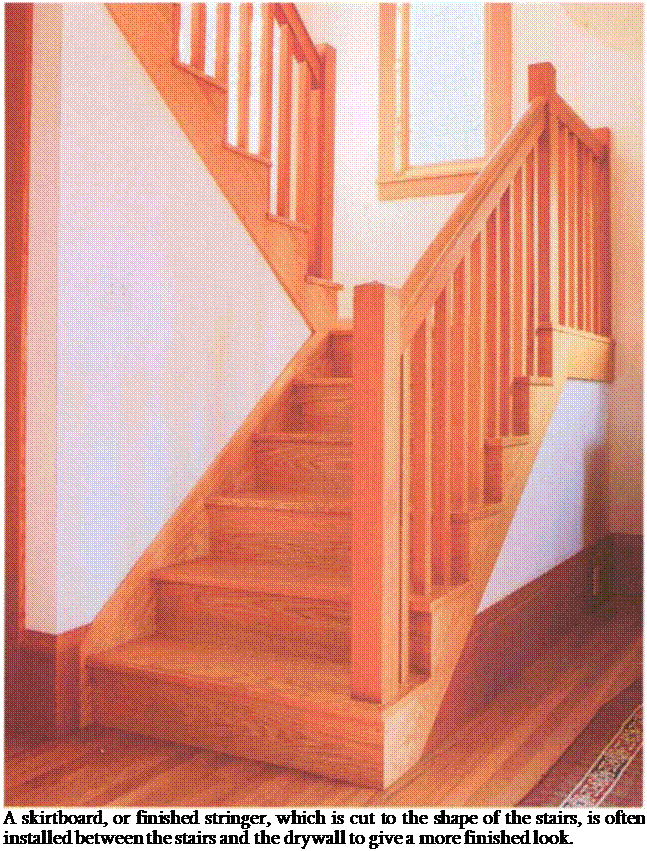
Before nailing in the stair parts, a 1x skirtboard is often installed between walls and stringers (see the photo on the facing page). This piece of trim (often a 1×12) protects drywall from being dented by shoe kicks or vacuum cleaners. To cut the skirtboard, first snap a chalkline above the nose of the treads 3 in. or 4 in. and measure its length. Mark a plumb cut on the top of the skirtboard and a level cut at the bottom by using the 774-in. and 10-in. layout on the framing square (just as the top and bottom cuts on the stringers were laid out). Of course, be sure to leave enough room between the rough stringers and wall framing to accommodate the thickness of both the drywall and the skirtboard.


Leave a reply