Category Framing

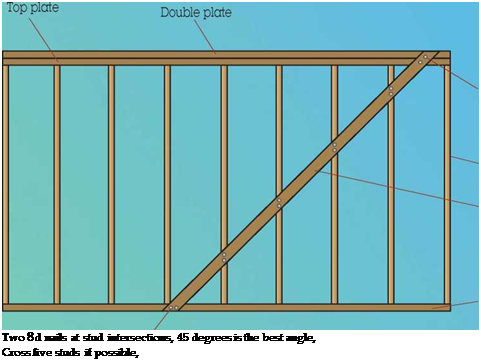
Nail Let-in Bracing

Nail Let-in Bracing

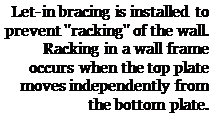
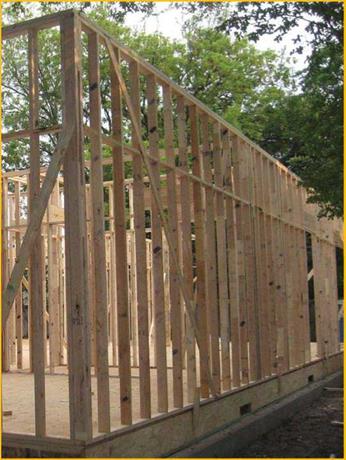
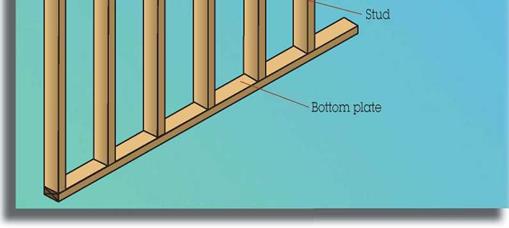
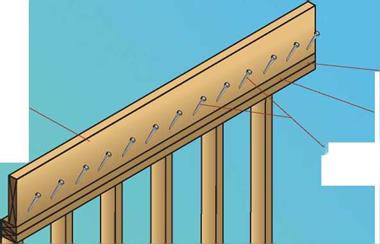
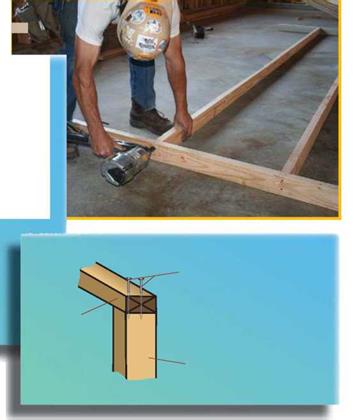
Подпись:Подпись: Let-in bracing is installed to prevent "racking" of the wall. Racking in a wall frame occurs when the top plate moves independently from the bottom plate.
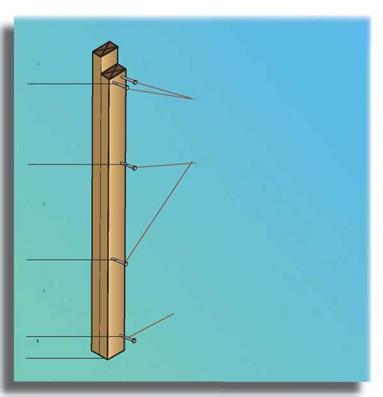
Two 8d common nails or 3” x,131" nails each stud

Stud

Nail Let-in Bracing
1 x 4 let-in brace Bottom plate

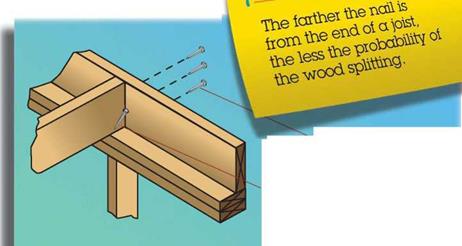
Nail Let-in BracingNail End of Joist

Подпись: Three 16d common nails or four 3" x ,131" nails through rim joist Two 16d nails, or 3" x .131" nails toenail. One on each side of joists. Nail Let-in Bracing

Nail Let-in Bracing

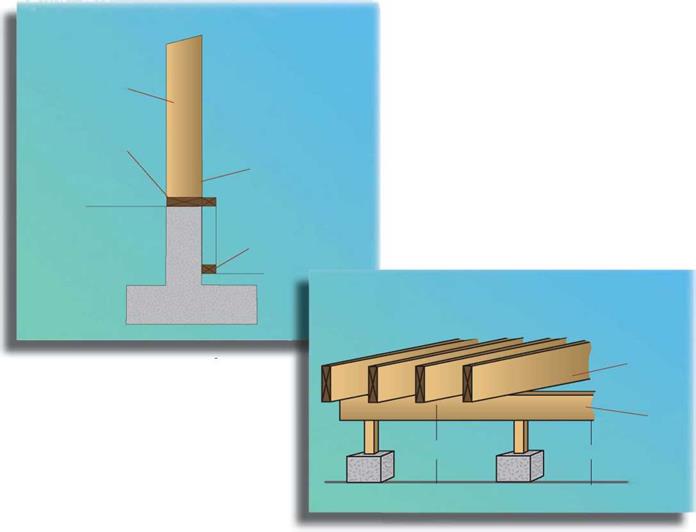
This illustration shows the installation of a floor joist on top of the double plate. The rim joist provides not only a good nailing surface, but also a structural component as it spans the space between the studs and prevents lateral rotation of the joists.

Nail Rim Joist

Here the rim joist is being installed. It is a structural component that provides an edge for the building and an attachment for the joists to prevent lateral rotation.


Top plate


Rim joist


Double plate


16d at 6” O. C. or 8d at 6” O. C. or 3” x .131" at 6" O. C.


Nail Let-in Bracing

Nail Bearing & Nonbearing Walls to Floor Perpendicular to Joists

Bearing Walls

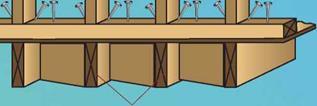
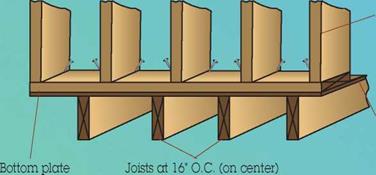
Three 16d nails or 3" x.131" nails into each joist.

Подпись: Bottom plateПодпись: Joists at 16" O.C. (on center)Nail Bearing & Nonbearing Walls to Floor Perpendicular to JoistsПодпись:Подпись: Subfloor sheathing Nail Bearing & Nonbearing Walls to Floor Perpendicular to JoistsIf wall sits on a rim joist or blocking, place third nail at center of joist space and nail into rim or block.

Nonbearing Walls

One 16d nail into each joist or two 3" x.131" into each joist.

Nail Bearing & Nonbearing Walls to Floor Parallel to Joists

Подпись:Подпись:Подпись:Nail Bearing & Nonbearing Walls to Floor Perpendicular to JoistsПодпись: Nonbearing Walls One 16d nail into each joist or two 3" x .131" into each joist. Nail Bearing & Nonbearing Walls to Floor Perpendicular to JoistsBearing Walls

Three 16d nails or 3" x.131" nails per stud into each joist. If wall rests on a rim joist or blocking, place third nail at center of joist space and nail into rim or block.

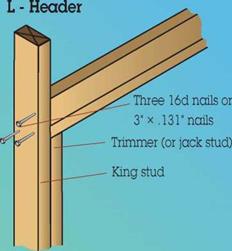
Nail Header to Stud

Nail Bearing & Nonbearing Walls to Floor Perpendicular to Joists

4 x 8 or 6 x 8 Header
4 x 10 or 6 x 10 Header

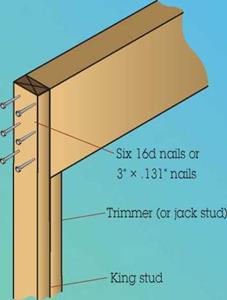
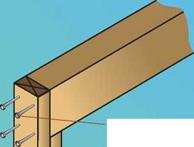
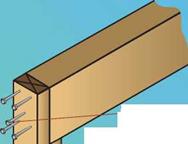
Four 16d nails or 3” x,131" nails


Five 16d nails or 3" x,131" nails

— Trimmer (or jack stud) King stud

Nail Bearing & Nonbearing Walls to Floor Perpendicular to Joists


Trimmer (or jack stud)


4 x 12 or 6 x 12 Header

Nail Bearing & Nonbearing Walls to Floor Perpendicular to Joists


Headers made up of 2x lumber with V2" plywood sandwiched between should be nailed similarly.


Nail Bearing & Nonbearing Walls to Floor Perpendicular to JoistsNail Bearing & Nonbearing Walls to Floor Perpendicular to JoistsNail Bearing & Nonbearing Walls to Floor Perpendicular to JoistsNail Bearing & Nonbearing Walls to Floor Perpendicular to JoistsNail Bearing & Nonbearing Walls to Floor Perpendicular to JoistsNail Bearing & Nonbearing Walls to Floor Perpendicular to Joists

Nail Bottom Plate to Studs

Nail Bottom Plate to Studs

Stud


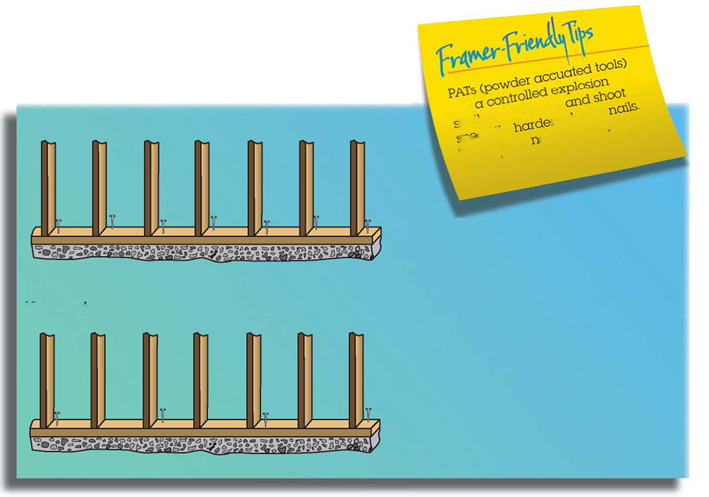
Two 16d common nails or three 3" x .131" nails through bottom plate into studs


Alternate: Toenail

four 8d common nails or four 3" x.131" nails


Nail Bottom Plate to StudsNail Bottom Plate to Studs

Nail Bottom Plate to StudsNail Double Plate to Top Plate

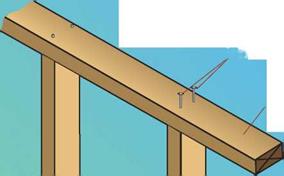
One 16d nail at 16" O. C, (on center) or one 3" x,131" nail at 12" O. C, Stagger nails,

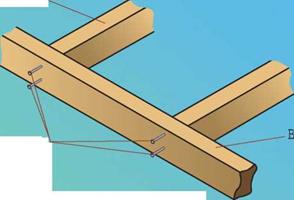
Four 16d common nails or six 3" x,131" nails each side of splice in top and double plate,

Nail over studs to allow plumber’s and electrician’s drills to pass freely through the place between the studs

Two 3” x,131" nails at 16” O. C. may be substituted to prevent interference,

Подпись: Nail CornerПодпись: Five 16d common nails or seven 3" x ,131" nails into studs, Start 6" from top and bottom,Nail Bottom Plate to StudsNail Bottom Plate to StudsПодпись:Nail Bottom Plate to StudsNail Walls Together or Nail Double Studs

Five 16d (3 1/2" x,135") nails or twelve 3" x,131" nails into studs, Start 6" from top and bottom,

Подпись:Nail Bottom Plate to StudsNote: A 16d (3 1/2" x,135") nail will protrude 1/2" beyond a doubled 2x, This sharp nail point can be a hazard, Nail at slight angle to prevent protrusion,

Nail Bottom Plate to Studs Подпись: Two nails 4" from top of trimmer.

Подпись: 24іПодпись: 6І

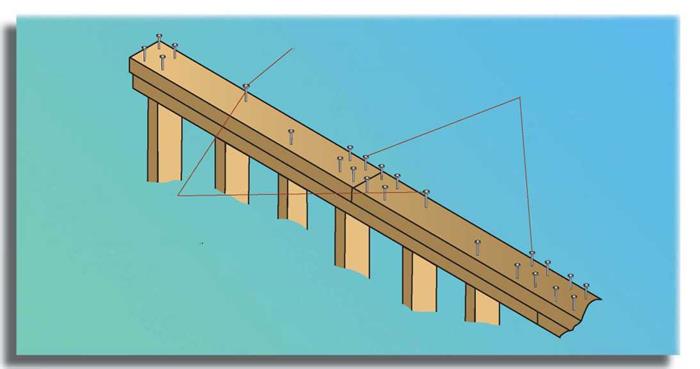
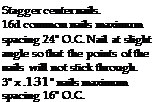
Подпись: Bearing Walls Подпись: Stagger center nails. 16d common nails maximum spacing 24" O.C. Nail at slight angle so that the points of the nails will not stick through. 3" x .131" nails maximum spacing 16" O.C. Nail Bottom Plate to Studs
Подпись: 24І
Подпись: One nail approximately 6" from the bottom centered.
Подпись: Concrete Nailing

Подпись: Nonbearing Walls

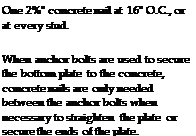
Подпись: One 2%" concrete nail at 16" O.C., or at every stud. When anchor bolts are used to secure the bottom plate to the concrete, concrete nails are only needed between the anchor bolts when necessary to straighten the plate or secure the ends of the plate.
Подпись: One 2%" concrete nail at 32" O.C., or at every other stud.

Nail Bottom Plate to StudsNail Bottom Plate to StudsNail Trimmer to Stud

PATTERNS

If you are framing every day, the nailing patterns in this chapter will soon become second nature.

For the part-time framer, they can serve as a quick reference.

Building codes and generally accepted practices were followed in developing the nailing patterns in this chapter. When the plans call for other nailing patterns, however, be sure to follow them.

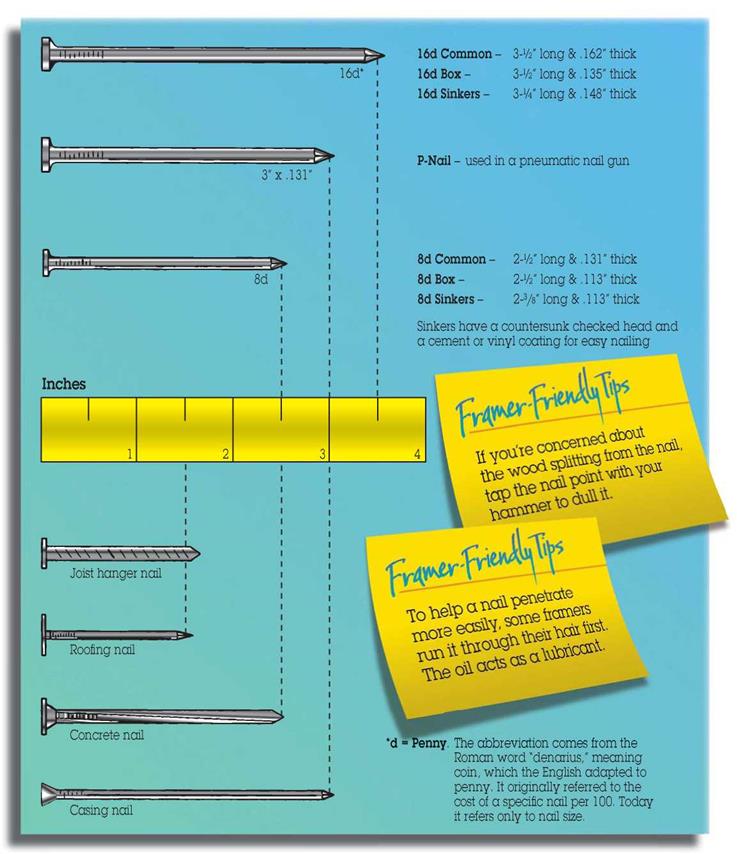
You will notice in this chapter that there are different nails specified for the same nailing. There are many different styles of nails. The five most frequently used categories are:

• Common nails

• Box nails

• Sinker nails

• Gun nails

• Positive placement nails

You will see a 3” x.131” nail specified frequently. This nail is the most common P-nail, or pneumatic gun nail, used.

The common nails are listed because they are typically specified by building codes. Most of the tests that are done to determine the strength needed use common nails. Box nails and sinker nails are listed because they are easier to nail, and less likely to split the wood. They are also commonly found at nail suppliers. The gun nails are listed because nail guns are used most often. Positive placement nails are made specially for nailing on hardware. They only work in positive placement nail guns.

Please note that common nails are listed with “common" written after the size. If the nail size has “common" after it, you can only use common nails. If it does not, you can use either common, box, or sinker nails.

The International Residential Code (IRC) is similar to the International Building Code (IBC) except it only covers one – and two-family dwellings. The patterns in this chapter are based on the 2009 IBC, which, in some cases, requires larger nails than the 2009 IRC.

PATTERNS PATTERNS

PATTERNSPATTERNSNail Top Plate to Studs

Preservative Treated Wood

Preservative Treated Wood

The treating of wood in recent years has gone through some major changes. The most important thing to know is that there are different types of preservative treatment and that some of the treatments require specially coated fasteners to prevent corrosion.

A little history will help in understanding. For years the predominate chemical for preserving dimension lumber had been chromated copper arsenate (CCA). However, health concerns arose because of the arsenic content in CCA, and in 2004 the Environmental Protection Agency (EPA) required labels on CCA, which had the effect of disallowing the use of CCA-treated wood for most residential uses.

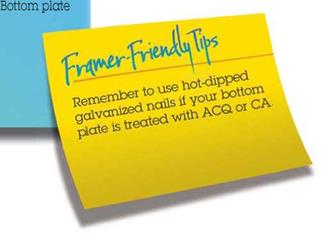
The first commonly used substitutes were copper azole (CA) and alkaline copper quaternary (ACQ). These eliminated the arsenic but created a different problem because they were corrosive to steel fasteners. To solve this problem, hardware manufacturers began making their common fasteners with a galvanized coating. For example, if you see a Simpson Strong-Tie hardware labeled Z-max you know it has been coated so that it can be used with CA and ACQ. Steel nails also had to be coated when used with lumber treated with CA or ACQ. Typically they are galvanized. Stainless steel is a better substitute for hardware and nails because it is less corrosive, but it is expensive.

Sodium Borate (SBX) preservative treatment is another substitute for CCA that does not have the problem of causing corrosion of steel fasteners, however it will wash out of the lumber with liquid exposure. It is specified for use above ground and continuously protected from liquid water.

New products are continually being developed. Carbon based compounds are among these and could prove to be less corrosive and natural in color.

The 2009 IBC & IRC code states that preservative treated wood should be in accordance with AWPA U1 (American Wood Protection Association Use Category System) for the species, product, preservative, and end use. The lumber tag attached to the treated wood will give the use category to assist you in making sure you are using the correctly treated wood.

All the different labels and chemicals can be confusing. Most importantly, make sure that you are using the right treatment for the task at hand and that you are using corrosive resistant fasteners where necessary. To check the correct use of treated lumber, read the tag attached to the lumber or ask the lumber supplier. For CA or ACQ treatment, you will need corrosion-resistant fasteners; for SBX or other borate treatments, you will not need corrosion-resistant fasteners. Beyond that, check on the fastener boxes for specifications or ask the lumber or fastener supplier.

Preservative Treated Wood

Protecting Lumber from Decay

Moisture and warmth will promote decay of most woods. To prevent decay, naturally durable woods or preservative-treated wood must be used when the wood is exposed to moisture.

Decay-resistant woods include redwood, cedar, black locust, and black walnut. Preservative-treated wood is treated according to certain industrial specifications. Preservative-treated wood is most commonly used because of its availability.

Preservative-treated or naturally durable woods should be used in the following locations:

1. On concrete foundation walls that are less than 8" from exposed earth.

2. On concrete or masonry slabs that are in direct contact with earth.

3. Where wood is attached directly to the interior of exterior masonry or concrete walls below grade.

4. For floor joists if they are closer than 18" to the exposed ground.

5. For floor girders if they are closer than 12" to the exposed ground.

Подпись: Ground Protecting Lumber from Decay
Protecting Lumber from Decay

Exterior wall

8" or less

When pressure treated lumber is cut on the job site, apply treatment to the end by soaking or brushing

Protecting Lumber from DecayProtecting Lumber from DecayProtecting Lumber from Decay (continued)

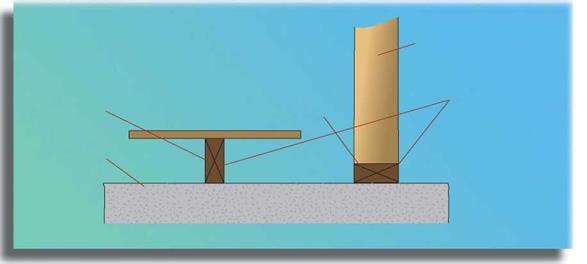
Framing on a concrete slab

Protecting Lumber from Decay Подпись: Bottom plate Подпись: Required unless slab is separated from ground by an impervious moisture barrier

Подпись: Ground level

Protecting Lumber from Decay Подпись: 12" or less Protecting Lumber from Decay Подпись: Ground
Подпись: Framing furring wall on a concrete foundation
Подпись: Stud
Подпись: Bottom plate
Подпись: Vapor retarder may be applied with non-protected wood.
Подпись: Bottom plate
Подпись: Framing crawl space from ground

Stud

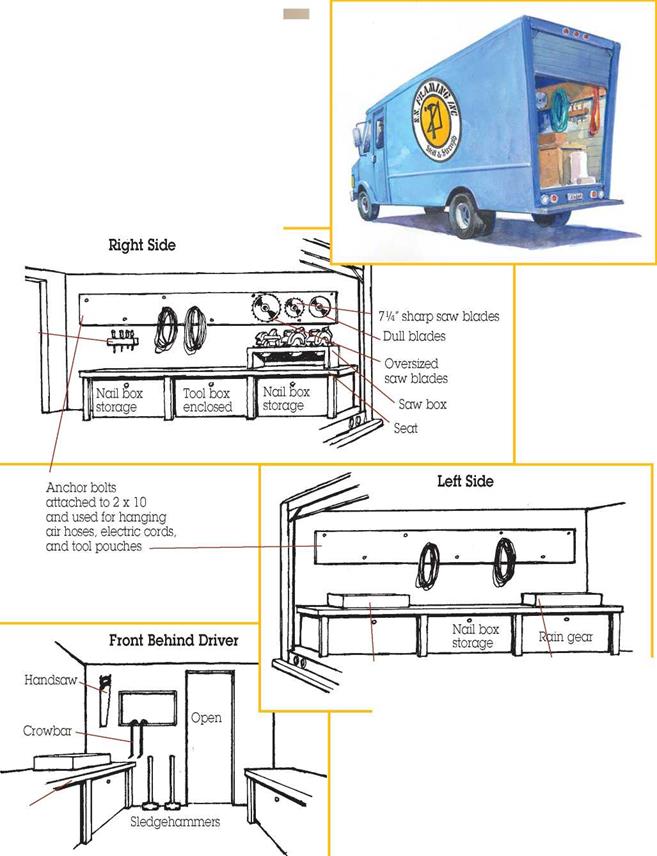
Step Van

If you’re a professional framer, organizing your tools helps keep them in good condition and helps you find them when you need them— saving valuable time on the job.

Lumber

Step Van

Saw blade


Check to make sure tape ‘ end is not bent and that it moves on the end rivets.


Saw upside – down


Step VanStep VanStep Van

Step Van

Accuracy in measuring, marking, and cutting lumber is a very important framing skill to master. Periodic checks should be made of the condition of tape measures and the squareness of saw tables and blades.

A typical saw blade removes a channel of wood approximately 1/8" wide, called a kerf. This must be taken into consideration when you make a cut.

Suppose you want to cut a board 25" long. Measure and make a mark at 25", then square a line through
the mark with a square. The work piece— the 25" piece you want to use—will be to the left of the line; the waste piece will be to the right. Guide your saw along the right edge of the line so the kerf is made in the waste piece. If your cut is perfectly made, the work piece will be left showing exactly half the width of your pencil line, and will measure exactly 25". Thus, the old carpenter’s saying: “Leave the line."

Example: Cut a 25" piece


Framing Lumber

Lumber is sized in “nominal," as opposed to number. For example, a piece of lumber that actually

Actual dimensions 1 3W" 1

Nominal 2 x 4 dimensions

Actual %"

1 3W" 1

Nominal 1 x 4

Framing Lumber Framing Lumber

“actual," dimensions. A nominal dimension rounds measures 1%”x 3%" is rounded off to the nominal off the actual dimension to the next highest whole 2” x 4”.

GWB = Gypsum wallboard (also called drywall or sheetrock). The most common thicknesses are V21 and 5/8".

Подпись: 3xo№eПодпись:

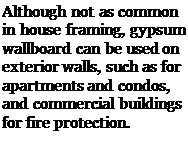
Подпись: Framing Sheathin Подпись: Although not as common in house framing, gypsum wallboard can be used on exterior walls, such as for apartments and condos, and commercial buildings for fire protection.
Подпись: У" — GWB 5/8" — GWB
Framing Lumber
Подпись: T&G Wood Structural Panels (tongue and groove)

Framing LumberThe engineered panel products on this wall provide the strength needed for the high ceiling of this elementary school

Dens Glass® gypsum sheathing is a brand that has fiberglass mat, which provides mold and moisture resistance and is gold in color.

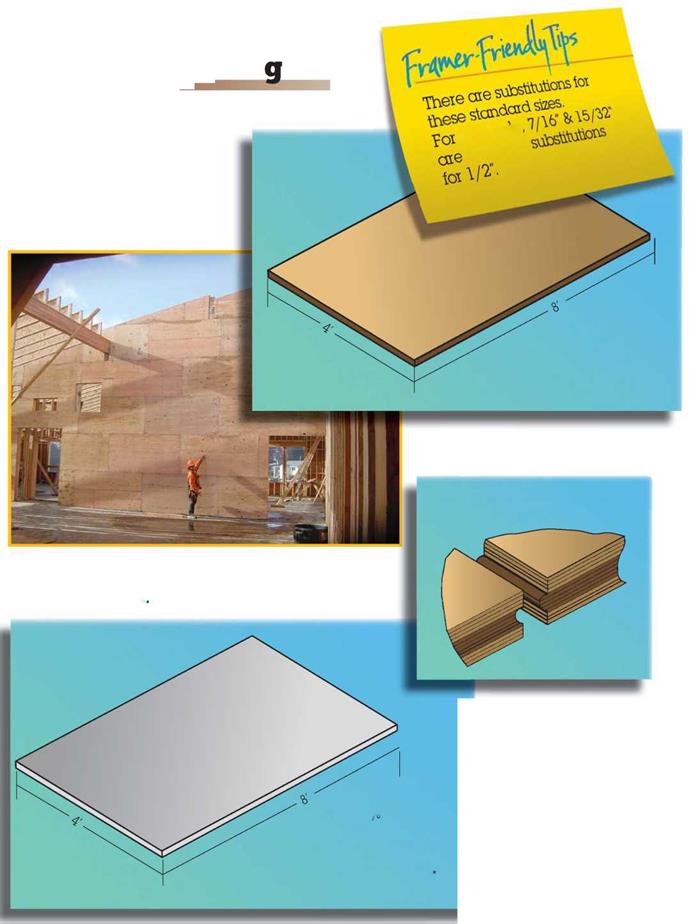
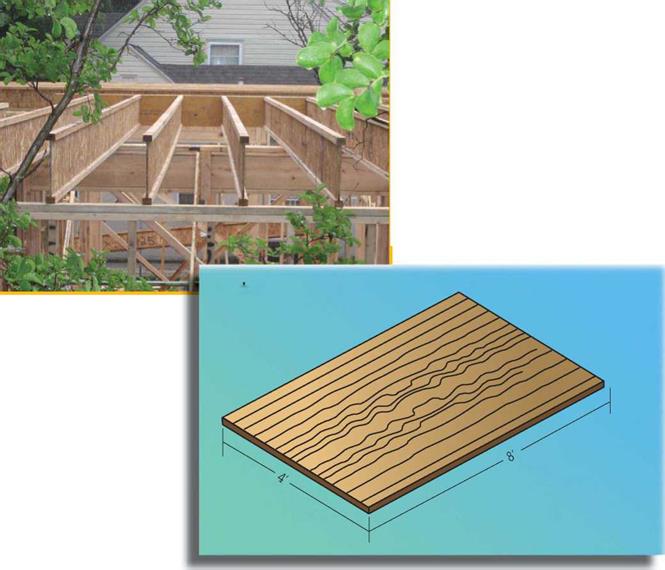
Engineered wood products can be divided into two categories: engineered panel products and engineered lumber products. Engineered panel products include plywood, oriented strand board (OSB), waferboard, composite, and structural particleboard. Engineered lumber products include I-joists, glu-lam beams, LVLs (laminated veneer lumber), PSLs (parallel strand lumber), and LSLs (laminated strand lumber).
Подпись: Engineered wood products are becoming more and more a part of our everyday framing. The strengths of these different products vary. Whenever you use engineered wood, it is important that you understand the qualities of the specific product you are planning to use, as well as structural considerations and any restrictions on cutting and installation.Engineered wood products have structural qualities different than those of traditional wood, so they must be used within the specification set by the manufacturer. When these products are specified on the plans, the architect or engineer who specified them will have checked with the structural engineer to ensure proper use.

Engineered panel products have been around for years and are treated in a

Подпись: Product

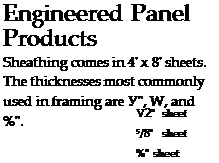
Подпись: I-joists are engineered panel products that provide consistency and fewer floor squeaks. Подпись: Plywood V2" sheet 5/8" sheet %" sheet

Framing LumberEngineered Panel

Framing LumberStagger (optional)

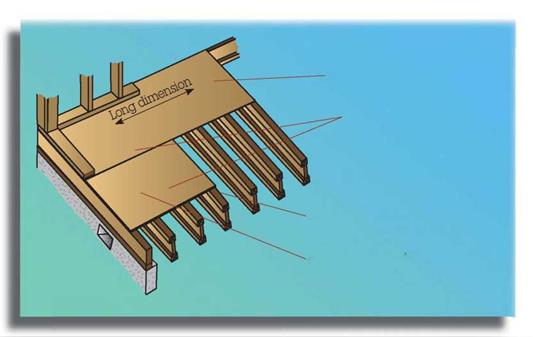
Leave space at all panel edge joints and У space at all panel end joints unless otherwise recommended by panel manufacturer.

2x joists, plywood-webbed I-joists or floor trusses.

APA rated sheathing

manner similar to engineered wood products. The 4′ x 8′ typical sheets are strongest in the direction of the grain. For floors and roofs, these sheets should be laid perpendicular to the direction of the supporting members. The strength of the panels comes from the panel cantilevering over the supports—so each piece should be at least as long as two support members.

Glu-lam beams, LVLs, PSLs, and LSLs can be cut to length, but should not be drilled or notched without checking with manufacturers’ specifications.

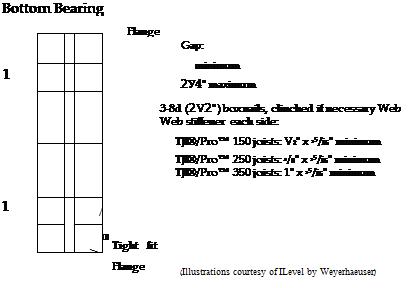
I-joists are becoming more widely used. Although the Engineered Wood Association has a standard for I-joists, not all I-joists manufacturers subscribe to that standard. Consequently, it is important to follow the manufacturer’s instructions whenever using I-joists. Installation instructions are usually delivered with the load for each job. The illustration shows some of the typical instructions.

Certain features are common among all I-joists. Rim and blocking may be of I-joist or solid rim board. Typical widths are 9%", 11 7/8 ", 14", 16", and 20".

Web stiffeners are used to add to the strength at bearing points. If the bearing point is at the bottom flange, then the web stiffener, which is the thickness of the flange on one side of the web, is held tight to the bottom. There should be at least a 1/8" space between the top flange and the web stiffener. If the bearing point is at the top flange, then the web stiffener is held tight to the top with at least 1/8" between the bottom flange and the web stiffener.

Framing Lumber

B1 on-center (61 on-center for Til® 110

Framing Lumber

Silent Floor* joist framing does not require


Rim board joint between joists


Framing Lumber

Safety bracing (1×4 minimum) placed at


Framing Lumber
Framing Lumber
Framing Lumber

Common construction details for engineered lumber joists.


ІЛ. 0 0 ~W 0 0 . – Я-0 Tf, , -0 . S* ^ -0

section view of 1-joist. iJlease note tne components of the joist (darker colors) and the web stiffener (lighter color). Fasteners are shown in black.


Framing LumberFraming Lumber

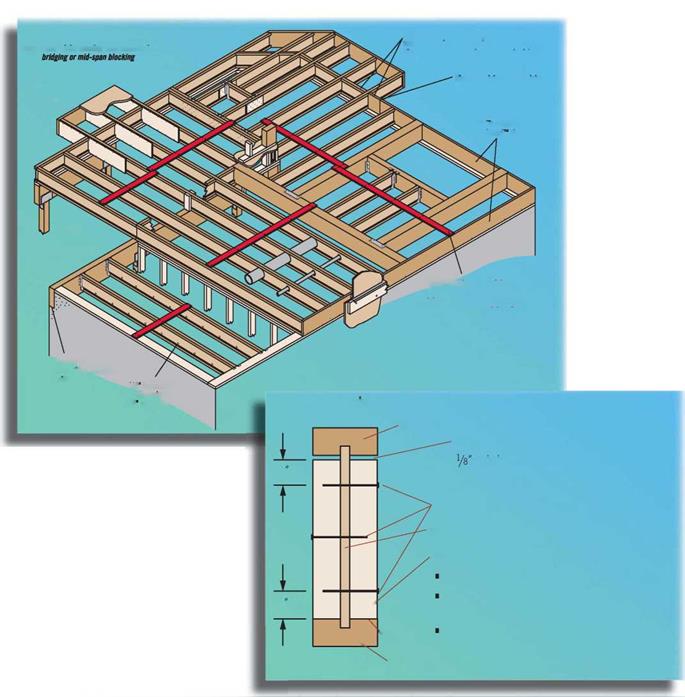
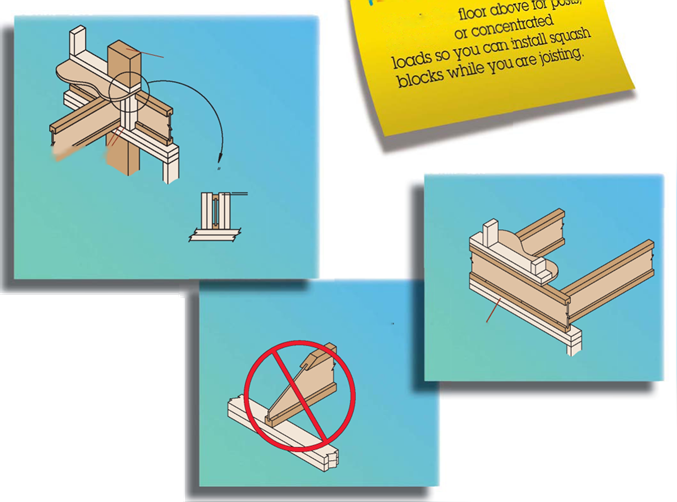
Framing LumberFraming LumberSquash blocks are pieces of lumber installed alongside TJI’s at points of heavy loading. They prevent the weight from crushing the TJI. They are typically dimensional lumber like 2 x 4s or 2 x 6s. They should be cut 1/іб" longer than the I-joist to take the load off the I-joists.

I-joists typically require a Ш" bearing. You can cut the end of an I-joist as long as it is not cut beyond a line straight up from the end of the bearing. However, no cuts should extend beyond a vertical line drawn from the end of the bearing point.

I-joist hardware, such as hangers, is usually delivered with the I-joist package. However, standard I-joist hardware can be purchased separately.

Check to-e

Подпись:Подпись: '/16coWirtoS,

V

2 x 4 minimum squash blocks (Illustrations courtesy of iLevel by Weyerhaeuser)

Подпись: DO NOT bevel-cut joist beyond inside face of wallПодпись: Rim board

Squash blocks should be 1/16" greater than the I – joist height.

Framing Lumber
Framing Lumber
Framing Lumber

Lumber


Framing

Grade

Use

Light framing

Construction

Plates

2 x 2 thru 4 x 4

Standard & better

Sills

Utility

Studs over 10′

Stud

Stud

Studs

2 x 2 thru 4 x 6 10′ or less

Cripples

Structural framing

Select structural

Joists

No.1

Rafters

No. 2

Headers

No. 3

Posts

Beams


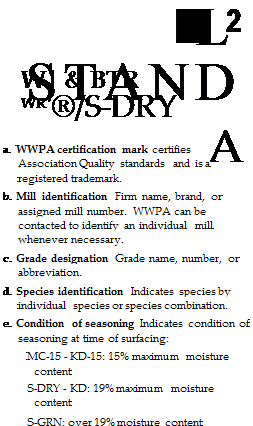
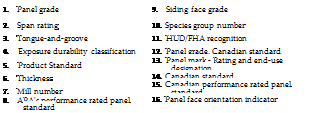
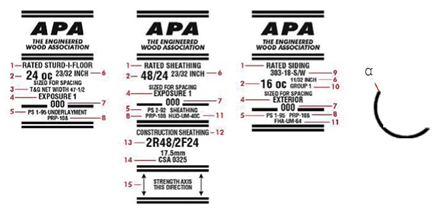
Images of grade stamps courtesy of APA, The Engineered Wood Association and WWPA, the Western Wood Products Assocoiation


Framing LumberFraming Lumber

Framing Lumber

Framing Lumber

Chalk Line


Hammer


Marking

Crayon


Carpenter’s

Pencil


Framing Square


Tape


Try Square


Chisel


Hand Saw


Glue Gun


Speed

Square


Crowbar


Wall Puller


Sledgehammer


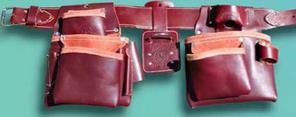
Tool Pouch

Framing Lumber


Flat Bar


Nail Puller or
Cat’s Paw


Framing LumberFraming LumberFraming Lumber

Framing Lumber

Framing Lumber

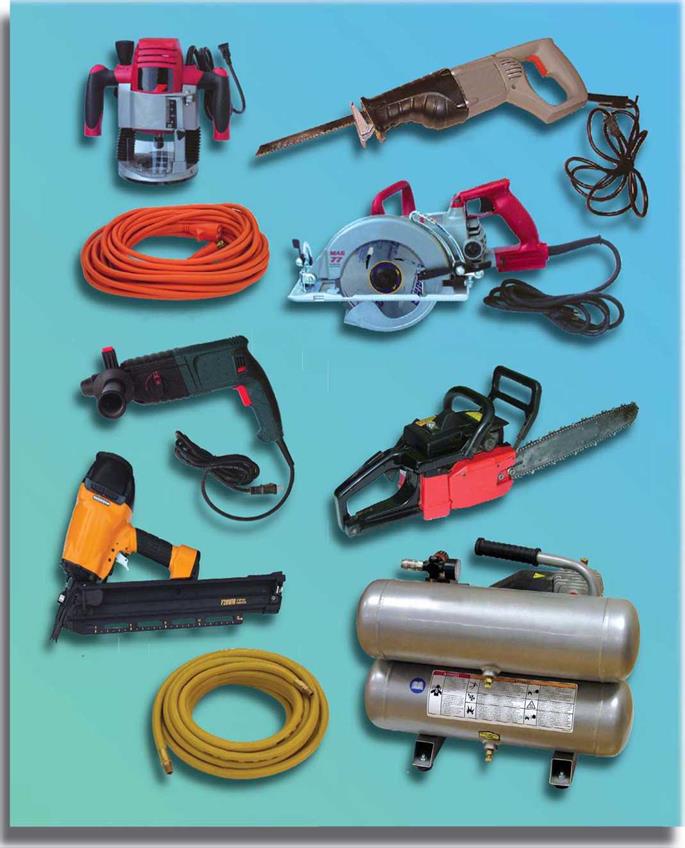
Reciprocating

Saw


Router


Electric Cord


Worm-drive Saw
(Circular Saw)


Drill


Chain Saw


Nail Gun


Air Hose


Air Compressor


Framing Lumber

Подпись: Screw driver rack Подпись: Flat box for electric parts, Metal box air hose parts, drill bits, etc. for wrenches and sockets Подпись: SeatFraming Lumber


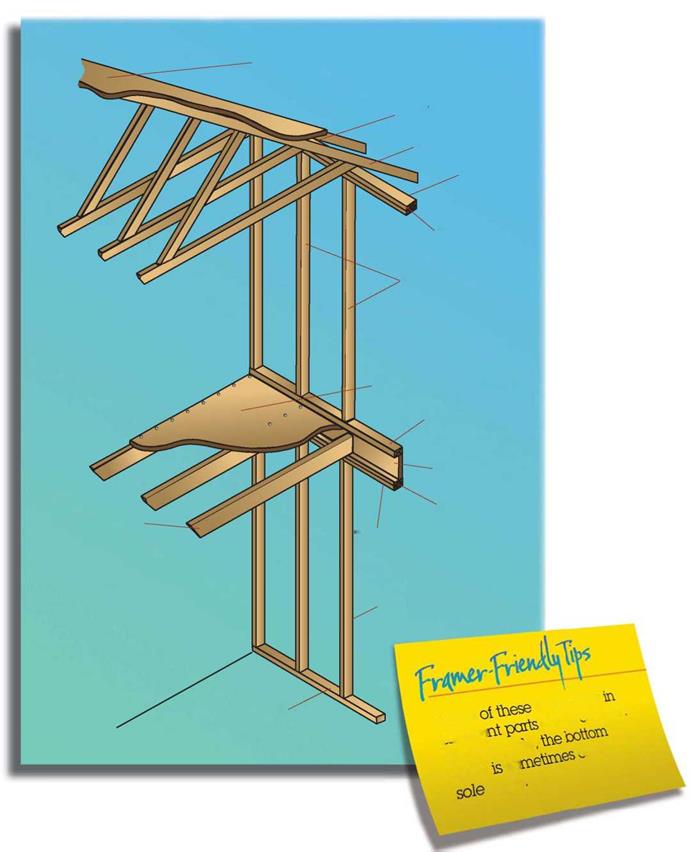
Roof sheathing


Blocking Roof truss

Double plate


Top plate


Studs


Subfloor sheathing (decking) Bottom plate


Rim joist (ribbon)


Double plate


Floor joist


Top plate


Stud


Framing Terms (continued)

Bottom plate


Framing Terms (continued)

Framing Terms

Framing Terms

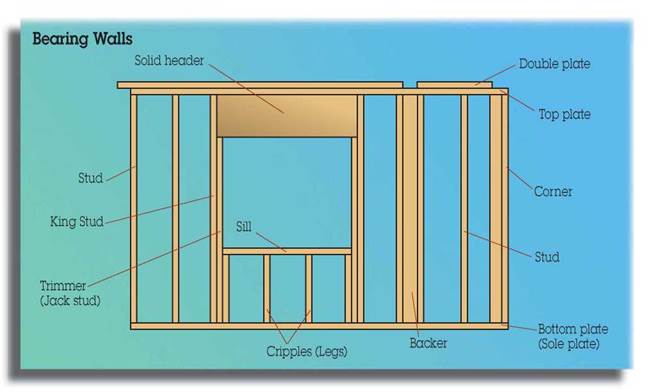
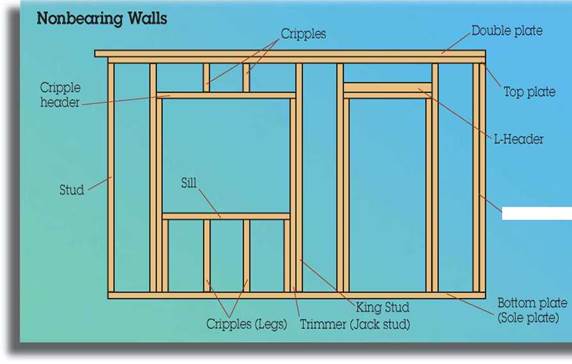
Bearing walls support the main weight of an upper to those upper portions. Remove nonbearing walls,

portion of a building, such as a ceiling, floor, or and the upper portions will stand; remove bearing

roof. Nonbearing walls provide little or no support walls, and the upper portions will fall.


Double studs


Framing Terms