Install the baseboard trim
Before installing baseboards, use a putty knife first to clean any excess joint compound from the corners. Then clearly mark (or re-mark) the location of the studs on the floor. If the gap between the bottom edge of the drywall and the floor is greater than 1 in., take the time to fill it with strips of ^-in.-thick OSB or plywood. Otherwise, the bottom part of the trim can easily be canted inward during installation. If you 11 be nailing the baseboard by hand, protect your knees with a pair of kneepads.
Right-handed people generally prefer to install baseboard counterclockwise (right to left), starting at a door. This makes it easier for righties to cut a coped joint. Lefties tend to install baseboard clockwise for the same reason. Set baseboard right on vinyl or wood flooring, but hold it up about Zi in. if you plan to install carpeting later so that you can slip the carpet under it. When working in rooms that will later be carpeted, use small blocks of OSB as temporary supports under baseboards as you nail them to the wall.
To get my trim skills up to speed, I like to start running baseboard in a closet. Try making a rough plan of each room on scrap paper and record the measured length of each wall. Drywall is often left a bit rough near the floor line, so its hard to measure accurately at that point. Hold the tape off the floor a couple of inches to get a more accurate measurement. This will save you time walking back and forth to the chopsaw with a new measurement each time you want to make a cut.
The first piece right inside the door is measured to length from the door casing to the wall and cut square on each end. Often, that piece is quite short (2 in. or so). If it fits snugly in place, you may not need to nail it. Instead, spread some glue on the back and just press it into position. The next piece of trim will hold the short one until the glue sets. Use 6d finishing nails for lA-in.-thick trim and 8d nails for %-in.-thick trim. Space the nails about 16 in. apart, and drive them into either the bottom plate or the studs. Driving each nail should pull the trim tightly against the wall.


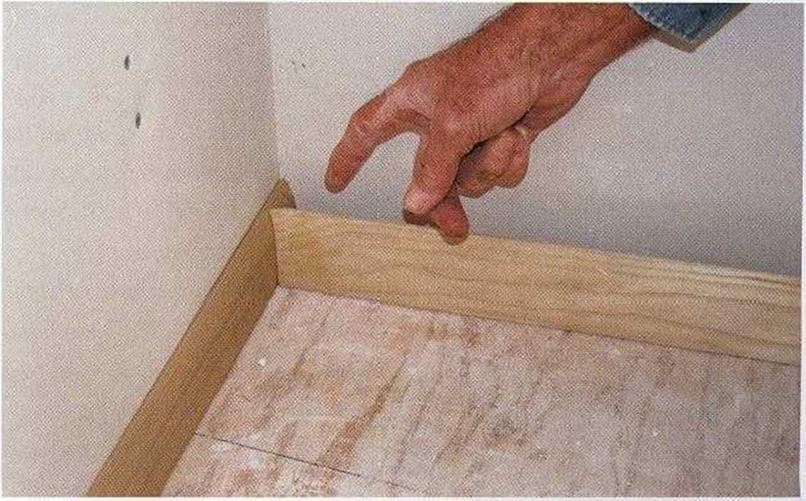
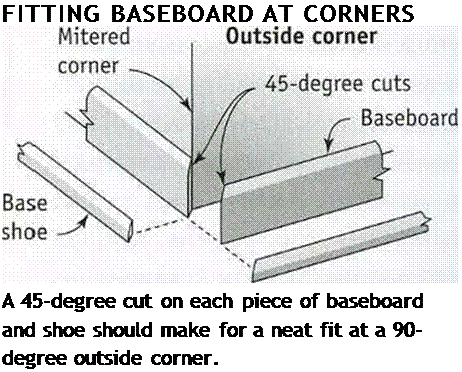
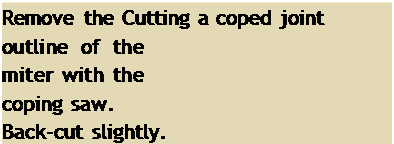
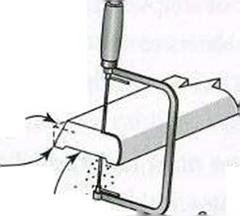
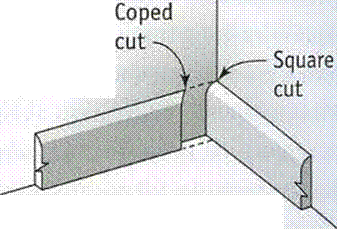
![Install the baseboard trim Подпись: INSIDE BASEBOARD CORNERS ARE COPED. The coped cut fits the profile of the trim piece that runs into the corner. [Photo * The Taunton Press, Inc.]](/img/1312/image956.gif) The second piece of baseboard is coped to fit against the first piece and cut square to butt against the next wall. On the end that will mate with the short piece of baseboard, cut a 45-degree miter that is long on the back (so you can see the cut surface). Now use a coping saw to cut the outline of the profile left in the exposed end grain (see the sidebar on the facing page). The cope-cut end will fit snugly against the first piece of baseboard (see the photo below).
The second piece of baseboard is coped to fit against the first piece and cut square to butt against the next wall. On the end that will mate with the short piece of baseboard, cut a 45-degree miter that is long on the back (so you can see the cut surface). Now use a coping saw to cut the outline of the profile left in the exposed end grain (see the sidebar on the facing page). The cope-cut end will fit snugly against the first piece of baseboard (see the photo below).
|
||
|
||
|
||
 |

![Techniques CROSS-SIGHTING A JAMB Подпись: LEAVE ENOUGH OPER-ATING CLEARANCE. Leave a Ye-in. margin between the door and the jamb so the door can open and Close freely. [Photo by Andy Engel, courtesy Fine Homebuilding magazine, ® The Taunton Press, Inc.]](/img/1312/image906.gif)
![Techniques CROSS-SIGHTING A JAMB Подпись: KEEP THE JAMBS STRAIGHT. A heavy door can bow a jamb inward at the top hinge. Straighten the jamb by lifting up the door on the lock side and then nailing the jamb securely in place. [Photo by Andy Engel, courtesy Fine Homebuilding magazine, ® The Taunton Press, Inc.]](/img/1312/image907.gif)
|
|
thickness of a nickel, all the way across the top (see the top photo above). If the margin at the top is too tight (less than % in.) or too wide (more than % in.), it can be corrected by raising a jamb side. The hinge side can be raised, even with a nail at the top, with a flat bar
under the jamb. Once the margin is correct, nail again near the bottom hinge. Remember to shim under every jamb that doesn’t rest directly on the subfloor.
When setting heavy doors, the weight on the top hinge can bow the jamb outward. If that happens, place a bar under the door and raise the strike (lock) side of the closed door until the hinge jamb is straight or even bowed back slightly. Then drive a nail through the jamb on the hinge side, both above and below the top hinge.
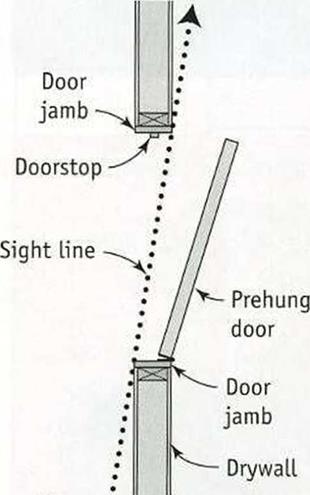
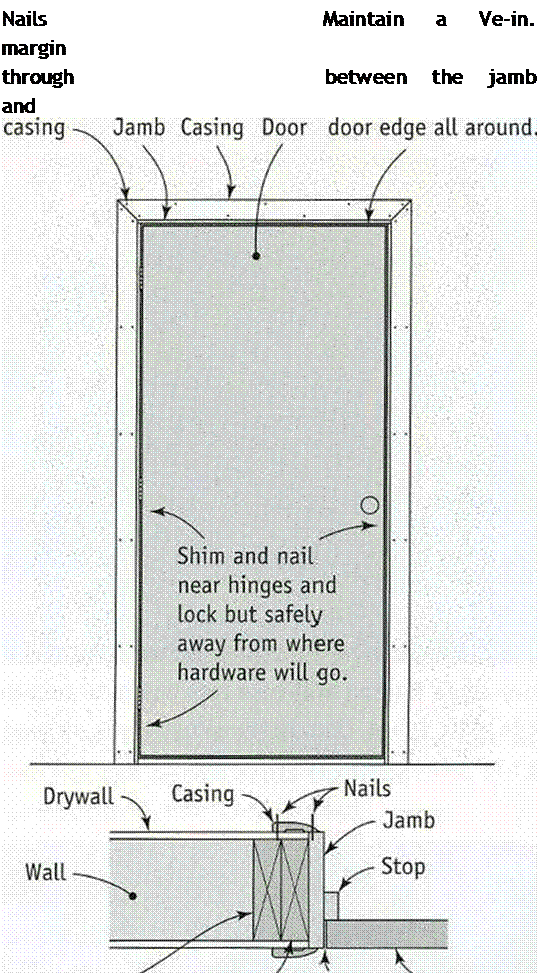
You don’t need to plumb the strike side of a prehung door. Just bring the jamb near the door so that the margin between the jamb and the door is consistent—and at least % in.—all the way around the door. Once the margin is correct, the strike-side jamb can be shimmed and nailed like the hinge side (see the illustration on the facing page). Keep all nails well above and below the lock area.
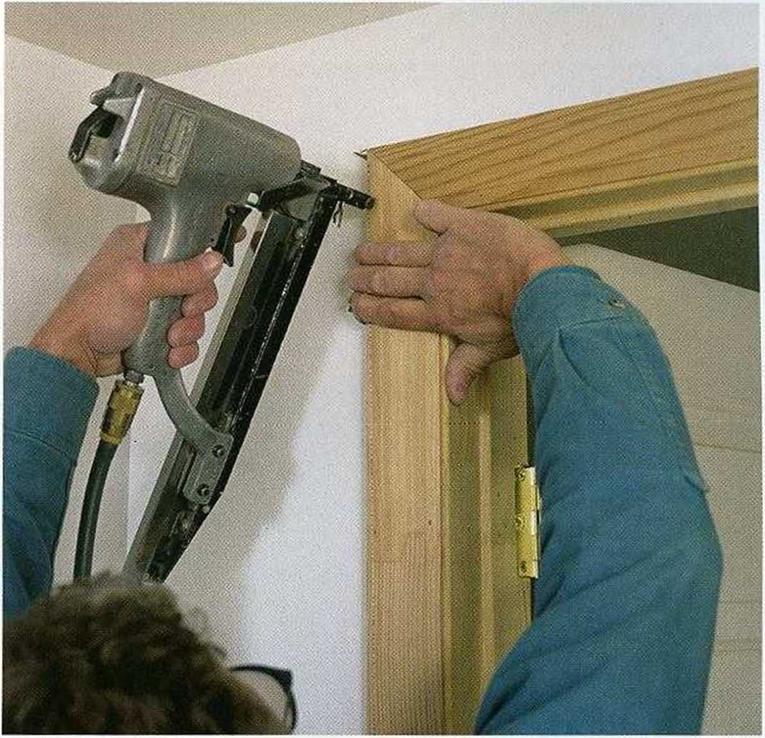
When jambs come with the casing trim installed, drive 6d finish nails through the casing and into the trimmer all the way around the door. Try not to drive nails into any grooves in the casing. This makes it hard to fill and sand nail holes.
Any space between the jamb and the trimmer can be filled with a shim before vou nail
/
the jamb to the rough framing. I am not a fan of tapered shims because, unless you use a pair of them, a jamb may not be installed flat and straight. 1 prefer using small pieces of plywood (% in., Уїв in, Z in., or thicker) for shims.
I slide a З-in.-square shim between the jamb and the trimmer to provide solid backing before nailing the jamb sides in place. If there is a wide gap between the jamb and the trimmer, don’t fill the space with a stack of tapered shims. Instead, use a single thick shim.
To strengthen the door assembly, remove a short screw from each hinge and drive an identical-looking but longer screw through





![STEPS Install the Countertops Подпись: CHECK THE MANUFACTURER'S PLANS FOR THE SINK CUTOUT. The dimensions and cutting details for this hole should come with the sink you plan to install. If your countertop supplier can't make the cutout, do it yourself with a jigsaw equipped with a fine cutting blade. [Photo ® Larry Haun.]](/img/1312/image939.gif)
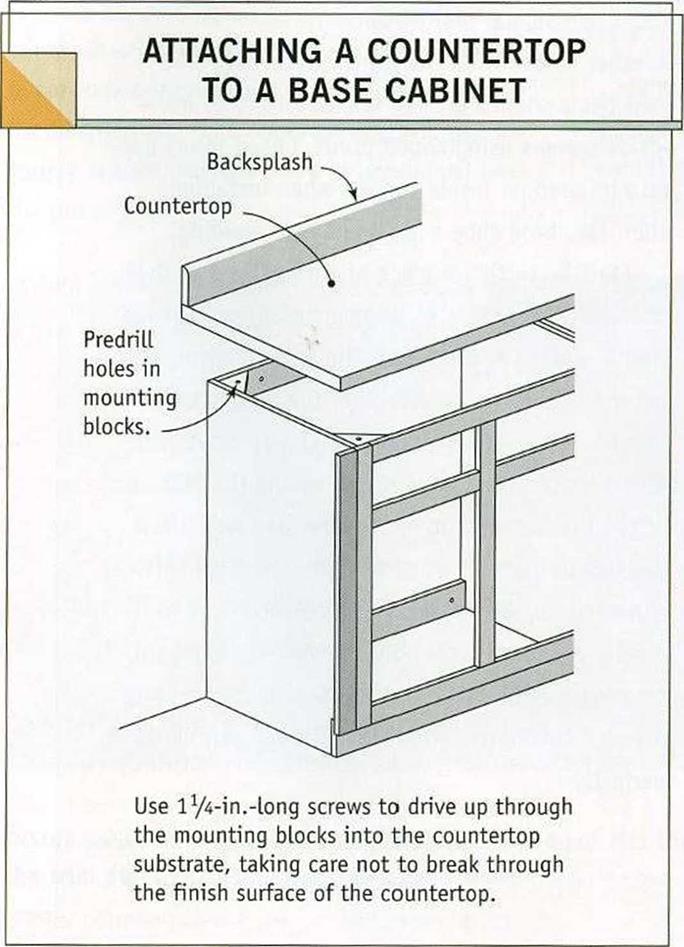 Prefinished countertops must be attached with screws from below. Attach the countertop by driving l%-in.-long screws up through the lx mounting blocks installed by the cabinet manufacturer (see the illustration at right). Predrill a screw hole through the mounting blocks, but be very careful not to drill or drive the screws so deeply that you break through the finish surface. It’s easy to strip a screw
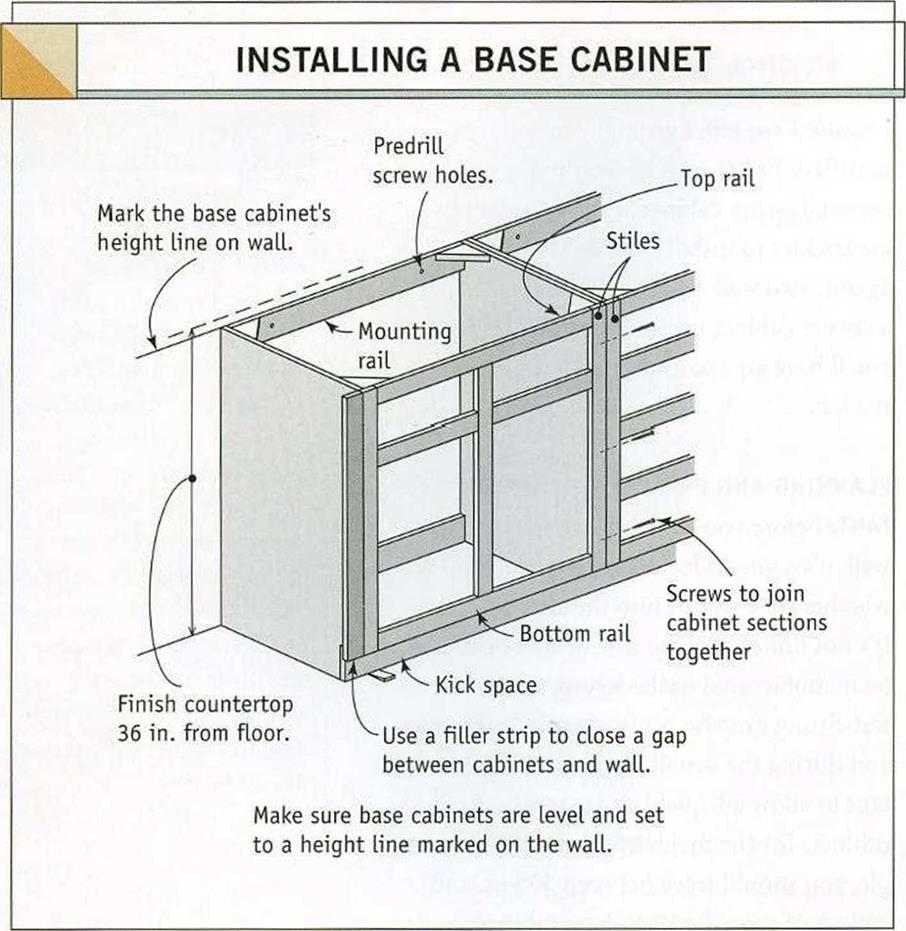 installed, use a level to find the highest spot on the floor, then measure up the wall near that spot. The standard height of base cabinets without a countertop is usually 34/ in. or 35/ in., depending on the manufacturer (see the illustration above).
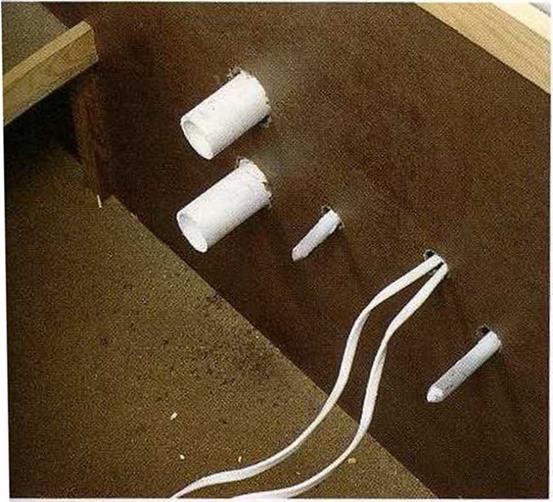
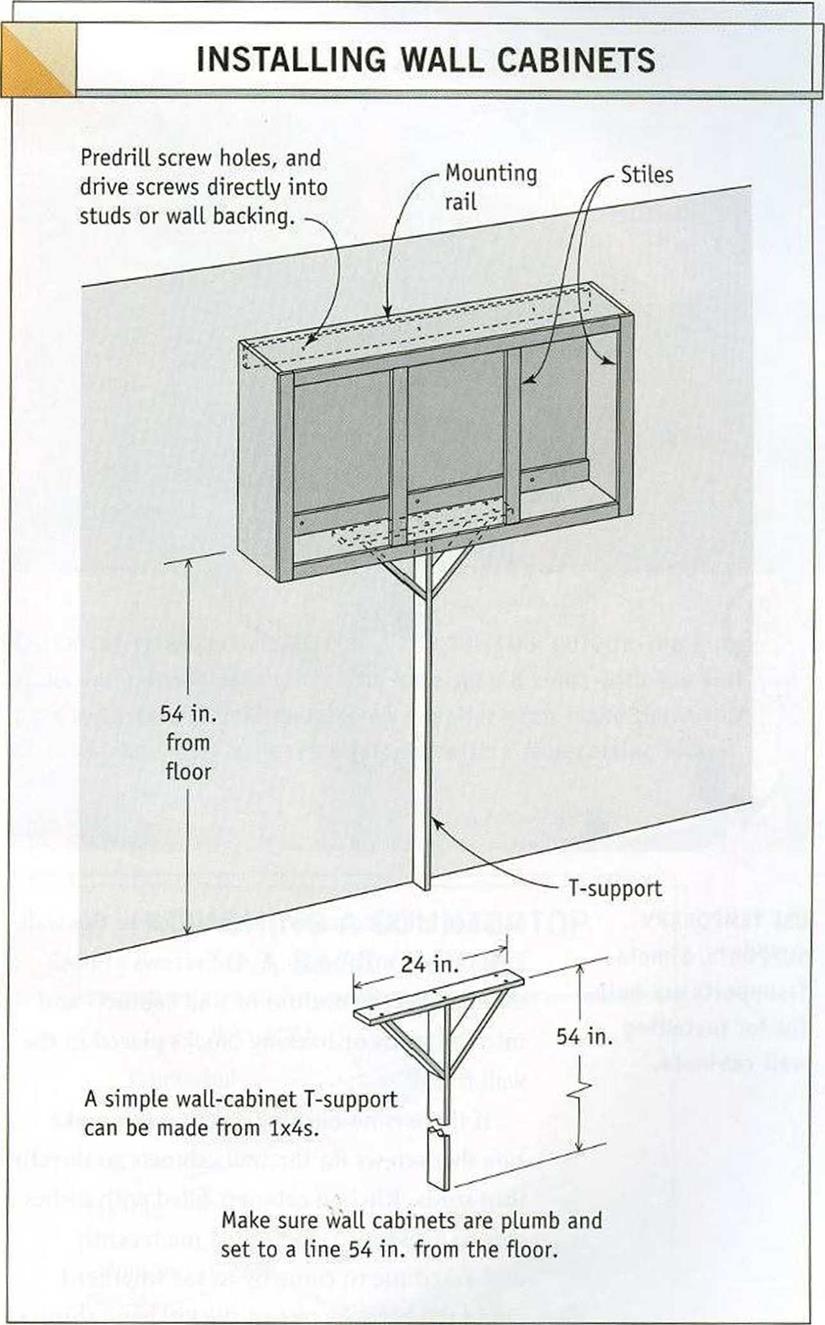 MAKE ROOM FOR UTILITIES BENEATH THE SINK. Holes must be drilled in the back of sink cabinets to make room for pipes and electrical wires.

![Colorful Character for a Colorful Home Подпись: [Photo © Anna Carter.]](/img/1312/image921.gif)

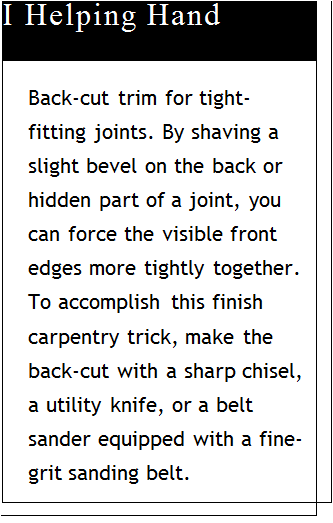

 edge of the jamb—whether it is on a door, a window, or an attic access—and mark a pencil line in several places (see the illustration below). With a little experience, you’ll be able to mark a setback by eye, without a square. The casing is cut and nailed to that line.
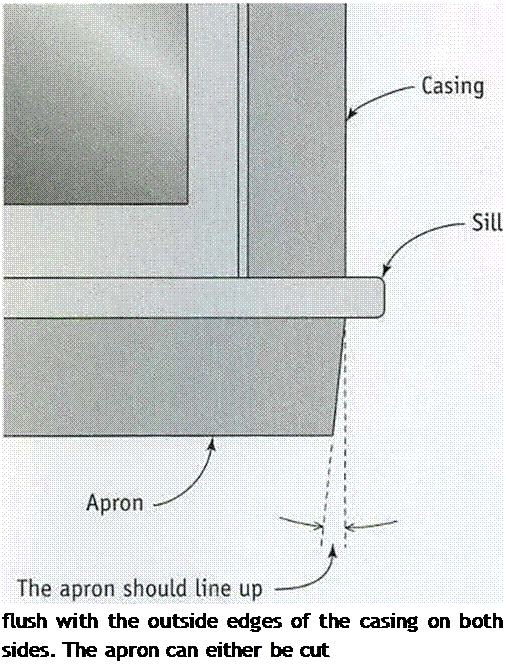
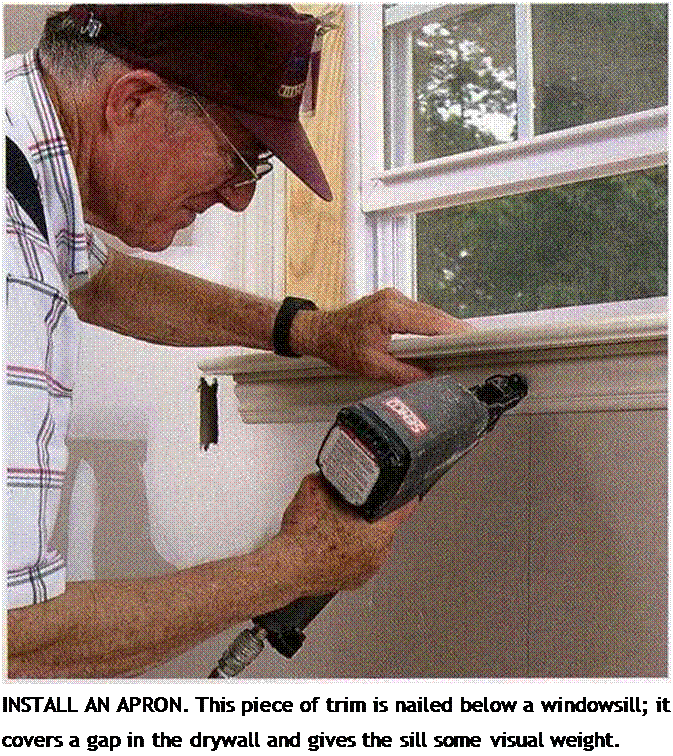


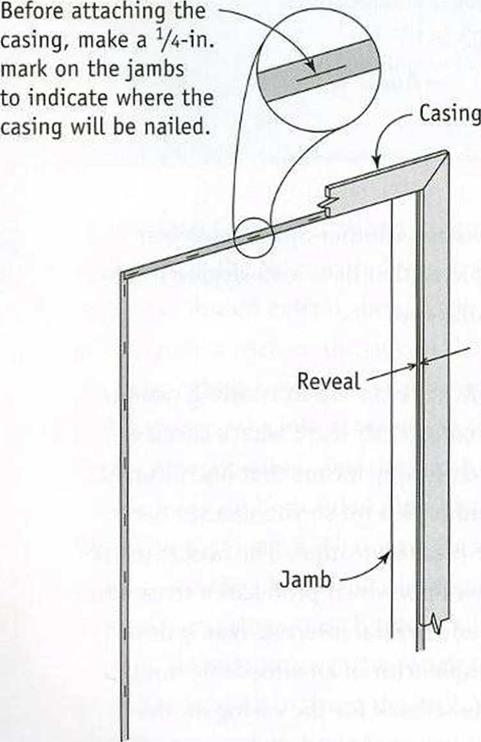
 WOOD AND MDF SILLS HAVE DIFFERENT ADVANTAGES. Standard, %-in.-thick stock works fine as a sill, but I think thicker stock— 1 in. or even I’/ in.—looks better. If you want to see natural wood and your budget allows it, trim with oak, pine, or spruce, and seal it with clear finish. If you prefer a painted finish or your budget is very tight, choose medium- density fiberboard (MDF). Like wood, MDF can be shaped into many styles of trim. It cuts much like wood does and, once painted, looks like solid wood but without an evident grain pattern. Just remember: MDF must be kept away from moisture, which can cause it to swell and come apart.
 The bottom section of the stairway must be cut to length, with the ends of the legs (or stringers) cut at the correct angle so they rest solidly on the floor. To find the angle, swing the staircase down and unfold all but the last section. Extend a 1×4 board alongside an upper-section stair stringer so that the 1×4 reaches the floor. Place another board on the floor and against the 1×4, then mark the cutoff angle on the 1×4. Once you cut that angle on the 1×4, transfer it to measured cutoff lines on both bottom-section stringers.

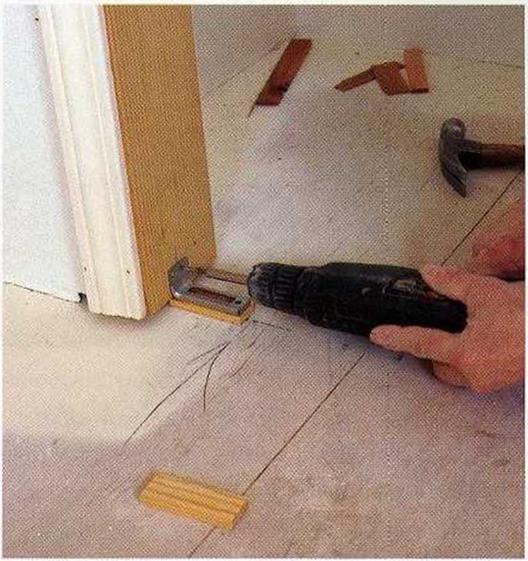
![SETTING A PREHUNG DOOR Подпись: MAKE A BLOCK FOR THE BRACKET. Set the bracket that supports the bottom pivot of a bifold door on a small block. This block will later be covered with carpet. [Photo by Charles Miller, courtesy Fine Homebuilding magazine, ф The Taunton Press, Inc.]](/img/1312/image912.gif)

![SETTING A PREHUNG DOOR Подпись: A DROP-DOWN STAIRCASE PROVIDES EASY ACCESS. Installing a factory-made folding staircase lets you gain convenient access to attic space. [Photo by Jefferson Kolle, courtesy Fine Homebuilding magazine, s The Taunton Press, Inc.]](/img/1312/image914.gif)


