Category A HOUSE

STEP 1 INSTALL THE REMAINING SHEATHING AND THE ROUGH EXTERIOR TRIM

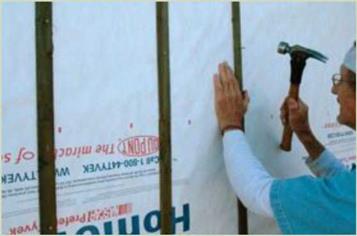
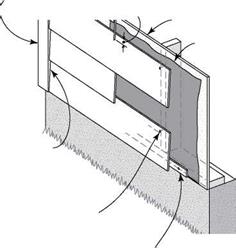
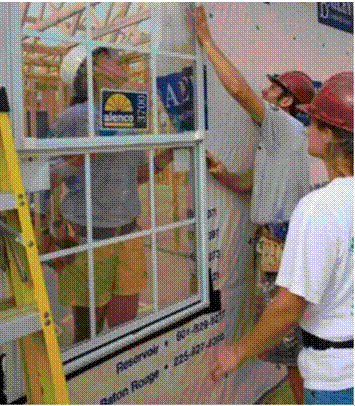
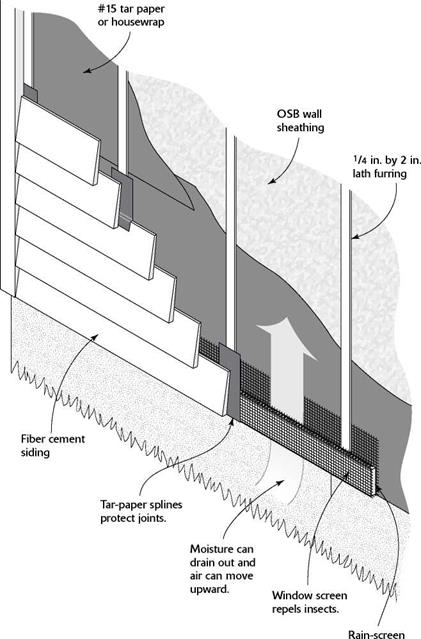
STEP 1 INSTALL THE REMAINING SHEATHING AND THE ROUGH EXTERIOR TRIMПодпись: Furring strips keep the siding away from the wall. This creates a drainage plane helping to keep both siding and OSB sheathing dry.Straight courses of finish siding and sharp-looking exterior trim depend on good prep work on the sheathing and exterior trim surfaces that will be covered with aluminum cladding. A good deal of wall sheathing will already be done at this stage. Now that finish siding is about to be installed, it’s important to make sure the wall surfaces are flat and free of gaps that will cause dips or irregularities when the vinyl is installed. When installing foam sheathing, you can sheathe right over window and door openings, then use a handsaw to cut out the foam from the opening (see the photo on p. 109).

Подпись:

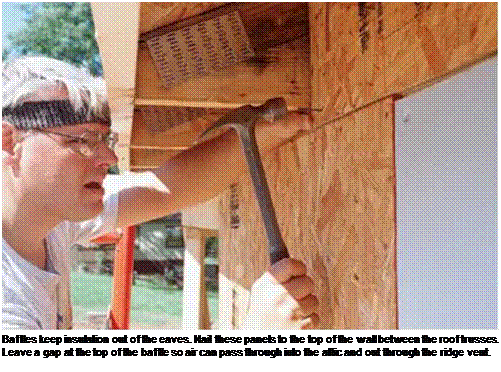
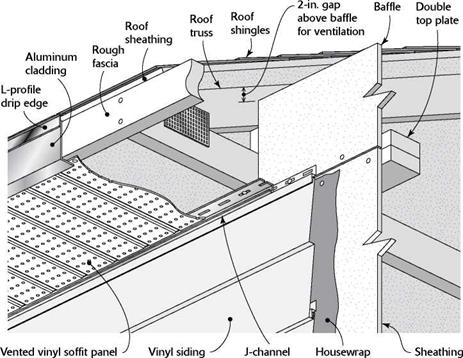
If necessary, install wood sheathing or foam board over any unsheathed areas on which siding will be installed. These areas include the rim joist and headers above windows and doors. Along eave walls, it’s also essential to extend the sheathing between the roof trusses above the top plate of the exterior wall, as shown in the photo at right. This additional sheathing acts as a baf­fle, preventing attic insulation from spilling out into the eaves. Cut each OSB panel so that there are a couple of inches of open space between the top edge of the panel and the top edge of the roof trusses. This clearance is essential for good ventilation; it allows air to be drawn through the soffit vents and into the attic space.

FIBER-CEMENT SIDING

Fiber-cement siding has been around a long time. The first house I worked on in the late 1940s was covered with fiber – cement siding. It was a bit brittle but just about indestruc­tible. It fell out of favor because it was hard to work with and full of asbestos, whereas high-quality wood siding was inexpensive and becoming widely available.

Times have changed. Today, wood siding is expensive and often lacking in quality. Modern fiber-cement siding, on the other hand, contains no asbestos and offers all of its old ad­vantages and a few new ones, too. I like it because it is simple to install, holds paint well, is fire resistant, is easy to trim out, and won’t decay, rust, or mold. And if that wasn’t enough, it has a 50-year guarantee! Like vinyl, it’s fairly easy to work with, thanks to the new cutting and nailing equipment avail­able today. Unlike wood, it doesn’t cup, curl, or attract ter­mites. Unlike vinyl, it doesn’t burn, melt, expand, or contract.

Once you learn a few basic techniques, such as how to cut and nail it, fiber-cement siding is easy to install and goes on one plank at a time. The siding can sometimes be nailed directly to studs that have been covered with housewrap. In high wind and earthquake areas, siding often has to be nailed on walls that have been sheathed with OSB panels. These

FIBER-CEMENT SIDING

Space can be created between the wall sheathing and the siding either by using a rain screen or by nailing lath strips to each stud. This space allows moisture to drain and protects wood from rot or mold. [Photo by Don Charles Blom]

FIBER-CEMENT SIDING

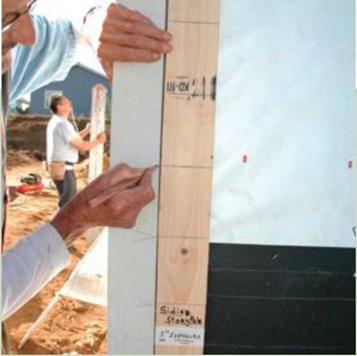
Layout to set the levels for horizontal siding can be done with a story pole. Use the story pole to mark the siding layout on doors, windows, and trim all around the house. [Photo by Don Charles Blom]

OSB panels add lateral and structural strength to a building. In such cases, care must be taken to insure that moisture passing through the walls does not settle on the OSB and cause rot. This problem can be dealt with by creating a space between the siding and the OSB. There are different ways to create this buffer zone. To learn how to approach this part of the project, refer to the manufacturer’s product and installa­tion information, which is comprehensive and extremely use­ful (see Resources on p. 279).

Fiber-cement clapboard siding comes in various widths that are usually 12 ft. long and 5/i6 in. thick. Both smooth and wood-grain textures are available. For best results, order the siding pre-primed on both sides. You can also purchase 4-ft. by 8-ft. panels that have vertical grooves likeTl-11, or smaller panels that have a shingle pattern. For best results, order the siding pre-primed or with a permanent color already on the siding. After it has been delivered to the job site, keep it covered with a tarp whenever you’re not using it to mini­mize moisture absorption. Store the siding flat and level, too, so it doesn’t break or warp.

Cutting tips

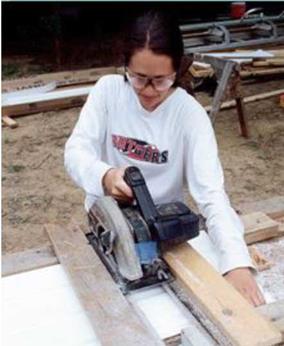
Fiber-cement siding can be cut with a regular circular saw and a conventional carbide blade, but a diamond-tipped ma­sonry blade with four to six teeth works much better and is probably cheaper in the long run. The biggest problem with
cutting fiber-cement with a power saw is that it creates a lot of dust. Be sure to wear a good dust mask and follow the manufacturer’s recommendations to avoid unnecessary ex­posure to silica, which can damage your lungs.

I prefer to use a set of electric fiber-cement siding shears, a power tool designed specifically for this job (see Resources on p. 279).The shears cut cleanly, don’t create any dust, and can be used for both straight and curved cuts. For small holes, such as those for exterior electrical outlets, use a jigsaw with a carbide-tipped blade. Cut round holes for pipes with a carbide – tipped hole saw mounted in a heavy-duty, two-handled drill.

Corrosion-resistant fasteners

Most companies guarantee their fiber-cement siding for 50 years. Therefore, it will last a long time—provided it’s properly attached with high-quality, corrosion-resistant nails. I generally use regular 2-in.-long, hot-dipped galva­nized nails. If I’m working near the ocean or another area with high humidity, I often use stainless-steel nails.

For the most part, builders use pneumatic nailers to at­tach fiber-cement siding to walls. I’ve found that a regular pneumatic nailer works better than a roofing nailer (see Resources on p. 279). Make sure that the pressure is set correctly once you get started so that you don’t overdrive the nails. Nailguns these days often have a depth gauge to ensure that nails are driven flush with the surface. And there are special coil nailguns that have been developed specifically for siding. Fiber-cement siding can be nailed by hand, but you may need to predrill the nail holes to keep from breaking off the end of the plank. It’s a good idea to have a pocket full of felt strips (3 in. by 8 in.). Each time you have two pieces of siding meet at a butt joint, slip a piece of felt behind the joint and let it lap down on the lower course about an inch. This will help prevent water from entering at the joint.

Trim details

As with wood siding, trim for fiber-cement siding is usually installed first, and then the siding panels are butted against

Siding can be highlighted by using different paint colors. The con­trast adds to the beauty of the building. [Photo by Don Charles Blom]
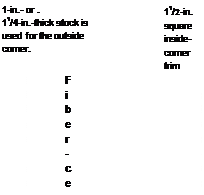
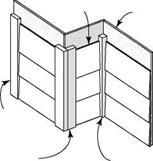
it. Fiber-cement trim is available for inside and outside corners, doors, and windows, as well as for covering fascia boards and soffits. The illustrations on p. 152 show a few of the trim details available. These same details also work for wood clapboards and wood shingle siding. The trim should be fairly thick—either 5/4 (11/4 in. thick) or 2x—in order to stand proud and cover the ends of the siding.

At the outside corners, the siding can butt against the cor­ner boards or be covered with aluminum corner pieces (called siding corners).These pieces have been used for many years as trim for wood siding and work just as well with fiber-cement siding. The siding is installed first and stopped exactly at the corner. After all the siding is in place, the siding corners can be slipped under each course. A flange at the bottom of the corner hooks a row of siding and a 6d or 8d galvanized nail is driven through a hole in the top to hold it in place.

Installing siding panels
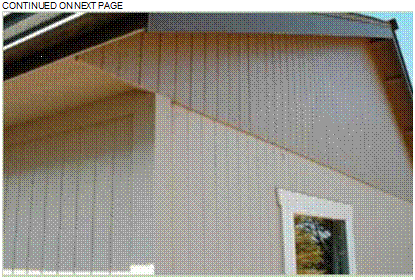
Подпись: CONTINUED ON NEXT PAGE The installation details for fiber-cement siding are similar to those for wood clapboards. The bottom-most course of siding rests on a 5/i6-in.-thick, 1f/2-in.-wide starter strip cut from the siding or from pressure-treated wood. The bottom edge of the first course should lap about 1 in. below the top of the founda – tion. To install subsequent courses, follow the manufacturer’s recommendations for overlapping and nailing. After you know the amount of reveal the siding will have, you can establish the height of each course. For example, a typical lap on 8f/4-in.-wide

FIBER-CEMENT SIDING CONTINUED

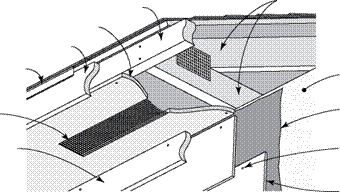
SOFFIT, SIDING, AND FRIEZE-BOARD DETAILS


FIBER-CEMENT SIDING

Drip

edge


Sheathing Housewrap Blind nail


Screened
vent


Frieze board


FIBER-CEMENT SIDING
FIBER-CEMENT SIDING

Door trim


FIBER-CEMENT SIDING
FIBER-CEMENT SIDING

Fiber-cement or PT starter strip, 5/16 in. thick and 11/2 in. wide


FIBER-CEMENT SIDINGFIBER-CEMENT SIDINGFIBER-CEMENT SIDING

FIBER-CEMENT SIDING

siding is 11/4 in., which leaves a 7-in. reveal. This reveal can be marked on each piece of corner trim and on every door and win­dow all around the house by using a story pole. A reveal can be adjusted up or down slightly (up to V2 in.) in order to fit siding pieces around door and window openings, and to maintain a uniform distance between the top of the wall and the uppermost siding course. To make sure the last course of siding will be uni­
form in width, measure down from the top of the wall frequently (every other course or so) and fine-tune the reveal, if necessary.

You can mix and match siding to add a bit of style to a build­ing. Gable ends can be sheathed with a different type of siding than the walls. Tl-11 in the gable end, for example, will contrast with lap siding on the walls. Contrasts can be made even greater by painting the walls a different color than the gable end.

FIBER-CEMENT SIDING Подпись: iiiiiiiiiiiiiiiiiiiiii
Подпись: FIBER CEMENT SIDING COMPONENTS AND INSTALLATION DETAILS

other components, such as vents, electrical out­let covers, and special exterior trim. It’s smart to get an overview of the full range of com­patible products before you order siding. Go online to visit manufacturer’s websites or call to request product information (see Resources on p. 279).
Vinyl Siding

It’s not difficult to understand the popularity of vinyl siding. It’s affordable, widely available, fairly easy to install, and maintenance-free.

A drawback is that it takes time to learn how to install the vinyl trim pieces that go around doors, windows, and under eaves. Another disadvantage is that in some areas, like the Northwest, vinyl siding needs to be pressure washed yearly to remove fungal growth.

Vinyl windows, vents, soffit material, and other components are designed to be compat­ible with vinyl siding, and there are plenty of
colors, surface textures, and styles from which to choose. You’ll find vinyl siding on compact, affordable houses like the one featured in this book, as well as on expensive custom – built homes.

Horizontal siding is the most popular type of vinyl siding, and most styles are designed to look like wood clapboards. Clapboard widths range from 4 in. to 8 in. Manufacturers of­fer most of their siding with either a smooth surface or a textured, wood-grain finish. When choosing a siding color, bear in mind that it will fade slightly over time. Also, darker siding will absorb more heat and expand more than light – colored vinyl.

To estimate how much siding you’ll need, refer to the sidebar on p. 154. Keep in mind that when you buy vinyl siding, you’re actu­ally buying a comprehensive system of siding components: siding panels, J-channel, inside and outside corner pieces, and other types of trim designed to simplify the installation and enhance the appearance. Siding manufacturers also make compatible vinyl soffit paneling and

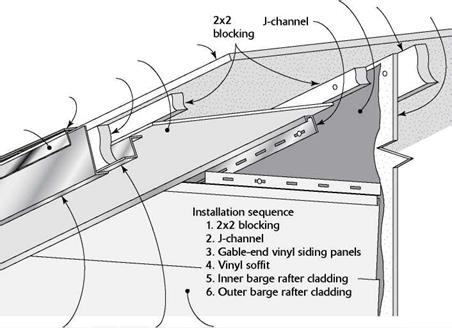
SOFFIT AND SIDING DETAILS

GABLE WALL

Подпись: Roof sheathing Подпись: Housewrap -Подпись: RafterПодпись:Подпись: Outer barge rafter claddingПодпись:Подпись: Vinyl sidingVinyl SidingПодпись:
Подпись: EAVE WALLVinyl SidingBe careful with delicate sheathing. Take aim care­fully when installing foam sheathing. A misdirected hammer blow can easily dent or puncture the foam. Install these insulating panels with broad-head roofing nails or plastic – cap nails. Space the nails about 16 in. apart along the edges and 24 in. apart everywhere else.
CLOSING IN

Windows, Doors, Siding, and Exterior Trim

Each phase of a homebuilding project offers a new set of challenges and rewards, but the work that we do in this chapter is especially exciting. The big, stick-framed box we’ve built is about to receive a beautiful skin, with windows and doors added to make it weatherproof. By the time we’ve fin­ished the tasks in this chapter, the house will show off its finished exterior appearance. And with the inside protected from the elements, we are free to take on all the interior work ahead.

As I mentioned in Chapter 4, it’s common practice in some parts of the country to sheathe wood-framed walls before they are raised rather than after. In other areas, sheathing is eliminated and diagonal steel or wood braces are installed to help walls resist shear forces. Certain types of exterior siding (such as fiber cement or sheets of T1-11 siding) can sometimes be nailed directly to the studs and do not require sheathing underneath.

Before we nail on the siding, we are sheathing this house with two mate­rials that share the same ‘A-in. thickness. Structural wood panels (oriented strand board, or OSB) are used in the corners, where they provide necessary shear strength. To cover the framing between the OSB panels, rigid foam insu­lation board is fastened against the studs and plates. Lighter and less expensive than wood panels, rigid foam sheets are easy to handle, cut, and install. Their insulating value improves the home’s energy performance, augmenting the R-value of the fiberglass batts installed between the studs.

Подпись:CLOSING INWe won’t make much sawdust in this chapter. Instead, we’ll learn which tools and techniques are needed to install vinyl siding and prefinished alumi­num coil stock. This plastic and sheet-metal exterior is quite different from the redwood siding and trim I used earlier in my construction career. Depending
CLOSING IN

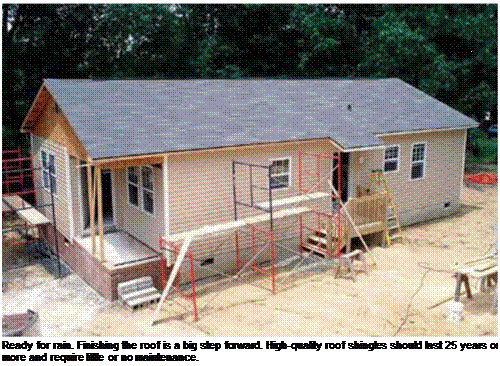
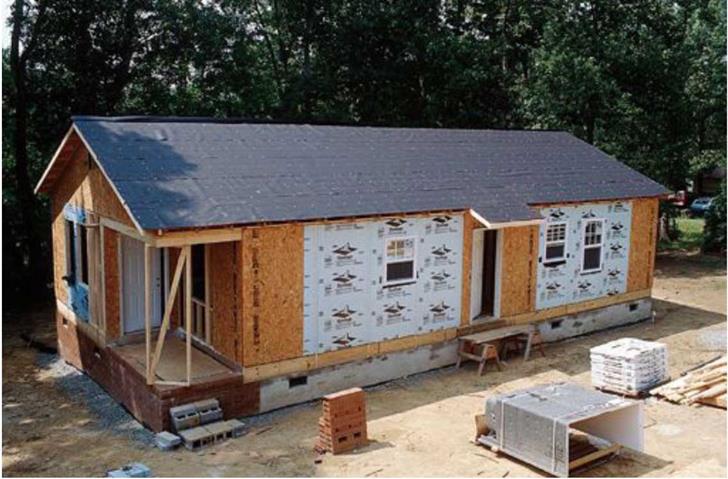
The house is almost ready for siding. This phase of construction begins with felt on the roof and sheath­ing on the walls.


on your budget, your personal preferences, and local availability, there are many siding and trim possibilities. Out West, where I’ve done the most building, fiber-cement siding is often used; it has been installed on quite a few Habitat houses in western states. There are other affordable, low-maintenance siding options to consider, too. A few of them are described briefly on pp. 162—163.

Install ridge shingles and the ridge vent

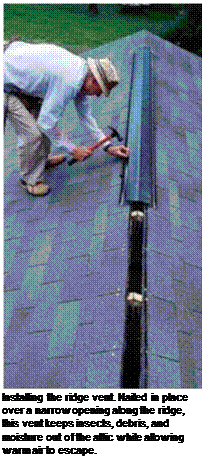
At the ridge, many builders install ridge shin­gles on the roof ends with a ridge vent between them. An alternative is to install the ridge vent across the entire roof, even though the ends of the vent (located over the gable-end overhangs) are not functional. Some ridge vents do not require a cap of roof shingles, but others do. No matter which type of ridge vent you use, follow the manufacturer’s instructions regarding its installation (see the top right photo on p. 143).

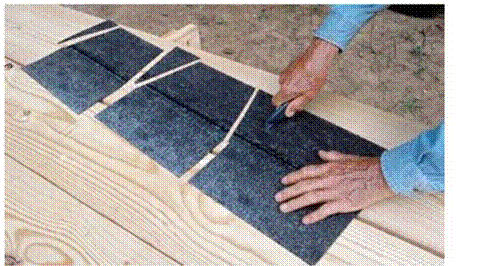
Ridge shingles are easy to make—simply cut regular three-tab shingles into three pieces, as shown in the bottom right photo on p. 143. Lay the shingle upside-down on a piece of ply­wood and cut it with a utility knife. Start at the top of a slot and angle inward slightly in both directions toward the top of the shingle, cutting out a small triangle of waste. These shingles cover the ridge at both ends of the roof and are overlapped to show a 5-in. reveal, just like regular shingles. The angled portion of each ridge shingle is covered by the exposed part of the next shingle.

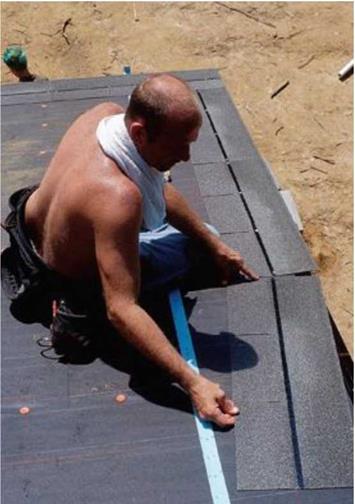
To ensure that both the ridge shingles and the ridge vent are installed straight, I like to snap a blue chalkline about 5 in. to 6 in. down one side of the ridge. No one but the eagles may see this, but it only takes a couple of minutes to do it correctly, and it’s important to develop good habits. Fasten the ridge shingles securely with L/2-in. roofing nails. Some ridge vents must also be installed with long nails. Cover exposed nail heads with a good-size dab of roofing tar.

Nice work! This peak experience gives the house its most important protection from the elements. When a roof is installed properly, you don’t have to worry about it for a long time.

Подпись: Photo cour tesy HFHI Подпись: Photo courtesy HFHIInstall ridge shingles and the ridge ventHabitat

"111 for Humanity®

PLAY US A TUNE

Before Katrina hit, Habitat affiliates in the Gulf were building 60 houses a year. After the storm, those same groups were building that many houses in a month! Mobilizing some 70,000 volunteers in the storm’s aftermath, Habitat for Humanity has completed or begun construction on more than 1,200 homes as of this writing in the Gulf Coast, and there’s no end in sight.

In New Orleans, hit hard by the hurricane, the New Orleans Area Habitat for Humanity is playing a key role in rebuilding their city. It has expanded its operations in many parishes outside the city, including St. Bernard parish, which sustained damage to nearly every structure within its limits,
and is also committed to the development of the celebrated Musicians’ Village.

Seeing hundreds of Crescent City musicians lose their homes and livelihoods because of the storm’s devastation, singer Harry Connick Jr. and jazz saxophonist Branford Marsalis teamed up with Habitat to do something about it.

Designed to foster the sounds and songs that make New Orleans unique, the Musicians’ Village consists of single-family homes and duplexes that will house musicians as well as residents who want to be part of this musically inclined neigh­borhood. To top it off, the Ellis Marsalis Center for Music is being built in the heart of the community. Part performance hall, part teaching facility, the center’s goal is to bring musicians young and old together to celebrate the rich musical heritage of New Orleans.

After so much devastation and upheaval, restoring New Orleans will not happen overnight. But if the joint efforts of Habitat and the city’s citizens are any indication, the spirit of the city is alive and singing. —Dave Culpepper

Install ridge shingles and the ridge vent

і

Install step flashing at roof – wall intersections

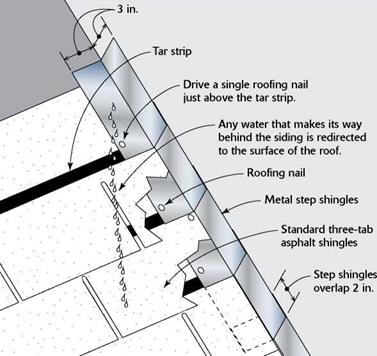
Use metal step flashing to waterproof the inter­section where a roof butts into a wall. Usually made from aluminum or copper, metal step flashing is bent to form a series of elongated, L-shaped pieces that are lapped over each other in successive shingle courses as well as upward along the wall. The step flashing we used on this house is 10 in. by 6 in., and each leg is 3 in. wide.

Подпись:

Install step flashing at roof - wall intersections

The illustration on p. 144 shows how step flashing is installed on each course of shingles that runs into a wall. (It’s also used where shingles meet a chimney or a skylight curb.) Each time a regular shingle is laid down, a step shingle is placed under it—on the part of the regular shingle that will be covered. Lap step shingles by about 2 in., one on top of the other. One nail above the tar strip should be enough to

Подпись: I III III II III III III III III III III III II III III III III III III III III II III III III III III III III II III III III III III III III III II III III III III III III III III II III III III III III III III III II III STEP FLASHING Install step flashing at roof - wall intersectionsПодпись: When a roof intersects a wall, metal step shingles are used to flash the intersection. The step shingles are covered by both the three-tab shingles on the roof and by the siding on the sidewall.Подпись: Ready for rain. Finishing the roof is a big step forward. High-quality roof shingles should last 25 years or more and require little or no maintenance.

hold each step shingle in place. As each succes­sive course of shingles is nailed in place, a por­tion of the step shingle on the roof is covered. Later, when the wall is covered with siding or stucco, the vertical leg will be covered as well.

Shingling across a valley

When a porch roof intersects the main roof at a right angle, a valley is formed. Shingles can be laid across a valley in different ways.

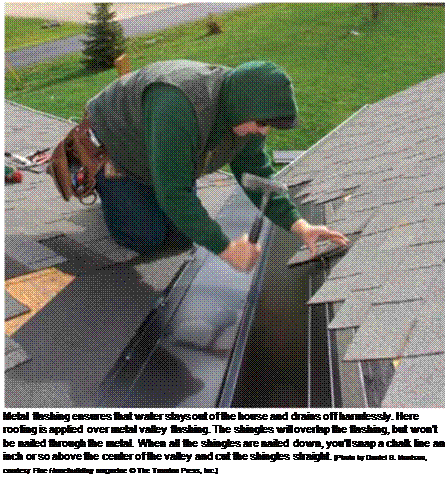
A woven valley is formed by weaving shingles across the valley, alternately overlapping from the main roof onto the porch roof, then vice versa. When properly done, a woven valley is watertight. Let each course of shingles overlap the valley by at least 12 in. and keep nails 8 in. or more from the centerline of the valley.

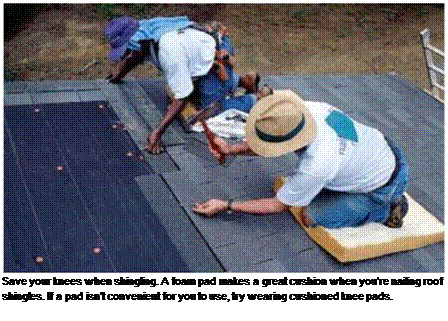
Подпись:Подпись: Save your knees when shingling. A foam pad makes a great cushion when you're nailing roof shingles. If a pad isn't convenient for you to use, try wearing cushioned knee pads. Подпись: iiiiiiiiiiiiiiiiiiiiiiiiiiiiiiiiiiiiiiiiiiiiiiiiiiiiiiiiiiiiiiiiiiiiiiiiiiiiiiiiiiiiiiiiiiiiiiiiiiiiiiiiiiiiiiiiiiiiiiiiiiiiiiiiiiiiiiiiiiiiiiiiiiiiiiiiiiiiiiiiiiiiiAn alternative to a woven valley is a closed, or cut, valley. To create a cut valley, let all shingle courses from the main roof lap across the porch valley by at least 12 in. Don’t alter­nate back and forth from the main roof to the

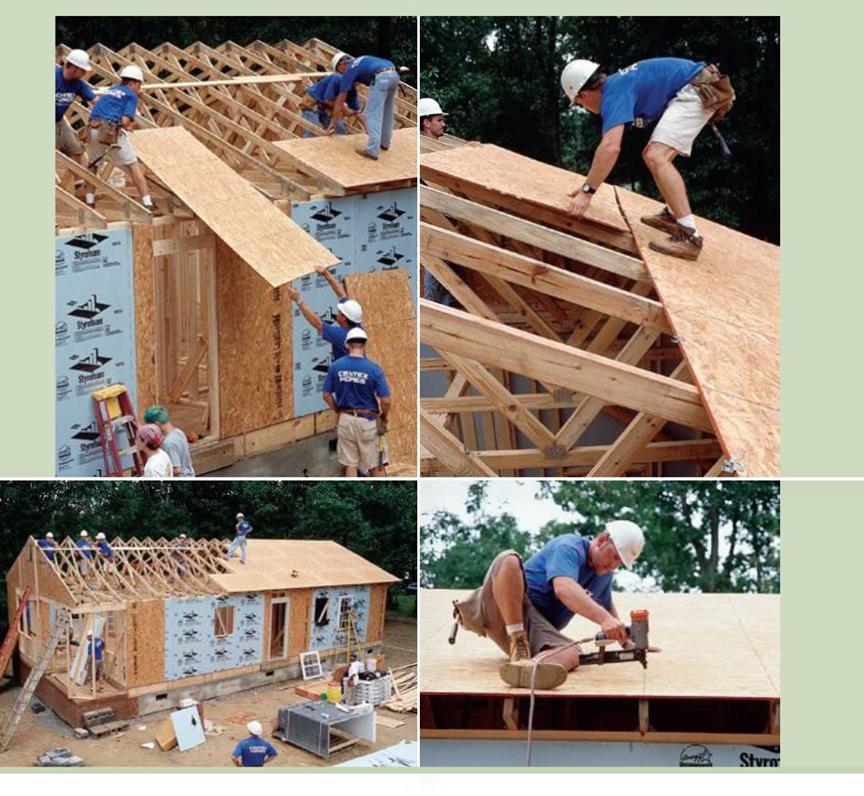
It’s hard work to hand up sheathing panels.

We yell back and forth from the roof to the ground. Everyone should wear a hard hat.

With some experienced volunteers using nailers and

others hammering, the panels go down quickly.

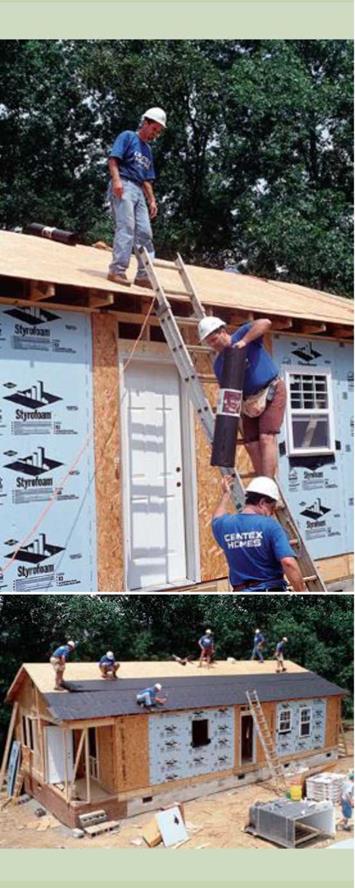
After lunch, we shift from sheathing to shingling.

The scent of cut wood is replaced by the smell of asphalt; pretty soon, we’re hoisting shingles onto the roof.

Shingling across a valley

Shingling across a valleyporch roof. After the shingles are laid on the main roof, lay the shingles on the porch roof so that each course laps over those on the main roof. Next, snap a chalkline down the center of the valley; use blue chalk, because most other colors stain. Cut the top layer of shingles at this chalkline. I use tinsnips or a utility knife with a hook blade to trim shingles to this line and to avoid cutting the lapped shingles below.
HOISTING MATERIALS TO THE ROOF

HOISTING MATERIALS TO THE ROOFHere in the West, we try to order shingles the day before they will be installed. Suppliers arrive with a hoist and stack both shingles and felt paper directly onto the roof. An experienced delivery per­son knows to stack bundles of shingles about 6 ft. apart on both sides of the roof.
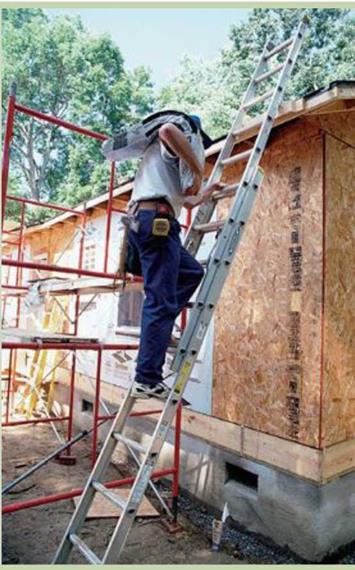
The other way to get shingles onto the roof is the hard way— hoisting one bundle at a time. If you must haul roofing shingles up to the roof yourself, make sure you have a secure ladder that is positioned properly and is 2 ft. to 3 ft. taller than the roof. It’s a good idea to nail a temporary 2x tread at the spot on the roof where you will step off the ladder. This tread provides a solid foothold where you need it most.

BUST THE BUNDLE. Shingles are much easier to carry if you “bust" the bundle first. Pick up a bundle and lay it across a sawhorse. Push down on both ends until the bundle curves downward. A curved bundle is easier and safer to carry on your shoulder than a straight, stiff one (see the photo at right).

Pick up the bundle by bending your knees and draping the bun­dle over your shoulder. This is not always easy, because a bundle of shingles can weigh as much as 80 lb. Ascend the ladder slowly and watch your balance. Don’t throw down bundles between rafters, or you could break the OSB sheathing. Just set them on the roof with­out a lot of force, and space the bundles so that they’re easy to grab while you’re shingling.

when the wind blows. Run these shingles up the gable ends, too. Remember to use shorter nails around the perimeter of the roof if the house has open eaves. Butt the starter shingles tightly to each other.

If you live in a very windy area, you can make the starter course even more secure with just a little extra effort. For the bottom layer of the starter course, cut off the three tabs on each shingle just below the tar strip. Snap a line the width of this narrower shingle around the roof’s perimeter. When you install the narrow shin­gles, the tar strip will be very close to the edge of the roof. Nail the narrow shingles 2 in. or so
from the roof’s edge with their tar strips down. When the sun heats up the tar strip, this layer of shingles will be sealed to the roofing felt below. STARTER COURSE, SECOND LAYER.

This shingle layer, and every subsequent course, is installed right side up (tabs down). Position the first row of regular shingles of this top layer flush with the lower edge of the bottom layer, with one of its short edges on the second vertical offset line. It doesn’t make any difference whether you go to the right or the left of the second vertical line—all that matters is that the tabs of this top layer are offset from the tabs of the bottom layer by 6 in. Nail each and every

shingle the same way. Use four ^-in. roofing nails and drive one nail about 1 in. from each edge and one nail above each slot. Drive all nails just below the tar strip and above the cutout. REMAINING COURSES. Start several courses of shingles, offsetting each by 6 in. This allows other shinglers to work in both directions. Hold each new course of shingles to the 5-in. horizontal mark above the last course, alternating shingle ends on the vertical marks. This establishes a pattern with a 6-in. offset on each shingle.

At vent pipes, install a roof jack, or metal flashing, over the vent to keep out water. Install shingles below the pipe’s centerline beneath the flashing. Install those above the centerline on top of the flashing (see the photo at right). The flashing can be nailed near the top corners of the tin, before shingles are laid on top of it. Don’t nail the bottom corners down, though, as this could cause the flashing to leak.

At the gable ends, cut the shingles to length before nailing them in position. Mark the length and cut them from the back with a utility knife. Rather than carrying a square, I use another shingle as a straightedge to guide the cut and a third shingle as a protective base below the cut. At the top, cut the shingles flush with the sheathing that was cut back to accom­modate the ridge vent.

VERTICAL LAYOUT FOR ROOF SHINGLES

To obtain the right layout, try this two-step method:

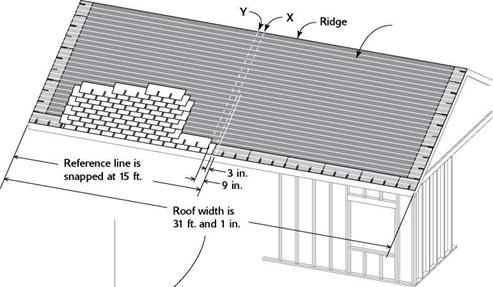
1. Measure across the roof from outside edge to outside edge (parallel with the eave wall), including the planned overhang distance for the shingles. For example, let’s assume that the shingles will overhang the drip edge by 1/2 in. Measure in yards (because the length of a standard shingle is 36 in.), plus remaining inches.

2 Measure in from the left edge by a round number of yards (say, 5 yd.) and mark that distance on the roof. Then refer to the chart below to ensure that all the shingles at the edges of the roof will be at least 15 in. wide (a full tab, plus 3 in.).

EXAMPLE. Let’s say the total distance across the roof, from gable end to gable end, is 10 yd. and 13 in. (including the 1/2-in. overhang at both ends). When you check the chart’s recommendations for a roof with a 13-in. remainder (12 in. to 15 in. is the range), you’ll see that the recommended offsets are 3 in. and 9 in.

From the reference mark at 5 yd., make marks 3 in. to the left and 9 in. to the left of the reference mark. You now have an offset of 6 in., or half the width of a shingle tab, between courses. Staggering the courses like this—so that the breaks between the tabs don’t stack up on top of each other—prevents water from seeping beneath the shingles.

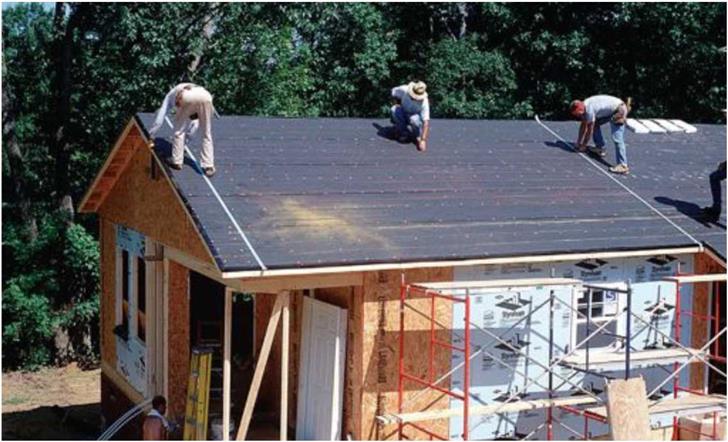
Mlake the 3-in. and 9-in. offset marks at the bottom of the roof, near the eave, and at the top, near the ridge. Snap chalklines between the marks to establish your vertical start lines.

VERTICAL LAYOUT FOR ROOF SHINGLING


Horizontal lines are snapped 5 in. apart.


Layout Chart


Inches left over

X

Y

0" to 3"

15

21

3" to 6"

12

18

6" to 9"

9

15

9"to 12"

6

12

12"to 15"

3

9

15" to 18"

0

6

18" to 21"

3

9

21" to 24"

0

6

24" to 27"

3

9

27" to 30"

0

6

30" to 33"*

21

3

33" to 36"*

0

18

*X and Y lines are 18 in. apart, not 6 in.


A pair of vertical bond, or offset, lines are snapped near the center of the roof, 6 in. apart from each other and to the left of the reference line by the distances specified in the chart.


VERTICAL LAYOUT FOR ROOF SHINGLES

different reveals, so check the label for specifics.

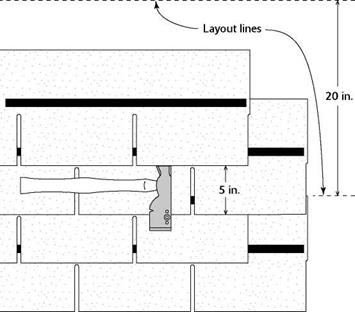
Подпись: iiiїм їм їм їм їм и їм їм їм їм їм їм їм и їм їм їм їм їм їм їм їм и їм їм їм їм їм їм їм їм и їм їм їм їм їм їм їм їм и їм їм їм їм їм їм їм їм и їм їм їм їм їм MI SPACING COURSES WITH A SHINGLE HATCHET VERTICAL LAYOUT FOR ROOF SHINGLESПодпись: The gauge on this shingle hatchet can be set for 5 in. This way, the gauge hooks onto the bottom edge of the shingle, and the next shingle sets right on the face, or head, of the hatchet.Assuming your reveal is 5 in., measure 5 in., 10 in., 15 in., and so on from the starter course’s chalkline (11//2 in. from the edge of the eaves). Mark these 5-in. increments near both gable ends—all the way from the eave to the ridge on both sides of the roof—then snap chalklines between the marks. It’s okay to use red chalk on felt, because it shows up well and will be covered by the shingles anyway. Each successive course of shingles is held to these horizontal lines.
Rather than snap a line every 5 in., some shinglers prefer to snap a line every 15 in. or 20 in., set the gauge on a shingle hatchet to 5 in., then use the hatchet to space the courses between the chalklines (see the illustration at right).

Install the shingles

Follow the vertical and horizontal lines and start nailing down shingles. Make the starter course two layers thick to provide extra protec­tion at the roof’s edge.

Подпись: An inverted starter course. The first course of shingles is two layers thick, and the first layer is nailed down with shingle tabs facing up.VERTICAL LAYOUT FOR ROOF SHINGLES

STARTER COURSE, BOTTOM LAYER.

All shingles (including wood) are meant to overlap, providing a double layer of protection from the elements. That’s why the starter course must be two layers thick. For the first layer, lay the shingles the “wrong” way so that the three tabs face up. The stone surface should also face up (see the photo at left). Or you can buy starter shingles made just for this first course. Hold the long part of the shingle to the horizontal starter line and the right edge of the shingle to one of the vertical offset lines that you snapped near the center of the roof. With either a hammer or a pneumatic nailer, drive four Ts-in. large-head roofing nails into each shingle just above the tar strip (see the illustration on p. 137). The tar strip is near the center of each shingle and bonds one course to the next, keeping everything in place

ESTIMATES FOR A ROOF

Determining the quantity of materials needed to cover and shingle a roof is rather easy. First, measure the roof to deter­mine its square footage. Add the width of both sides of the roof and multiply that number by the length of the roof. Let’s look at an example: A roof with an overall width of 28 ft. and a length of 46 ft. has a total area of 1,288 sq. ft., which I’d round up to 1,300 sq. ft.

FIGURE FELT PAPER FIRST. The first material you will need is felt paper. The coverage you can obtain from a roll of felt paper varies, but it’s often 300 sq. ft. (to make sure, ask your building-materials supplier). Divide 1,300 sq. ft. by 300 sq. ft. for a total of 4.33 or 41/3 rolls. Buy five rolls of felt paper, because you’ll need the extra to compensate for overlap and to seal around the plumbing vents.

SHINGLES COME IN BUNDLES AND ARE ORDERED BY THE SQUARE. One bundle of standard-size shingles covers 33.3 sq. ft. Three bundles cover 100 sq. ft. (10 ft. by 10 ft.), which is called a square. It takes 13 squares (39 bundles) to cover a 1,300-sq.-ft. roof. Order at least two extra bundles to make up for the ridge cap, the valley lap, and waste.

In addition to the shingles, you’ll need a ridge vent. Measure the length of the ridge to determine the size you’ll need. Depending on the manufacturer’s recommendations, vents can extend all the way across the ridge or to within 2 ft. of the roof’s edge at each end.

DON’T FORGET THE NAILS. Buy 7/s-in. roofing nails for the shingles (about 1 lb. per square) and 11/2-in. nails for the ridge vent (about У2 lb.). Buy coil nails if you are using a pneumatic nailer. If the eave overhangs will be exposed, buy 2 lb. of 5/s-in. roofing nails; longer nails that penetrate the roof sheathing are unsightly. You’ll also need about 5 lb. of plastic-head roofing nails to hold the felt paper in place on a roof this size. Add a tube or two of asphalt caulk to cover any exposed nails and to seal around the plumbing vents.

Подпись: Back in the days when I was a roof shingler, I hardly ever saw asphalt or fiberglass (composition) shingles. Being a shingler meant working with wood shingles. Now in most parts of the country I see wood shingles used more often on the sides of buildings than on roofs. Composition shingles are more popular because they are faster to install and more resistant to fire. Give some thought as to the color and style of the shingles that you want on your house. A new style of architectural shingle that casts a shadow has become popular. Light-colored shingles reflect more heat than dark ones do. For this reason, people living in the southern part of the United States tend to prefer light- colored shingles. People living further north often select darker shingles. Lay out the shingles With some simple layout, your shingles can look like a professional installed them. Poorly laid shingles may keep out water, but they just don’t look appealing. Admittedly, not many people visit your home just to see whether your shingle pattern is pleasing to the eye, but good workers take pride in doing things right. When I was framing tract houses (500 at a time), I knew roofers who could start in one corner and shingle an entire roof without snapping a chalkline and do a neat, proper job. That’s skill. The rest of us need to snap a few lines to keep the materials oriented correctly. BASIC MEASUREMENTS. Before snapping a chalkline for the first shingle course (the starter course), determine the distance the shingles will extend beyond the drip edge. Here in Oregon, shingles typically lap over the edge by about Vi in. I worked on houses in Georgia where the shingle overhang was about 2 in. They drooped in the hot sun and provided the roof with a nice-looking detail. Just be aware that a large shingle overhang presents a greater surface area to heavy winds, making them more vulnerable and likely to tear or rip off. Check Don’t let shingles get sunburned. Don’t store asphalt shingles in the sun, unless you’re going to use them right away. The tar strips can melt and seal the shingles together into a big, useless mess. If you must store shingles, put them in the shade or cover them with a light-colored tarp to reflect the heat.
the shingle manufacturer’s recommendations for overhang.

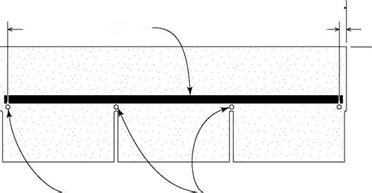
As shown in the illustration at right, a stan­dard three-tab shingle measures 12 in. wide by 36 in. long. Each of the three tabs measures 12 in. across. (Dimensional or metric shingles are a bit larger. To install them, read the instructions printed on the package.) If you want 12-in. shin­gles to hang over the edges by ‘/2 in., for example, measure ПУ2 in. from the outside edge and snap chalklines around the roof’s perimeter. VERTICAL LAYOUT LINES. Sometimes referred to as bond or offset lines, vertical layout lines keep shingles aligned and ensure that you don’t end up with a narrow section of shingle when you get to the edge of the roof. There are different ways to establish vertical layout lines. The best method I’ve seen is explained in the sidebar on p. 138. My thanks to Habitat veteran Anna Carter and other volunteers, who figured out this vertical layout technique. HORIZONTAL LAYOUT LINES. Once the vertical layout lines are in place, you can lay


111111111111111111111111111111111111111111111111111111111111111111111111111111111111111111111111111111111111111111111111111111111111111111111111111111111111111111111

SHINGLE ANATOMY AND NAILING DETAILS


36 in.


Tar strip


3/4 in.


3/4 in.-


in.


Nails between slots and tar strips


7/8-in.

roofing nails


out the horizontal lines. To do this, you must know the reveal—the part of each shingle that remains exposed (“to the weather”) after the next course is installed. On standard shingles, this distance is usually 5 in. Therefore, on a 12-in.-wide shingle, 7 in. will be covered by the next course. Some manufacturers recommend


Snapped with red chalk, vertical and horizontal layout lines ensure proper shingle alignment and al­low shingling work to go quickly.


ESTIMATES FOR A ROOFESTIMATES FOR A ROOF