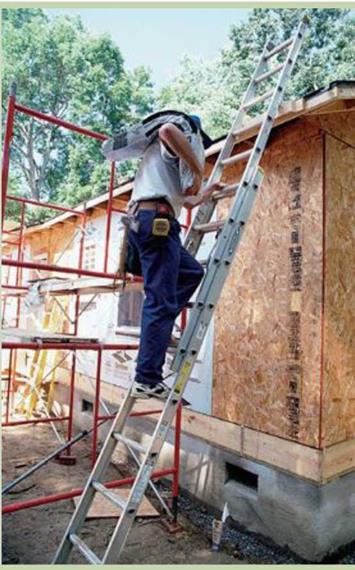
HOISTING MATERIALS TO THE ROOF
 Here in the West, we try to order shingles the day before they will be installed. Suppliers arrive with a hoist and stack both shingles and felt paper directly onto the roof. An experienced delivery person knows to stack bundles of shingles about 6 ft. apart on both sides of the roof.
The other way to get shingles onto the roof is the hard way— hoisting one bundle at a time. If you must haul roofing shingles up to the roof yourself, make sure you have a secure ladder that is positioned properly and is 2 ft. to 3 ft. taller than the roof. It’s a good idea to nail a temporary 2x tread at the spot on the roof where you will step off the ladder. This tread provides a solid foothold where you need it most.
BUST THE BUNDLE. Shingles are much easier to carry if you “bust" the bundle first. Pick up a bundle and lay it across a sawhorse. Push down on both ends until the bundle curves downward. A curved bundle is easier and safer to carry on your shoulder than a straight, stiff one (see the photo at right).
Pick up the bundle by bending your knees and draping the bundle over your shoulder. This is not always easy, because a bundle of shingles can weigh as much as 80 lb. Ascend the ladder slowly and watch your balance. Don’t throw down bundles between rafters, or you could break the OSB sheathing. Just set them on the roof without a lot of force, and space the bundles so that they’re easy to grab while you’re shingling.
when the wind blows. Run these shingles up the gable ends, too. Remember to use shorter nails around the perimeter of the roof if the house has open eaves. Butt the starter shingles tightly to each other.
If you live in a very windy area, you can make the starter course even more secure with just a little extra effort. For the bottom layer of the starter course, cut off the three tabs on each shingle just below the tar strip. Snap a line the width of this narrower shingle around the roof’s perimeter. When you install the narrow shingles, the tar strip will be very close to the edge of the roof. Nail the narrow shingles 2 in. or so
from the roof’s edge with their tar strips down. When the sun heats up the tar strip, this layer of shingles will be sealed to the roofing felt below. STARTER COURSE, SECOND LAYER.
This shingle layer, and every subsequent course, is installed right side up (tabs down). Position the first row of regular shingles of this top layer flush with the lower edge of the bottom layer, with one of its short edges on the second vertical offset line. It doesn’t make any difference whether you go to the right or the left of the second vertical line—all that matters is that the tabs of this top layer are offset from the tabs of the bottom layer by 6 in. Nail each and every
shingle the same way. Use four ^-in. roofing nails and drive one nail about 1 in. from each edge and one nail above each slot. Drive all nails just below the tar strip and above the cutout. REMAINING COURSES. Start several courses of shingles, offsetting each by 6 in. This allows other shinglers to work in both directions. Hold each new course of shingles to the 5-in. horizontal mark above the last course, alternating shingle ends on the vertical marks. This establishes a pattern with a 6-in. offset on each shingle.
At vent pipes, install a roof jack, or metal flashing, over the vent to keep out water. Install shingles below the pipe’s centerline beneath the flashing. Install those above the centerline on top of the flashing (see the photo at right). The flashing can be nailed near the top corners of the tin, before shingles are laid on top of it. Don’t nail the bottom corners down, though, as this could cause the flashing to leak.
At the gable ends, cut the shingles to length before nailing them in position. Mark the length and cut them from the back with a utility knife. Rather than carrying a square, I use another shingle as a straightedge to guide the cut and a third shingle as a protective base below the cut. At the top, cut the shingles flush with the sheathing that was cut back to accommodate the ridge vent.


Leave a reply