FIBER-CEMENT SIDING
Fiber-cement siding has been around a long time. The first house I worked on in the late 1940s was covered with fiber – cement siding. It was a bit brittle but just about indestructible. It fell out of favor because it was hard to work with and full of asbestos, whereas high-quality wood siding was inexpensive and becoming widely available.
Times have changed. Today, wood siding is expensive and often lacking in quality. Modern fiber-cement siding, on the other hand, contains no asbestos and offers all of its old advantages and a few new ones, too. I like it because it is simple to install, holds paint well, is fire resistant, is easy to trim out, and won’t decay, rust, or mold. And if that wasn’t enough, it has a 50-year guarantee! Like vinyl, it’s fairly easy to work with, thanks to the new cutting and nailing equipment available today. Unlike wood, it doesn’t cup, curl, or attract termites. Unlike vinyl, it doesn’t burn, melt, expand, or contract.
Once you learn a few basic techniques, such as how to cut and nail it, fiber-cement siding is easy to install and goes on one plank at a time. The siding can sometimes be nailed directly to studs that have been covered with housewrap. In high wind and earthquake areas, siding often has to be nailed on walls that have been sheathed with OSB panels. These
|
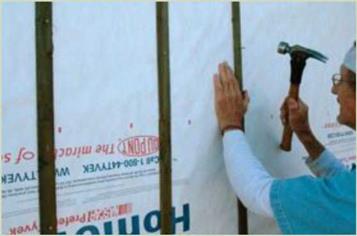
Space can be created between the wall sheathing and the siding either by using a rain screen or by nailing lath strips to each stud. This space allows moisture to drain and protects wood from rot or mold. [Photo by Don Charles Blom] |
|
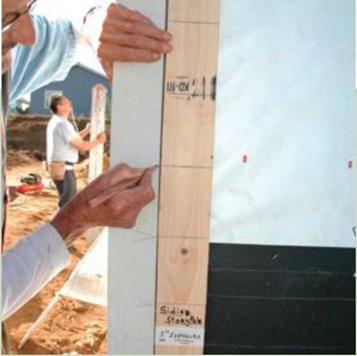
Layout to set the levels for horizontal siding can be done with a story pole. Use the story pole to mark the siding layout on doors, windows, and trim all around the house. [Photo by Don Charles Blom] |
OSB panels add lateral and structural strength to a building. In such cases, care must be taken to insure that moisture passing through the walls does not settle on the OSB and cause rot. This problem can be dealt with by creating a space between the siding and the OSB. There are different ways to create this buffer zone. To learn how to approach this part of the project, refer to the manufacturer’s product and installation information, which is comprehensive and extremely useful (see Resources on p. 279).
Fiber-cement clapboard siding comes in various widths that are usually 12 ft. long and 5/i6 in. thick. Both smooth and wood-grain textures are available. For best results, order the siding pre-primed on both sides. You can also purchase 4-ft. by 8-ft. panels that have vertical grooves likeTl-11, or smaller panels that have a shingle pattern. For best results, order the siding pre-primed or with a permanent color already on the siding. After it has been delivered to the job site, keep it covered with a tarp whenever you’re not using it to minimize moisture absorption. Store the siding flat and level, too, so it doesn’t break or warp.
Fiber-cement siding can be cut with a regular circular saw and a conventional carbide blade, but a diamond-tipped masonry blade with four to six teeth works much better and is probably cheaper in the long run. The biggest problem with
cutting fiber-cement with a power saw is that it creates a lot of dust. Be sure to wear a good dust mask and follow the manufacturer’s recommendations to avoid unnecessary exposure to silica, which can damage your lungs.
I prefer to use a set of electric fiber-cement siding shears, a power tool designed specifically for this job (see Resources on p. 279).The shears cut cleanly, don’t create any dust, and can be used for both straight and curved cuts. For small holes, such as those for exterior electrical outlets, use a jigsaw with a carbide-tipped blade. Cut round holes for pipes with a carbide – tipped hole saw mounted in a heavy-duty, two-handled drill.
Most companies guarantee their fiber-cement siding for 50 years. Therefore, it will last a long time—provided it’s properly attached with high-quality, corrosion-resistant nails. I generally use regular 2-in.-long, hot-dipped galvanized nails. If I’m working near the ocean or another area with high humidity, I often use stainless-steel nails.
For the most part, builders use pneumatic nailers to attach fiber-cement siding to walls. I’ve found that a regular pneumatic nailer works better than a roofing nailer (see Resources on p. 279). Make sure that the pressure is set correctly once you get started so that you don’t overdrive the nails. Nailguns these days often have a depth gauge to ensure that nails are driven flush with the surface. And there are special coil nailguns that have been developed specifically for siding. Fiber-cement siding can be nailed by hand, but you may need to predrill the nail holes to keep from breaking off the end of the plank. It’s a good idea to have a pocket full of felt strips (3 in. by 8 in.). Each time you have two pieces of siding meet at a butt joint, slip a piece of felt behind the joint and let it lap down on the lower course about an inch. This will help prevent water from entering at the joint.
As with wood siding, trim for fiber-cement siding is usually installed first, and then the siding panels are butted against
Siding can be highlighted by using different paint colors. The contrast adds to the beauty of the building. [Photo by Don Charles Blom]
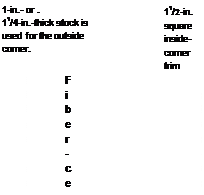
it. Fiber-cement trim is available for inside and outside corners, doors, and windows, as well as for covering fascia boards and soffits. The illustrations on p. 152 show a few of the trim details available. These same details also work for wood clapboards and wood shingle siding. The trim should be fairly thick—either 5/4 (11/4 in. thick) or 2x—in order to stand proud and cover the ends of the siding.
At the outside corners, the siding can butt against the corner boards or be covered with aluminum corner pieces (called siding corners).These pieces have been used for many years as trim for wood siding and work just as well with fiber-cement siding. The siding is installed first and stopped exactly at the corner. After all the siding is in place, the siding corners can be slipped under each course. A flange at the bottom of the corner hooks a row of siding and a 6d or 8d galvanized nail is driven through a hole in the top to hold it in place.
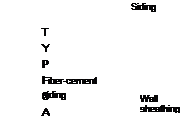
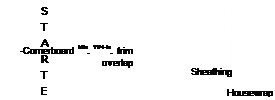
 The installation details for fiber-cement siding are similar to those for wood clapboards. The bottom-most course of siding rests on a 5/i6-in.-thick, 1f/2-in.-wide starter strip cut from the siding or from pressure-treated wood. The bottom edge of the first course should lap about 1 in. below the top of the founda – tion. To install subsequent courses, follow the manufacturer’s recommendations for overlapping and nailing. After you know the amount of reveal the siding will have, you can establish the height of each course. For example, a typical lap on 8f/4-in.-wide
FIBER-CEMENT SIDING CONTINUED
|
|||
 |
|||
|
|
||
|
|||
|
|||
 |
|||
 |
|||
|
|||
 |
|||
 |
|||
|
|||
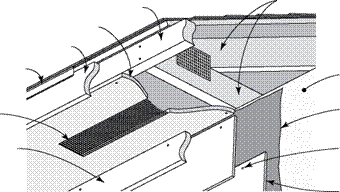
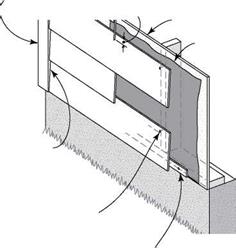
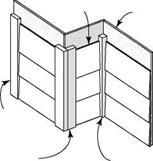

siding is 11/4 in., which leaves a 7-in. reveal. This reveal can be marked on each piece of corner trim and on every door and window all around the house by using a story pole. A reveal can be adjusted up or down slightly (up to V2 in.) in order to fit siding pieces around door and window openings, and to maintain a uniform distance between the top of the wall and the uppermost siding course. To make sure the last course of siding will be uni
form in width, measure down from the top of the wall frequently (every other course or so) and fine-tune the reveal, if necessary.
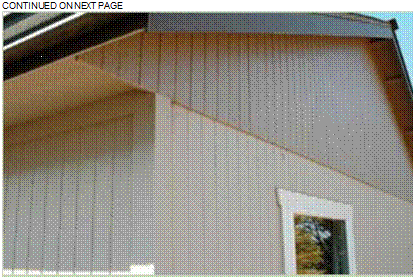
You can mix and match siding to add a bit of style to a building. Gable ends can be sheathed with a different type of siding than the walls. Tl-11 in the gable end, for example, will contrast with lap siding on the walls. Contrasts can be made even greater by painting the walls a different color than the gable end.
 |
|
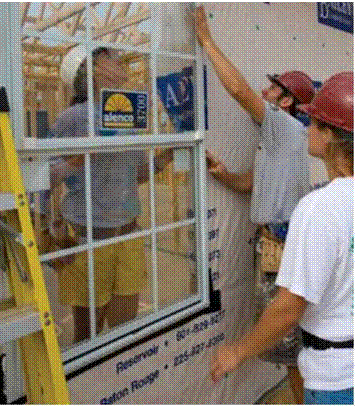
other components, such as vents, electrical outlet covers, and special exterior trim. It’s smart to get an overview of the full range of compatible products before you order siding. Go online to visit manufacturer’s websites or call to request product information (see Resources on p. 279).


Leave a reply