Category THE SMALL HOUSE BOOK

Organizing Principles

The success of a work of art hinges, more than anything else, on the strength of its composition. Here the term "composition” is used to mean "a whole comprised of parts.” A strong composition is one in which all its parts work to strengthen the whole. This is as true of a piece of music as it is of a painting or the design of a small house.

The last chapter described subtractive design as the means to distilling a house to its essential components. This chapter will focus primarily on how the remaining parts are to be organized into a comprehensive whole. Seven principles: simplicity, honesty, proportion, scale, alignment, hierarchy and procession will be presented as essential considerations to meeting this end.

Symbolic Meaning

Vernacular architects have at their disposal not only what they have assimil­ated from books, travel and the work of their ancestors but a lot of hard-wired knowledge as well. Human beings have an innate understanding of certain forms. We are born liking some shapes more than others, and our favorites turn up frequently in the art of young children and in every culture. Among these is the icon representing our collective idea of home. Everyone will un­doubtedly recognize the depiction of a structure with a pitched roof, a chim­ney accompanied by a curlicue of smoke and a door flanked by mullioned windows. Children draw this as repeatedly and as spontaneously as they do faces and animals. It represents our shared idea of home, and, not supris – ingly, it includes some of the most essential parts of an effective house. With little exception, a pitched roof to deflect the elements, with a well-marked entrance leading into a warm interior, with a view to the world outside are ex­actly what are necessary to a freestanding home. For a vernacular designer, any deviation from this ideal is dictated by the particular needs posed by local climate.

The symbolic meaning of common architectural shapes is as universal as the use of the shapes themselves. Just as surely as we look for meaning in our everyday world, the most common things in our world do become meaning­ful. That the symbolism behind these objects is virtually the same from culture to culture may say something about the nature of our less corporal desires. It seems necessary that we see ourselves as part of an undivided universe. Through science, religion, and art, we strive to make this connection. On an intuitive level, home reminds us that the self and its environment are inextri­cable. Archetypes like the pierced gable are not contrived, but rather turn up naturally wherever necessity is allowed to dictate form and its content.

Mac Callum House in Mendocino, CA

It just so happens that the most practical shapes are also the most symbolic­ally loaded. Those forms best-suited to our physical needs have come to hold special meaning for us. The standard gabled roof not only represents our most primal idea of shelter, but also embodies the most universal of all abstract concepts, that of All-as-One. This theme has been the foundation for virtually every religion and government in history, and there may very well be an illustration of it in your purse or wallet at this very moment.

The image of the pyramid on the back of the U. S. dollar represents the four sides of the universe (All) culminating at their apex as the eye of God (One). The phrase "E Pluribus Unum” (from many, one) appears elsewhere on the bill along with no less than three other references to the archetype.

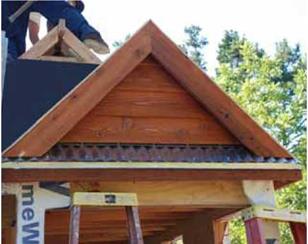
The common gable with a window at its center is vernacular architecture’s one-eyed pyramid. The duality of its two sides converging at their singular peak represents divinity, and is again underscored by a single central win­dow. All of this rests on four walls, which are universally symbolic of the cosmos.

Tumbleweed Tiny House Company’s Epu with the wheels removed.

Form and Number

The meaning of numbers and shapes is as universal as the use of the shapes themselves. Those that turn up in nature most often, like circles, squares, 1,1.6, 2, 3, 4, 12 and 28 tend to be the most sym­bolically loaded.

One is a single point without dimension, typically represented by the circle created when a line is drawn around the point with a compass. One symbolizes the divine through its singularity.

Two adds dimension through the addition of a second point. It is commonly depicted by the Vesica Piscis shape that occurs when two circles overlap. It represents duality and creativity.

Three brings balance back to two. It is represented by the triangle and symbol­izes variations on the Trinity.

Four, as embodied by the square, typi­cally represents the world we live in, with its four cardinal directions.

All Natural

What the subtractive process requires, more than anything else, is a firm understanding of necessity. Knowledge of universal human needs and the archetypal forms that satisfy them is a prerequisite for the practice of good design. This knowledge is available to anyone willing to pay attention.

A vernacular architect who has come across a photo of a Kirghizian yurt and encountered a Japanese unitized bathroom and a termite mound while traveling does not set out to build a yurt with a unitized bathroom and termite inspired air conditioning just to show what he has learned. He retains the forms for a time when necessity demands their use.

Vernacular architects do not strive to produce novel designs for novelty’s sake. Necessity must be allowed to dictate form. The architect’s primary job is to get out of its way. It might seem that such a process would produce a monotonously limited variety of structures, but, in fact, there is infinite varia­tion within the discipline. Vernacular architecture is as diverse as the climates and cultures that produce it. The buildings in a particular region may all look similar as they have all resulted from the same set of socionatural conditions, but within these boundaries, there is also plenty of room for variance. With the big problems of design already resolved by the common sense of their predecessors, vernacular architects are left free to focus on the specifics of the project at hand. Instead of reinventing the wheel, they are left to fine-tune the spokes.

Remembering Common Sense

Most of our new houses are really not designed at all, but assembled without much thought for their ultimate composition. Architects seldom have anything to do with the process. Instead, a team of marketing engineers comes up with a product that will bring in more money at less cost to the developer. The team’s job is to devise a cheap structure that people will actually pay good money for. Low-grade, vinyl siding, ornamental gables and asphalt shingles have become their preferred medium. Adding extra square footage is about the cheapest, easiest way there is to increase a property’s market value, so it is applied liberally without any apparent attempt to make the additional space particularly useful. The final product is almost always a bulky conglomeration

of parts without cohesion — a success, by industry standards, where over­sized invariably equals big profits.

Even when left to certified architects, the design of our homes can some­times be less than sensible. Too frequently, a licensed architect’s self-per­ceived need for originality takes precedence over the real needs of his or her clients. Common sense is abandoned for frivolous displays of talent. Where a straight gable would make the most sense, a less savvy architect will throw in a few cantilevers and an extra dormer, just for show. Subtractive design is abandoned for hopes of personal recognition and for what is likely to be a very leaky house. Common sense is an inherent part of all great architecture. Sadly, this crucial resource has become anything but common in the creation of residential America.

Certainly the most famous example of those whose aspirations for a good name took precedence over good design was Frank Lloyd Wright. Wright was fond of innovative methods and extravagant forms. Those novel houses that once earned him recognition as a peerless innovator have since earned him another kind of reputation. Leaks are a part of many Wright houses. Wright has become infamous not only for his abundant drips but for his im­pudent dismissal of their significance. "If the roof doesn’t leak,” he professed, "the architect hasn’t been creative enough.” And to those clients who dared to complain about seepage, he would repeatedly quip, "That’s how you can tell it’s a roof.”

Subtractive design is integral to, and nearly synonymous with, vernacular design. Both entail planning a home that will satisfy its inhabitants’ domestic needs without far exceeding them. This is also what is known as common sense. When applied to buildings, the word "vernacular” in fact means "com­mon”: that is to say "ordinary” and "of the people.” In contrast to housing that is made by professionals for profit or fame, vernacular housing is designed by ordinary folks simply striving to house themselves by the most proven and effective means available.

Webster’s defines vernacular as "architectural expression employing the commonest forms, materials, and decorations” (Webster’s Third New Inter­national Dictionary, G. and C. Merriam Co. 1966. p. 2544). If a particular type of roof works better than any other, then that is what is used. In short, vernacular architecture is not the product of invention, but of evolution—its parts plucked from the great global stew pot of common knowledge and com­mon forms. Anything is fair game so long as it has been empirically proven to work well and withstand the test of time. By using only tried-and-true forms and building practices, such design successfully avoids the multitude of post­occupancy problems typical of more "innovative” architecture.

The vernacular home does not preclude modern conveniences. There are, after all, better ways to insulate these days than with buffalo skins. The ver­nacular designer appropriates the best means currently available to meet human needs, but, technology is, of course, employed only where it will en­hance the quality of life within a dwelling and not cause undue burden.

Mendocino gable (right)

Subtractive Design

A well-designed little house is like an oversized house with the unusable parts removed. Such refinement is achieved through subtractive design — the systematic elimination of all that does not contribute to the intended func­tion of a composition. In the case of residential architecture, everything not enhancing the quality of life within a dwelling must go. Anything not working to this end works against it. Extra bathrooms, bedrooms, gables and extra space require extra money, time and energy from the occupant(s). Super­fluous luxury items are a burden. A simple home, unfettered by extraneous gadgets, is the most effective labor-saving device there is.

Subtractive design is used in disciplines ranging from industrial design to civil engineering. In machine design, its primary purpose is demonstrated with particular clarity. The more parts there are in a piece of machinery, the more inefficient it will be. This is no less true of a home than it is of an engine.

Step-By-Step Instructions

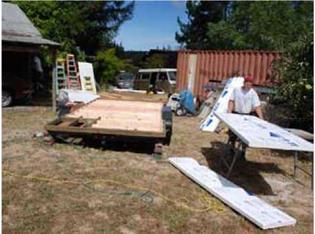
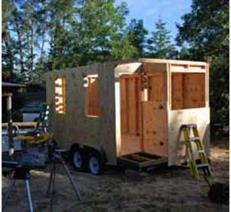
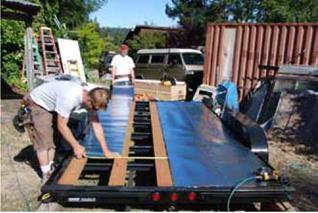
1) image41Buy your materials and order your windows. Be sure the trailer will accommodate the weight of your house. Cut any extra vertical parts off the trailer, but leave the wheel wells intact. Remove all the decking you can. Leave no more than 24” be­tween the remaining boards. These gaps should be cov­ered with aluminum flashing to guard against rodent and water infiltration. Do not put any beneath the porch.

2) image42Assemble the floor framing in front and in back of the wheel wells. Then connect the two sections by framing between the wells. Use screws instead of nails for this and all your fram­ing.
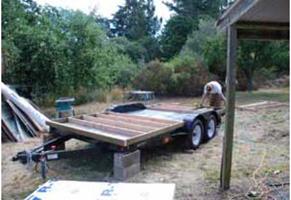
3) image43Fill the cavities with your choice of insulation (in this case, expanded polystyrene foam board with expanding spray foam at the seams). Once again, the porch area should be left open to let wa­ter drain through it.

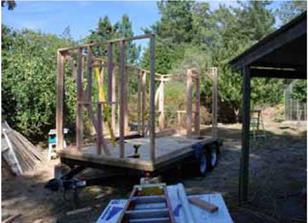
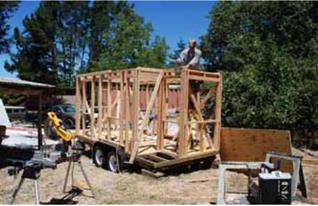
4) image44Once you cover the whole thing with 3/4” flooring or a subfloor, the exterior wall framing can be erected all along the perimeter. Connect the walls by driving screws through the bottom plates into the floor framing below.

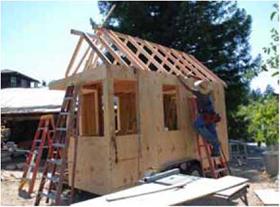
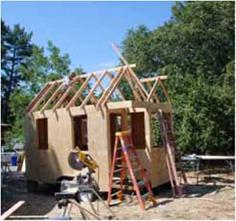
5) image45Put up temporary, diago­nal braces to steady the project while you work. Then install the collar beams (ceil­ing joists). The framing over the wheel wells is supported by horizontal headers which are, in turn, supported by the wheel wells.
6) image46Screw and glue CDX plywood to the exterior surface, and cut openings for the windows and door(s) with your skill saw.
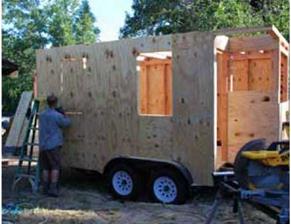
image47

image48

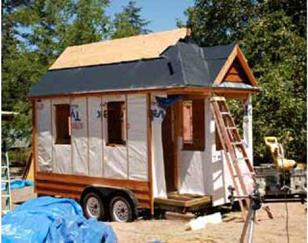
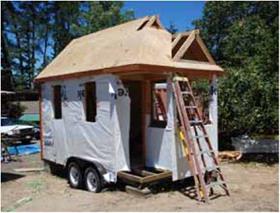
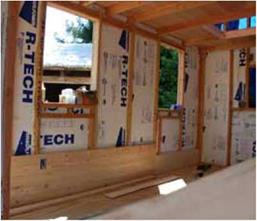
8) Staple house-wrap to the walls. Go ahead and cut holes in the wrap if you anticipate dry weather or if your windows and door(s) are available for installation.

image49

7) Frame the roof and gables. Be sure to fasten the rafters to the walls with metal hurricane clips so that the entire roof does not blow off onto the highway.

image50

9) image51image52
Waterproof the roof with tar paper or some equivalent. Then, run some 1/4” lath up the sides of the house. Place each over a stud. The chan­nels between the strips will serve as air spaces to vent be­neath the siding. This would also be a good time to trim the corners and openings and to put facia boards up around the eaves and rakes.

10) image53Use metal roofing if you plan on moving the house much. Asphalt shingles and most other materials are far more prone to blowing off. When the roof is done, you can put up your siding. Drive screws through it into the lath, and studs below. Caulk the seams where boards meet the wheel wells.
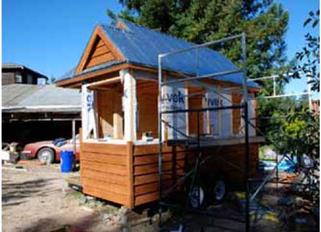
11) image54Fill the wall cavities with your insulation of choice, and frame the interior walls. Then, run the wires and pipes for your plumb­ing and electrical systems. I like to hire professionals to do most of the utilities, as these require a whole new skill set. If your in­sulation is water-permeable, this would be the time to hang some sort of vapor barrier to protect it from potential condensation problems.
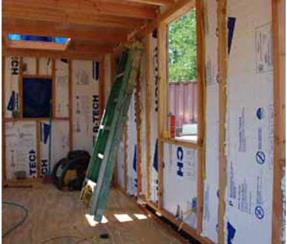
image55

13) If your windows and doors are not in place by now, then this would be the time to insert them. You can also start building and/or installing any cabinetry and built-ins you in­tend to include.

image56

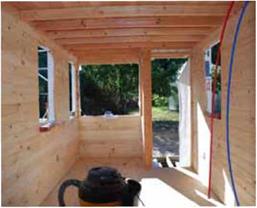
12) Your interior wall finish can now be hung. I generally use thin, knotty pine tongue-and-groove paneling be­cause it is so light and easy to install, but drywall and other materials will work, too, so long as you do not ex­ceed your trailer’s weight limit.

image57

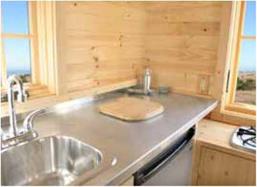
14) Put your integral appliances in place and trim your edges. I do tend to put the screws aside and use nails and glue for this part. Finish work is, by far, the most time-consuming part of the entire building process, but, when it is done, your house is done, too. Make yourself at home.

The finished product (right)

I и

Tools

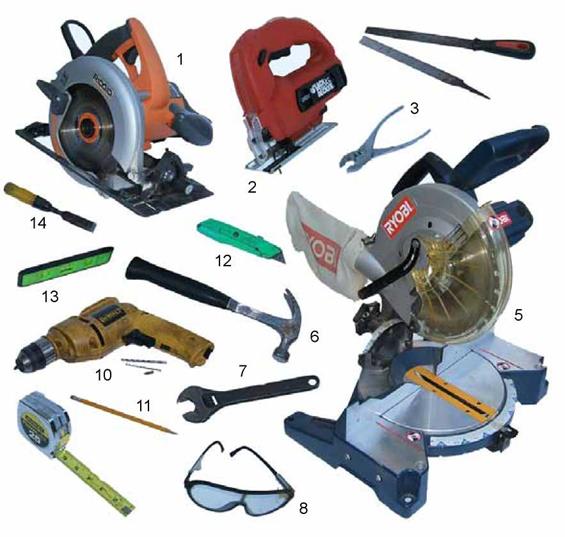
My tools are pictured on the facing page. They are pretty much all I have needed to build a dozen small houses. Folks I’ve worked with tell me I’m a fool for not using a table saw, too. You might want to add one to your list.

1. skill saw, 2. jig saw, 3. plyers, 4. files, 5. miter saw, 6. hammer, 7. wrench, 8.goggles, 9. tape measure, 10. drill & drill bits, 11. pencil, 12. box cutter, 13. level, 14. chisel.

image40

Preventing Condensation

The only other special building consideration, after the foundation and bra­cing, for a little house on wheels is condensation. Unless they are insulated, sealed, and vented properly, small spaces are prone to a lot of condensation. It simply takes less time to fill the air in a small enclosure with the moisture caused by bathing, breathing, laundry, and cooking than it does to fill a large one. If that warm, moist air comes into contact with a sufficiently cold surface, it will condense into water. That is the reason that cars come equipped with defrosters, and that small houses need to be equipped with the right insula­tion, vapor retarders, and ventilation.

I used expanded polystyrene foam board as insulation with expanding spray foam in the seams for two basic reasons: 1) It takes a thicker piece of fiber­glass batting to get the same amount of insulating power as you get out of a piece of extruded polystyrene. As I didn’t have enough space for eight-inch – thick walls, this would have stood as reason enough for my choice. 2) Foam board is far more resistant to condensation.

With fiberglass batting and other porous insulations, you have to worry about moist air getting into it and condensing when the moisture gets to the cold part of the wall. At that point, the fluffy, pink stuff turns to mush, and mush doesn’t insulate. It rots. To prevent this, you have to use a vapor retarder. This is usually just a large sheet of six-millimeter plastic hung over the inside

surface of the batting and sealed at its edges. If your seals hold and your plastic does not rip, your fiberglass should stay fairly dry.

Expanded polystyrene with an impermeable coating does not need a vapor retarder. Being virtually waterproof makes it its own retarder. I chose the white, expanded polystyrene over the pink, extruded poly because, while I love the pink stuff for its superior insulating qualities, bugs love it, too.

The threat of condensation is also what prompted me to use double-glazed, insulated windows. The glass panes on a little abode can fog up pretty quick­ly unless they are well protected against the cold. I’ve found that windows sold with gas between the interior and exterior panes work pretty well for this purpose.

The other primary way to eliminate condensation in a small enclosure is by venting it. I installed a fan at the peak of my loft. It sucks moisture-laden air out of my living quarters when I am cooking or bathing and helps keep the place cool during the summer. On cold days, the vent can be sealed with a plug I cut from some leftover scraps of foam board.

Bracing

Tumbleweed would have to withstand not only the normal wear and tear of everyday living, but also the occasional jolts and gale-force winds generated by highway travel. To prepare for this, I used what has come to be called the “screw-and-glue” method of sheathing. This means that a bead of construc­tion adhesive was squeezed onto the entire length of every framing member before 3/8” plywood sheathing was screwed (not nailed) to its surface. This makes for a structure far more resilient to lateral wind loads than sheathing secured with nails alone.

before 3/8” plywood sheathing was screwed (not nailed) to its surface. This makes for a structure far more resistant to lateral wind loads than sheathing secured with nails alone.

How to Build a House on Wheels

The Foundation and Framing

With little exception, my first portable house was built by using the most stan­dard methods of construction. Like any other mobile home, my structure sit on a steel chassis – in this case, a 7’ x 14’ flatbed, utility trailer. I took most of the wooden deck off to save weight and put aluminum flashing over the gaps to safeguard against mice. The floor framing was laid on top of that. I used two-by-fours spaced about 24 inches apart on center.

Once that framing was assembled, I filled the cavities between the boards with foam board insulation and spray foam and capped the whole thing off with some %-inch plywood subflooring.

The walls were framed right over the wheel wells using headers just as you would over any other opening. I used two-by-four studs and rafters spaced twenty-four inches on center rather than the more typical sixteen inches. This is a fairly standard practice used to save both money and natural resources. At this point, I was using it primarily to save weight. My flatbed was rated to hold 7,000 pounds.