Timber Framing Hybrid
Let’s return to Chris Ryan’s garage to see a method of making girts from a pair of two-by-eights instead of a single eight-by-eight. Chris had seen that Russell Pray used a similar method on the gables ends of the garage at Earthwood and he modified Russell’s method slightly, so that he could use doubled two-by-eights all around the building at the girt level. The advantages were twofold: i) he was able to save on cost, as two two-by-eights are only half as much wood as a single eight – by-eight. And, 2) Chris could install the two-by-eights working alone, whereas hefting long heavy eight-by-eight girts up over the eight-foot-high posts would require a crew of helpers.
This hybrid method of timber framing is very strong. It is not quite traditional timber framing, as it does use some metal fasteners and the joints are easy to make with a circular saw and a chisel. But it requires shaping the top of posts. “Timber framing for the rest of us” does not mean that you have to be afraid of a little timber shaping. I always get a lot of satisfaction when I take the time to make a simple wood joint, even the relatively easy kind described here. Figs. 4.29 through 4.36 will take you through the simple process.
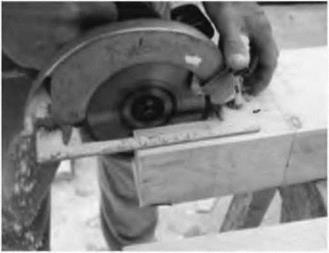
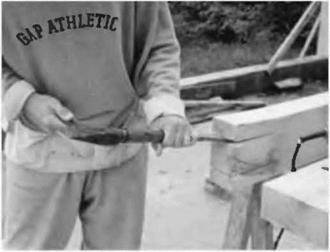
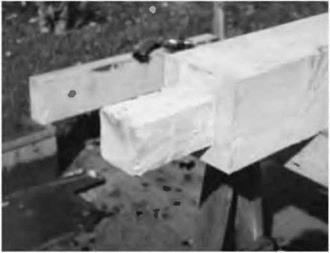
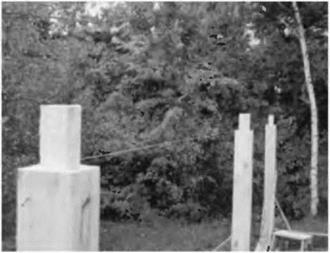 Fig. 4.29: The goal is to support a doubled system of continuous full-sized two – by-eights all around the building at the girt level. One set will be installed flush with the posts on the inside, and the other set will be flush with the posts on the outside. To accomplish this, all that is needed is to remove some of the wood at the top of the post to create a notch — or "shoulder" — upon which the two-byeight will be supported. Here, Chris works on the top of a four-by-eight door frame. He marks a notch eight inches (20.3 centimeters) long and two inches (5.1 centimeters) from each edge of the eight-inch (20.3-centimeter)-wide surface of the post. He cuts as deeply as he can with his circular saw, then turns the timber over and repeats from the other side. Then he makes the transverse cut across the four-inch dimension. This one can be done at the full two-inch depth.
Fig. 4.30: The two longer cuts meet, but not quite all the way, because of the circular shape of the saw blade. However, the wood is easily snapped off with a chisel.
Fig. 4.31: The four eight-by-eight corner posts have two inches of wood removed all the way around the top of the post, down to a shoulder eight inches from the top. Again, this is accomplished by combining saw cuts with chisel work. All of the post tops for the garage are shaped in this way before they are stood up and plumbed, but sidewall posts need shoulders on just the inner and outer sides, not all four.
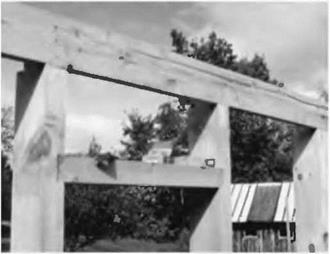
Fig. 4.32: Here, the three major eight-by-eight posts along the sidewall are in place. The middle post is set to the stretched nylon mason’s line. Corner posts are shaped as in the previous picture, Fig. 4.31, and the middle eight-by-eight has had just its sides trimmed back two inches to receive the two-by-eights, butted together on the shoulder.
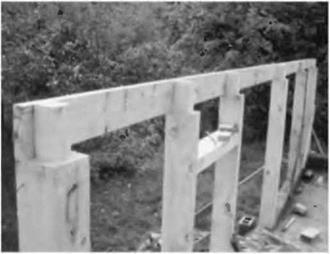
Fig. 4.33: Two outside two-by-eights, each 14 feet long, meet over the middle post, which is another eight-by-eight. It is the fourth one from the left. The other two posts, with a door lintel notched in near the top, are made of four-by-eights, as shown in Figs. 4.34 and 4.35. This view shows clearly where the inner two-by – eight member of this girt system will bear on the notched posts.
|
|
|
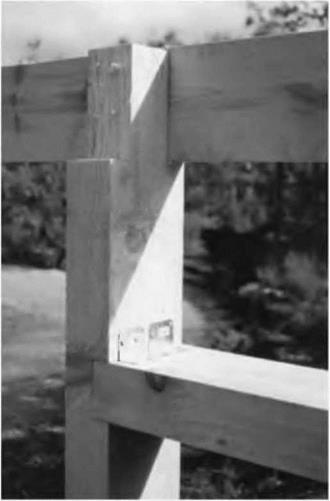
Fig. 4.34: This detail shows the notching of the door lintel into the doorposts. The four-inch-thick lintel is set about 1-1/2 inches (3.8 centimeters) into the four-inch dimension of the posts. Four-inch (10.1 – centimeter) screws driven from the side of the post into the lintel could hold it in place, as could four-inch (20-penny) nails. Screws have less impact on the frame than nails, and they are easily removed. |
Fig. 4.35, far right: This is the other side of Fig. 4.34. Chris used right-angle galvanized metal connectors to hold the lintel fast to the door posts.
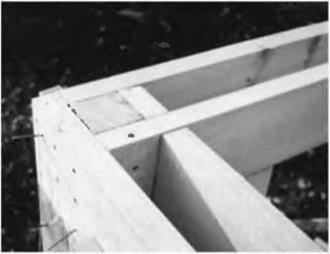
Fig. 4.36: The two-by-eights at the gable ends give stability to the entire rectilinear frame of the garage. One of the two-by-eights needs to be attached with a mechanical fastener or toenails. The little piece replaces a chiseled cut from Fig. 4.31 that really did not have to be removed in the first place. If this was an error, it was a very minor one, and gave Chris the option of fastening the doubled two-by-eights in two different ways. Visualization is important in planning even simple joints. Draw everything out on paper first, erasing and redrawing lines
 until it makes sense.


Leave a reply