There Are All Kinds of Ways to Cut a Beam

Chainsaw
|
|
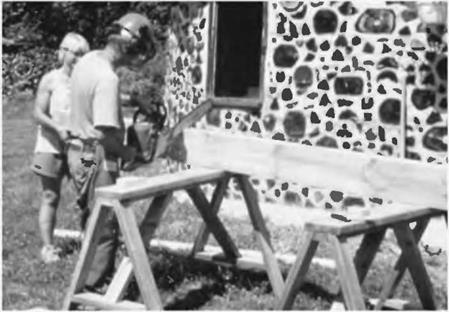
Fig. 5.25: Chainsaw. The author cuts a heavy timber supported at a convenient height by sawhorses. The saw cut can be no better than:
1. The accuracy with which the pencil marks are transposed to the timber. Use a good carpenter’s square and mark all around the timber, to make sure that — after its circumnavigation — the mark returns to the point of beginning. If it doesn’t, the cut cannot be square. Always set your square on the beam being cut, not on the piece being cut off.
2. The quality of the chain and bar. The right – and left-side chain teeth must be sharpened equally to prevent pull to either direction, and the bar must be straight, with a clean, un-nicked groove.
3. The skill of the operator. In this regard, I can only say: Practice, practice, practice! Always cut on the long side of the line. A chainsaw removes about a quarter inch of wood. This is called the kerf. Don’t make your post a quarter inch short!
Note the use of a chainsaw safety helmet for sound and kickback protection, as well as to keep wood chips out of your eyes. Use protective leg chaps in case the saw cuts through the timber and continues on to your knees and legs.
Cutoff saw
|
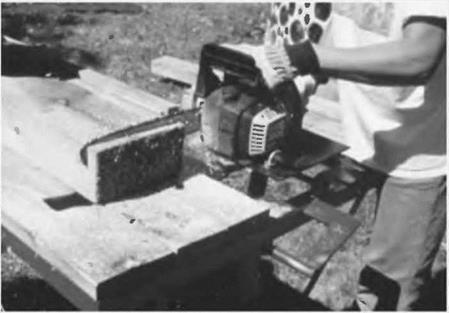
Fig. 5.26 Cutoff saw. This cutoff saw moves the chain through a vertical arc, perpendicular to the timber on the table. This advantage makes it easier to maintain a consistently straight cut. There are also 24-inch circular saws made for crosscutting, also called beam cutters or compound miter saws. Log cabin builders and professional timber framers use these all the time. Contractor Russell Pray owns one of these and used it to make perfect right- angle cuts on the posts and beams at the Earthwood garage. They are very expensive, though, and it would make more economic sense to hire one for a day from a contractor’s tool rental store rather than buy one. |
![]()
![]()
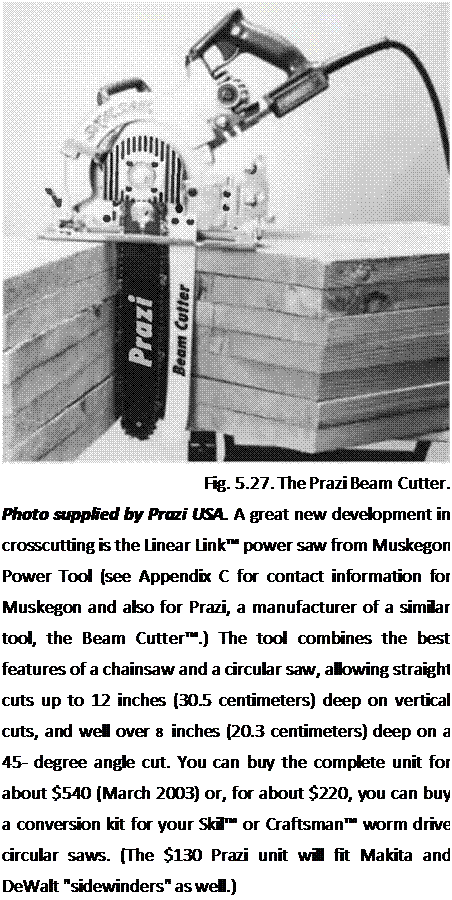 This sturdy chain kit can replace your circular saw blade in a few minutes, and enables you to make deep accurate crosscuts through beams up to a foot thick. Think of the accuracy and convenience of a circular saw, combined with the depth of a chainsaw. It can even be used to do minor "saw milling," if you need to rip an inch or two off the edge of a beam. (For major saw milling, use one of the chainsaw mills described in Chapter 3.)
Circular saw and handsaw
|
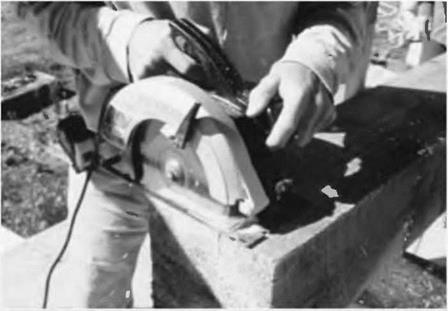
Fig. 5.28: Circular saw and handsaw. After marking the square cut all the way around with a pencil and square, use a circular saw to cut as deeply as possible into all four surfaces, all the way around the beam and back to the original side. My seven-inch (17.8- centimeter) circular saw will allow me to make a vertical cut 2-1/2 inches (6.3 centimeters) deep, maximum. With an eight-by-eight, cutting into all four surfaces will leave a square of uncut wood in the center about three inches (7.6 centimeters) square, which you can finish with a good sharp handsaw. The cuts made with the circular saw will guide your handsaw straight through. |
When you think you’ve got a good square base on your post, try it at its actual location to see if it stands up vertically. If it is good, measure (twice!) and make the square cut at the top end. Don’t be nervous — timber framing for the rest of us is quite forgiving, unless you happen to be a card-carrying obsessive-compulsive neat freak. Tapered cedar shingles will tighten up any joint, and can often be hidden, or at least sanded smooth and rendered almost invisible.
Once the post is the right length, stand it in place. Fastening to concrete foundations was discussed in Chapter
4. In our sunroom, we were standing the post onto a wooden substrate, the two-by-six tongue-and-groove floor.
In Fig. 5.29 Jaki and Anna plumb a post. We felt we had a good square cut on this one, yet it still wanted to lean in slightly. Anna tapped in the thin edge of an eight-inch-wide cedar shingle, while Jaki consulted the plumb bubble of her four-foot level. In Fig. 5.30,1 toe – screw the post in place, a couple of screws each side. Right angle connectors are another option here.
Because of the odd angles where girders meet on the south wall (please revisit Fig. 5.2), two of the posts required some custom work at the sawmill. I used my angle square to capture this angle, and transposed it to the ends of a couple of six- by-eight posts, already made. I took the timbers back to the sawmill and showed Norm, the sawyer, how the post needed to be ripped on the bias so that, when placed up against its neighbor, the resulting “double-wide” post makes the slight angle turn in the wall. Norm loves this sort of challenge, and clamped the piece onto his movable carriage with shims to create the angle. In no time, I had the
required posts with their trapezoidal
 cross-sections.
The posts are all installed — and braced — and the girders have had their angles cut as described above (see Preparing the Girders, pages 121—122).
Now it is time to blow the whistle on some muscle and heft the girders into place. We had enough help right in the family so that I could hide behind the camera. By the way, I think of these beams as girders, because they support
rafters, but, as they are on the edge of a building, they can also be called girts.
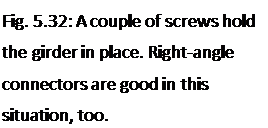
We started with the west girder, letting the west end run long. Its overhang could be cut to length later in situ. We did not fasten it yet, for its own weight kept it in place. The second one — the central girder — was the really heavy one: a ten-foot six-inch full-sized eight-by-ten of fairly green white pine. But many hands make light work. See Fig. 5.31.
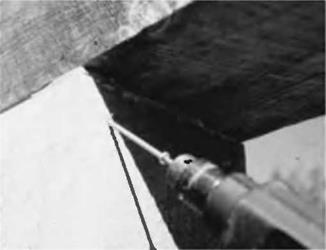 After all three girders were set in place, we adjusted their positions slightly with a heavy hammer, sliding them this way and that until we were happy with the way they sat and joined each other. Small wooden shingle shims can be used as necessary to take any wobbles out. Then I toe-screwed up through the posts into the underside of the girders, using two screws at each side of a post. Fig. 5.32. I made a mistake at this point that you can avoid. I should have fastened the top sides of the girders together with truss plates, as I had done many times before. I either forgot to do this, or felt it wasn’t necessary, or thought that the truss plates might get in the way of rafters later on; I really don’t remember. (And excuses are like belly buttons; everybody has one.)
But the girders did separate by about a quarter inch (6.3 millimeters) later on. This is a cosmetic — as opposed


Leave a reply