Roof Timber Framing for the Rest of Us
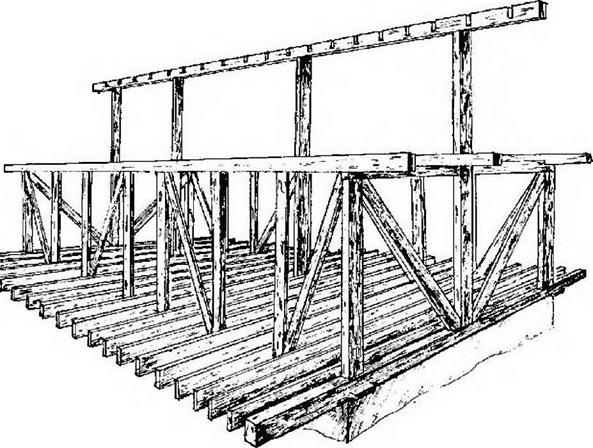 Ridge beam. I cannot hide my love for a substantial ridge beam (also called, correctly but oddly, a ridgepole), and Гт not talking about the comparatively flimsy ridge “board” used by most stick-frame builders. No, I like something like the eight-by-ten at Log End Cottage (Fig. 4.39) or the ten-by-ten at Log End Cave (Fig. 4.40). Both of these houses were designed to support heavy earth roof loads, so the ridge beam spans were limited to about ten feet. Internal posts can be “freestanding,” where they are not in the way, or they can be incorporated into a wall and become integral with the floor plan. At Earthwood, we have two free-standing posts, one each story, and we learn to live and work around them. Another is built into a kitchen peninsula, containing countertop and cabinets beneath.
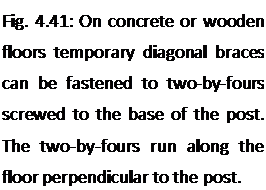
The post-supported ridge beam is strong. It transfers the load down in compression through the posts. As usual, brace the posts so that they are sturdy and plumb. I use screws to fasten the bracing material. Compared with pounding — and removing — nails, screwing imparts less stress to the frame. Sidewall posts can generally be braced to stakes in the ground, but on concrete brace as shown in Fig. 4.41.
Carefully measure and mark the rafter location along the ridge beam and also along the sidewall girts, according to your plan.
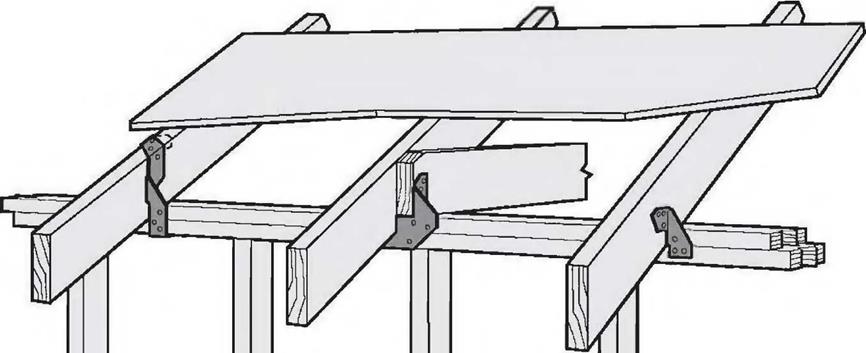
Rafters can be hung on the ridge beam with rafter hangers, but, as the hangers are adjustable for different pitches, they tend to be quite uncommon, as well as expensive.
Another method is to notch the rafters into the ridge beam. At Log End Cottage, we were fortunate that our recycled eight-by-ten ridge beam was already notched to receive the three – by-ten rafters that we recycled from the
same 19th century building in our local village.
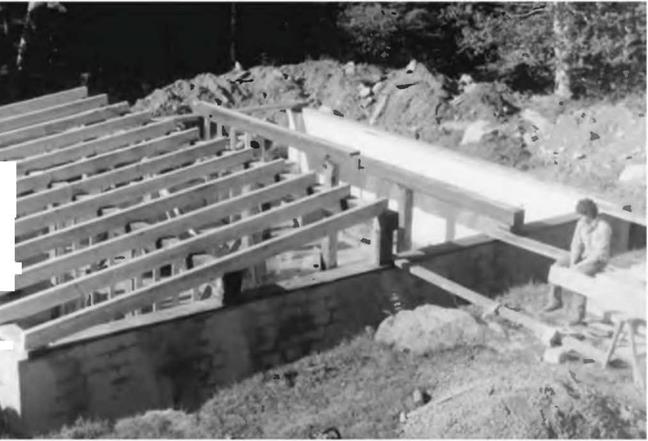 Yet another good method is to join a corresponding pair of rafters over the ridge beam, as we did at Log End Cave. In this case, truss plates on each side of the four-by-eights, at the ridge, can tie each pair of rafters together, or a metal strap can be installed over the top of the rafters, which also serves to tie the rafters to each other. This is important; whatever method of fastening you choose, the rafters must be positively fastened to the ridge beam or to each other to prevent a lateral thrust on the walls. Explanation: The ridge beam cannot move in a downward direction because of the “reactionary load” of the posts, as we saw in Fig. 4.37c. If the
|
І |
rafters are firmly fastened at the ridge,
І »Jtheir top ends cannot move downward
Iw % dpi either. If the tops of the rafters cannot
move downwards, the lower parts of the rafters cannot splay the sidewalls outwards.
 Fastening rafters to sidewalls using birdsmouths. There are various ways of tying rafters to sidewalls, and the choices may vary depending on roof pitch. One of the most common is the use of “birdsmouths” cut into the rafter. A notch is cut into the rafter so that the rafter bears down flat upon the doubled top plate of stick framing, or upon the girt in heavy timber framing. (The notch resembles a birds open beak, thus the term.) The birdsmouthing method, in combination with toe-nailing or the use of metal right angle fasteners, is a good way to transfer load down to the wall with roof slopes of 2:12 to 12:12. But there are drawbacks:
1. The rafter is weakened when you
 cut into its cross section in this way, particularly on shear, which is a function of cross – sectional area of the timber.
This weakness is mostly in the overhang.
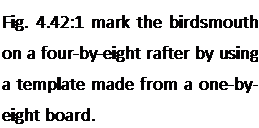
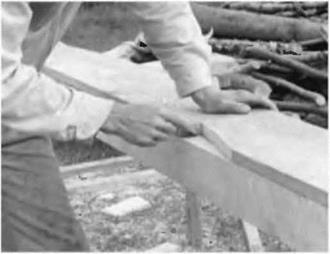
2. It is very easy to make a mistake and cut the birdsmouth at the wrong location. Either the piece is wasted, or there will be some other problem with the build quality if you try to use a miscut member. One would like to think that each piece should be exactly the same, and that a template that works well for one rafter will work for all. In the best of all possible worlds, this is true, but combine rough-cut material with a firsttime owner-builder, and the chances of success with a template are pretty slim. By all means, use a template for marking the depth and shape of the cut according to the chosen pitch, but be ready to change the distance spacing of the birdsmouth from the ridge according to actual (not theoretical) measurements. I used a template at Log End Cave (Fig. 4.42), but always checked my measurements for each rafter, sliding the template a little bit, as needed, to accommodate discrepancies.
3. Rafters with birdsmouths in them are not much use for recycling when another builder attempts to recycle your materials two hundred years from now.
4. The cuts are moderately difficult on heavy timbers, such as five-by-tens, something were trying to avoid with timber framing for the rest of us.
You may have guessed that I’m not a big fan of birdsmouths, although I used them on the three-by-ten rafters at Log End Cottage in 1975. I remember that it was a slow tedious process, for reasons already stated in Drawback 2 above. But, in fairness, it must be stated that birdsmouthing is the method that most carpenters use.
Metal connectors are not commonly made for replacing birdsmouthing, and the reason for this may be that connectors would have to be made for a variety of pitches. However, metal tie-down connectors for use in special wind or seismic
|
|
L-Ur
|
|
Fig. 4.43: A variety of tie-down
connectors. Illustration courtesy of areas are very common and will be required by code in those areas. They can be
Simpson Strong-Tie Co., Inc. used in combination with birdsmouths. Examples of such tie-down connectors
are shown in Fig. 4.43.
Fastening rafters to sidewalls using shims. With shallow-sloped roofs, — say 1:12 to 2:12 — I avoid birdsmouths altogether in favor of shimming with wooden shingles. These shingles, usually white cedar, have a taper to them of about one – quarter in twelve (0.25:12). So four shingles, laid one upon another, yields a 1:12- slope roof, which I like with plank-and-beam earth roofs. The use of shingles with rough-cut timbers has these advantages:
1. It is easy to accommodate different depth dimensions of the rafters with shims. Extra shims can raise “low” rafters so that tops of all are in the same plane, greatly facilitating the installation of planking or plywood.
2. Shimming is much easier to do than birdsmouthing, and yet is still strong, because of the great friction between the rough wood shingles and rough – cut timbers.
3. The use of shims does not weaken the rafters in shear, particularly important with heavy earth roof loads.
|
|
|
4. A place of common error is eliminated, saving the heartbreak of a wasted timber. (Hey, it’s heartbreak for me, known for squeezing a quarter until the eagle screeches.)
After the rafters are all shimmed and placed in the right locations (which you’ve already marked with pencil on the girt), you can use toenails or right-angle plates to tie them to the wall. Remember that in certain areas, code may require metal straps or metal tie-downs to tie the roof structure to the wall structure, part of the continuous load path already discussed.


Leave a reply