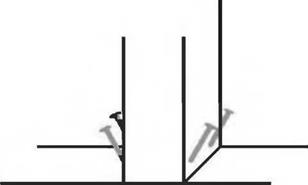
Fastening the Girt to the Top of the Posts
Before attempting to lift a heavy girt (or girding beam) to the top of posts, make sure that the posts are vertically plumb — check two adjacent sides with the plumbing bubble on your level — and that all the posts are supported with sturdy bracing, as already discussed. Make sure that the posts are all the same — and the correct — height (see Post Height earlier in this chapter), and that their tops are square, which, in this case, translates to flat.
Based on your plan, the girts might be supported by two, three, or even more posts. A post at each end supports the 16-foot-long (4.9-meter-long) eight-by – eight girts in our garage, with a third post supporting the middle. The posts need to be the same height so that the girt will rest nicely on all three.
Russell Pray, a contractor friend, actually erected our entire garage framework for us while we were conducting workshops in British Columbia. He used a beam-cutting saw (very expensive!) to get nice square cuts on the eight-by-eight and four-by-eight posts and the eight-by-eight girts. To fasten the girts to the top of the posts, he used a heavy-duty electric drill to install ten-inch TimberLok™[7] screws down through the eight-inch girt and into the tops of the posts, two screws at each post. Lots of temporary diagonal bracing protected the entire frame against racking and provided stability while the 30-foot-long (9.1-meter-long) trusses were installed over the girts. Where two girts butt together over the post halfway along the sidewalls, shorter toe screws at the tops of the girts help tie one to the other.

|


Leave a reply