WATER TABLE
The water table is horizontal trim running around the base of a building below the siding, and not all houses have it. Depending mostly on regional preferences, the water table takes several forms. In the West, it typically looks like windowsill ears (the parts that stick out) and is often used to separate different types of siding materials, such as shiplap siding from wood shingles above. This strip-like water table usually runs continuously around the building and is mitered at the corners. It often has a rabbeted heel, which fits over the top of the wood siding below, and a
|
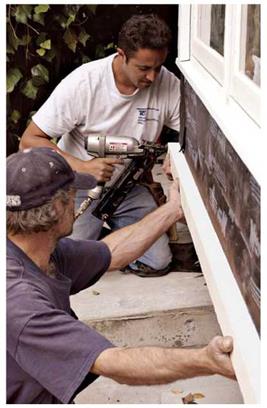
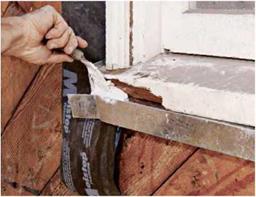
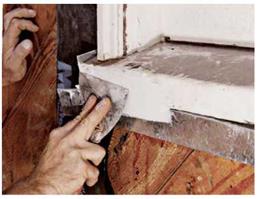
Water-table trim often finishes off the bottom of a wall and provides a level base for the first course of siding. To forestall rot, cap the water table with metal or vinyl flashing before installing the siding. |
![]()
beveled top, which is overlain with shingles or clapboards.
In the East, water tables are also called splashboards; they usually are 1-in. boards 8 in. to 12 in. wide and may be capped to shed water. Splashboards are most common in wet regions, where roof runoff often splashes back along the base of a house. (Some primal carpenter may have reasoned it would be easier to replace a single rotted board than to disturb several courses of siding or that a thicker board would simply last longer.)
Whatever shape of water table you prefer, flash its top with a metal drip-edge that extends at least 12 in. beyond the face of the board. The section where corner boards sit atop the water board is especially rot prone. Prime and paint the boards thoroughly.
Corner boards are usually 1-in. boards butted together. Siding is then butted against them, making an attractive and weathertight corner.
Not all buildings have horizontal trim below the bottom of the siding. For example, the first (bottom) course of shingles is often doubled and
overhangs the sheathing slightly. In that case, run corner boards 2 in. to 3 in. below the bottom edge of the sheathing; then, after you nail up the first course of shingles, trim the corner board ends level to the shingles’ butts. If the house has a water table or splashboard, measure from its top edge up to the underside of the soffit to determine the length of the corner boards.
If you’re installing shingles, whose overlapping courses have a higher profile than clapboards, use 5/4 corner boards, which are full 1 in. thick. To give the illusion that corner boards are the same width at each side, rip down the overlapped board by the thickness of the stock. And for a crisp, straight corner, preassemble corner boards before installing them, as explained earlier.
Occasionally, corner boards are nailed over siding. This can be a problem because nails driven through the trim are likely to split the thinner siding. Besides, corner boards can’t seal well if nailed over an irregular surface. This method was commonly used on Victorian homes with flat, shiplap siding. Careful nailing and liberal doses of caulk will help ensure a weathertight seal. To minimize splits, predrill the board nails.
|
1 |
Boxed Eave: Detail 1 |
Boxed Eave: Detail 2 |
|
: 1 |
1 :1 |
1 |
|
|
|
|
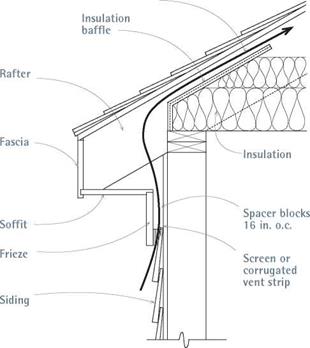
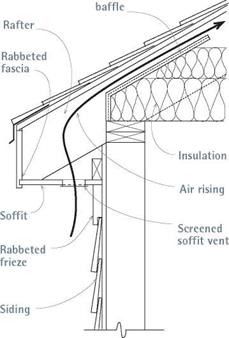
A strip of continuous screen in the soffit allows you can create ventilation channels behind the frieze by
air to circulate into the attic. The rabbeted frieze spacing it out 3/4 in., using blocks spaced every 16 in. on center.
conceals and protects the top of the siding. This also conceals the top of the siding.
|
|
|
|
|
|
|
|
|
|
|
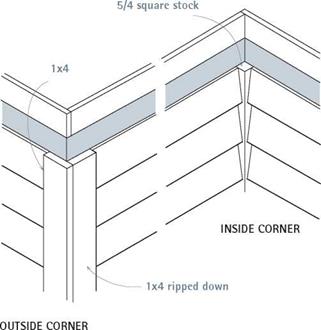

The corner boards described thus far cover outside corners. Inside corners aren’t as exposed to weather, so wide boards aren’t necessary. Instead, nail 1-in. by 1-in. strips (or 114-in. by 114-in. strips) to the inside corners, and butt the siding to that. That’s much faster than cutting compound miters in the clapboards or interweaving shingles.


Leave a reply