WALLCOVERINGS
Wallpaper, actual paper, is most appropriate for historically accurate restoration and wherever you want fine detail. Although vinyl coverings are increasingly hard to distinguish from paper, vinyls tend to look glossier. Although paper may have an aesthetically pleasing flat finish, it is more vulnerable to grime and abuse.
Vinyl is today’s workhorse, available in a dizzying range of patterns and in finishes ranging from flat to glossy. Vinyl is especially suitable for areas with traffic and moisture. Most vinyls are washable, and cloth-backed vinyls are usually strippable—that is, they are easily removable when you want to change them. Although no wallcovering is intended to conceal major cracks and irregularities, heavier vinyls can conceal minor ones.
Fabric coverings include cotton, linen, silk, stringcloth, and wool. They’re often chosen to match or coordinate with colors and textures in drapes and fabric-covered furniture. They come paper-backed, acrylic-backed, or unbacked (raw). And the backing largely determines the method of installation. Avoid slopping adhesive or water onto the fabric facing because some fabrics stain easily; delicate fabrics are usually dry hung, in which paste is applied to the wall and the dry wallcovering is smoothed onto it, as explained on p. 477.
Natural textures such as rice paper, grasses, and bamboo tend to be expensive, temperamental, and delicate. And because the thinner coverings reveal even minor flaws in wall surfaces, you first need to cover the walls with a lining paper. Still, natural textures are evolving, with vinyl-coated versions that are relatively durable and easy to install. Besides their beauty, most natural textures have no pattern that needs matching.
Foils and Mylars also vary greatly in appearance and ease of handling. For example, heavier, vinyl-laminated foils are durable and easy to
A Wall OF YOUR OWN
Thanks to technology, you can have wall coverings fabricated with virtually any pattern
or image you want, including historical documents or wall-size photos of family members.
The cost has come down a lot. Make sure that
such coverings are treated with a protective
coating, so they will wear well.
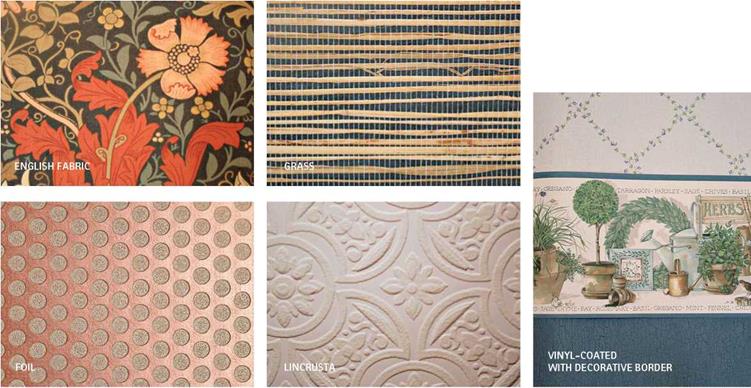
install. However, some uncoated metallic coverings retain fingerprints, so you should wear gloves when hanging them, or perhaps avoid them altogether. That said, foils are well suited to small rooms because they reflect light, thus making the space appear larger.
Lincrusta, an embossed wallpaper similar to a fine cardboard, is making a comeback. The modern version of Victorian lincrusta is called anaglypta.
Cork and wood-veneer wallcoverings are finely milled and manufactured to use cork and rare woods efficiently. Typical veneer dimensions: /64 in. thick, 1 ft. to 4 ft. wide, 12 ft. long. Such specialty coverings may be available through suppliers of professional paperhangers.
Borders are thin strips of wallcovering that run along the edges of walls where they meet ceilings, wainscoting, and trim. They can be installed over wallcovering or directly to drywall or plaster. The surface determines the adhesive.
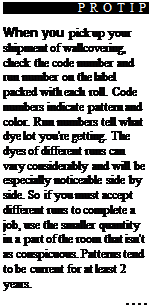
Like wallcoverings, pastes have evolved. Probably the best advice is to follow the manufacturer’s paste specifications, usually printed on the wallcovering label, along with the code and run numbers. If the paste isn’t specified, ask your supplier to get that information from the manufacturer.
Wheat pastes were the standard for centuries, but that changed in the 1960s and 1970s, with the introduction of vinyl wallcoverings. Trapped behind an impervious skin of vinyl, wheat paste was an ideal medium for mold. Moreover, wheat
paste wasn’t strong enough to adhere many of the newer, thicker materials. Wheat pastes are occasionally specified for delicate wallpaper, but mostly they’ve been supplanted by clay – or starch-based adhesives with additives that increase grip and discourage mold.
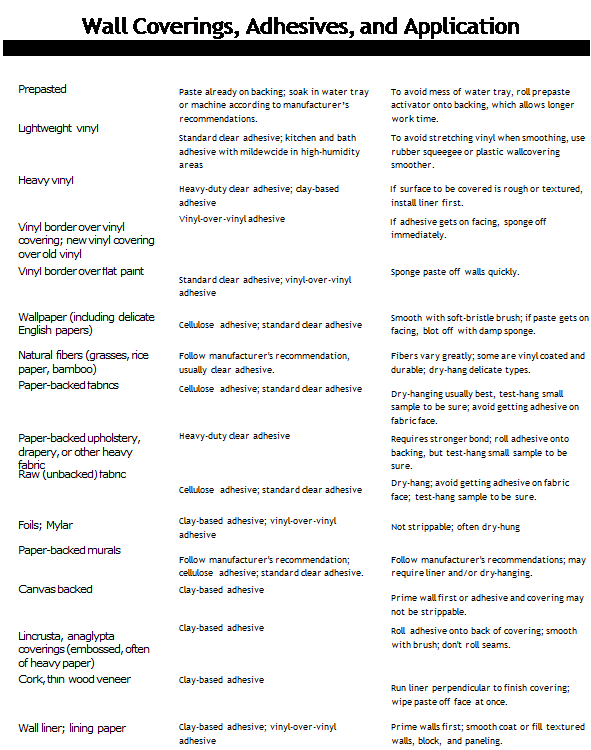
Pastes come premixed or as powders to be mixed with water. Premixed pastes are generally stronger, more consistent and more convenient. Once opened, however, such adhesives have a relatively short life. In general, the thicker the paste, the quicker it dries and the greater the weight it can support.
Before ordering wallcovering, calculate the square footage of your walls and ceilings. Once you’ve determined the overall square footage, subtract 12 sq. ft. for each average-size door and window. To determine the total number of rolls you’ll need, divide each room’s square footage by
|
|
|
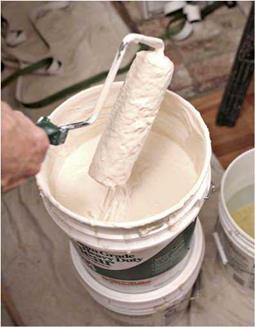
The wallcovering type determines which paste you need. Pastes come premixed, as shown, or as powders you mix with water. Many wallcoverings are prepasted and require that you either roll prepaste activator onto their backing or soak them in water trays. |
Wallcovering rolls (also called bolts) are available in American single rolls, Euro rolls (metric), and commercial widths. At this writing, Euro rolls dominate the market.
► American single rolls are 18 in. to 36 in. wide. (A 27-in. width is comfortable for most people.) The wider rolls generate fewer seams but are much more difficult to handle. Whatever the width of an American single roll, it will contain 36 sq. ft. of material.
► Euro rolls are 201/ in. to 28 in. wide, and are generally sold as double rolls (twice as long). Typically, there are 56 sq. ft. to 60 sq. ft. on a Euro roll.
► Commercial coverings are typically 48 in. to 54 in. wide, a width usually beyond the skills of nonprofessionals.
the square footage listed on the wallcovering rolls. If you’re using American single rolls (see "How Much on a Roll?,” below left), you could instead divide by 36 (the number of square feet on each roll). But dividing by 30 gives you an allowance for waste.
If the room has numerous recesses, difficult corners, or a lot of trim to cut around, order an extra roll or two. Also, if the pattern is large, you’ll waste more because you’ll need to match patterns along seams. On the back of most wallcovering, you’ll find the pattern repeat, usually stated in inches: The larger the pattern repeat, the greater the waste. Also, order an extra roll or two for repairs. You never know when a roof will leak or a child will bruise a wall.
You’ll need some special tools and work surfaces to apply your wallcovering.
► A spirit level will tell you whether walls and wallcovering edges are plumb. Be sure to plumb the leading edge of the first strip of wallcovering. A 4-ft. level with metal edges can double as a straightedge when trimming selvage (manufactured edges).
► Your pasting table should have a washable top about 3 ft. by 6 ft. Avoid covering it with newspaper because newsprint may bleed. To protect the top from scarring during cutting, cover the tabletop with hardboard or use a zinc cutting-strip. (If you don’t have a suitable table, lay a sheet of smooth, void-free plywood over sawhorses.)
► Have a 16-ft. retractable tape measure for measuring and marking.
► 

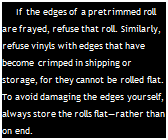 A razor knife with replaceable blades gives the cleanest cuts. Don’t be stingy about replacing blades during use because dull
|
|
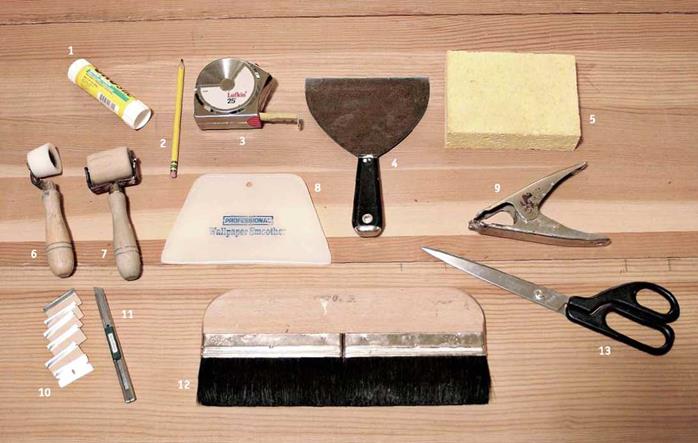
blades can rip wallpaper. A professional may use 200 or 300 blades on a big job. Some pros prefer single-edge razor blades, though knives with snap-off blades are popular, too.
► Shears help you rough-cut from a roll.
► Paste brushes spread wheat paste on backing—or on walls, in some cases.
► A roller and pan are needed to spread vinyl paste, which is too heavy to brush on. Ask your supplier how long the nap of the roller cover should be.
► A smoothing brush, with soft bristles, will smooth out the wallcovering paste.
► A wallpaper smoother smooths vinyls, liners, and other heavy materials. It is also handy for flattening the occasional paste lump.
► A seam roller spreads glue along the edges of the strips to ensure that seams will stick well. Caution: Seam rollers are not generally recommended for delicate or finely textured papers or grasses.
► A 6-in. taping knife, also called a joint knife, is useful for filling low spots and scraping off high spots in a wall. Also use this knife to press the wallcovering snugly against the trim before cutting away excess paper.
► A sponge and water pail are handy for wiping excess paste off the pasting table, trim, and most wallcovering surfaces. In general, the sponge should be just damp. Change the water in your pail often. To avoid creating a sheen along the seams, wipe the entire strips rather than just their edges.
► Other useful equipment includes a sturdy fiberglass stepladder; a long, straight board for detecting irregularities in walls and ceilings; and a plenty of clean, soft rags. If you use a prepasted wallcovering, you’ll also need a water tray in which to soak the strips to activate their adhesives.


Leave a reply