Thinset Adhesive
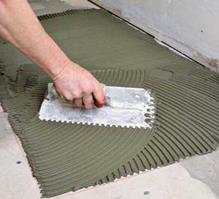
Once you’ve snapped layout lines and vacuumed the setting bed one last time, use the straight edge of a notched trowel to spread thinset adhesive. Then, using the notched edge of the trowel, comb ridges into the adhesive.
As you apply and comb adhesive, try to stop just short of the layout lines, so you don’t bury them under adhesive.
|
|
‘ Л
Using a framing square and a tape measure, check to be sure the room’s corners are square and parallel. Make a quick sketch of the room, showing which way corners diverge. Or sketch this directly onto the setting bed.
Floor layout begins by identifying the focal point of the room, and snapping two chalklines (control lines) onto the setting bed, perpendicular to each other. In the photos on these two pages, the doorway is the focal point of the room. Thus, the first control line will run through the middle of that doorway and continue across the room till it hits the opposite wall at roughly a right angle.
Full tiles look best in a doorway. So the installers butted uncut tiles against the threshold and continued the course until it met a sidewall near the doorway. The installers then shifted the course slightly till an uncut tile butted into the sidewall, as well. They noted the tile joint closest to the middle of the doorway and marked it on the subfloor. Then they moved to the wall opposite the doorway, measured out from the same
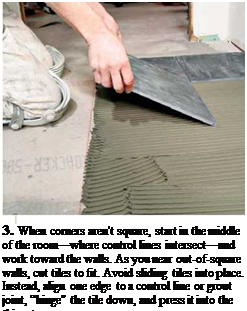
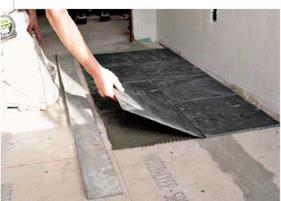
In theory, you can start setting tiles anywhere, but it’s usually best to start where the control lines meet and work out toward the walls. That way, you know that tile joints in the middle of the room—which are the most visible-will line up. Set several tiles; then pull up one and examine its back, which should be uniformly covered with adhesive. If it isn’t, you may have applied too thin a layer of thinset, or used a notched trowel with teeth that are too small, or mixed the thinset too thin. If you are using large, handmade tiles like Mexican pavers, they are often irregular, so you may need to "butter" additional adhesive onto their back surfaces before setting. For buttering, use the straight edge of a trowel.
Conversely, if adhesive oozes up between tiles, the notched trowel’s teeth are probably too large; try one with smaller teeth. Use a margin trowel to remove excess thinset between the tiles before it hardens. Left in place, the thinset between tiles would prevent grout from filling the joints and bonding properly.


4. As tile fills each quadrant, have a straightedge nearby to see if tiles edges line up, especially if thinset has obscured the chalklines. Note: Chalklines indicate the middle of the tile joints. An experienced installer uses both the chalkline and a straightedge to align tiles—whichever gives the better-looking result.
sidewall, and made a second mark that represented an extension of that middle tile joint. They lightly snapped a chalkline (as shown in photo 1) through the two marks to create a first control line. But they snapped the line lightly because they knew they might need to move it a bit before settling on its final location, as explained next.
Before photo 2 was taken, the installers used a framing square to mark a second control line perpendicular the first, thus dividing the bathroom roughly into quadrants. They wanted full tiles against the threshold, so they placed one end of the story pole there and measured away from it to find a tile-joint mark close to the midpoint of the first control line.
The rest of such a layout is mostly fine-tuning, with an eye to the four time-tested tips of tiling, as outlined earlier: using full tiles at focal points, cutting as few tiles as possible, making layouts as symmetrical as possible, and avoiding tiles less than half size. For this, a story pole is essential.
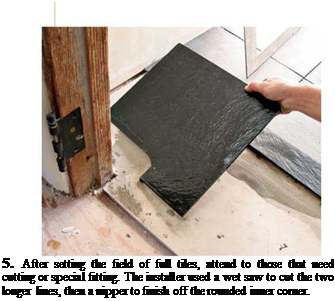
Set full tiles before partial tiles. To get a rhythm going, most tilesetters first set all the full tiles, and then attend to partial tiles, which take time to cut and set. However, you may want to make complex cuts beforehand, for example, where tiles meet obstacles in the middle of the field, such as a toilet closet flange. By cutting these tiles first, you can set them quickly and install other full tiles around them. Give the adhesive a day to harden, and you’re ready to grout the surface.
Note: This description is much condensed. If
you’re a perfectionist, you’ll fuss with the spacing between tiles or between tile sheets, and continue making little adjustments till the job is done.
Be sure to stand back from time to time for an overview of the layout.
The front edge of a counter is almost always the focal point. Thus the primary control line runs parallel to the front of the counter, and all other layout lines are secondary to it. If the counter will be subject to moisture, install a membrane before installing a setting bed.


Leave a reply