Texturing Drywall and Plaster
Joint compound is a marvelous medium for texturing a drywall patch or matching the texture of existing plaster. All that’s needed is a little ingenuity.
► For a stippled plaster look, place joint compound in a paint tray, thin it with water till it is the consistency of thick whipping cream, and roll it onto the wall or ceiling using a stippled roller. Don’t over-roll the compound, or you’ll flatten the stipples.
► Create an irregular "splatter" texture by thinning the compound to a heavy-cream consistency, sucking it into a turkey baster and squirting it onto the wall.
► For an open-pore, orange-peel look, use a stiff-bristle brush or whisk broom to jab compound that is just starting to dry. Jab lightly and keep the bristles clean.
► To achieve the flat but hand-tooled look of real plaster, apply the compound in short, intersecting arcs. Then knock down the high spots with a rubber-edged Magic Trowel®, as shown.
► If you’re trying to duplicate a slightly grainy but highly finished plaster surface, trowel on the topping coat as smoothly as possible and allow it to dry. Then mist the surface slightly and rub it gently with a rubber-edged grout float.

You can achieve the irregular, hand-tooled look of plaster by covering drywall with joint compound applied in tight, intersecting arcs. Because of its crack-resistance, use 90-minute or 120-minutes setting-type compound. It’s okay if the drywall isn’t completely covered.
PLASTERING
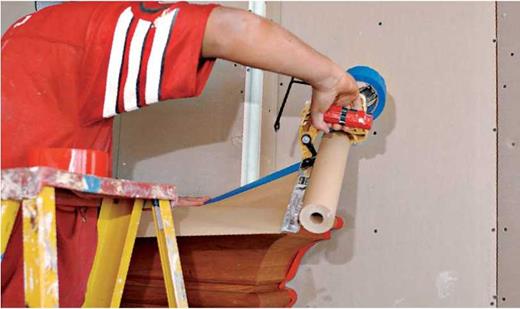
1. If casing, baseboards, or floors are already installed, cover them with paper and tape to protect them from plaster splatters.
 |
 |
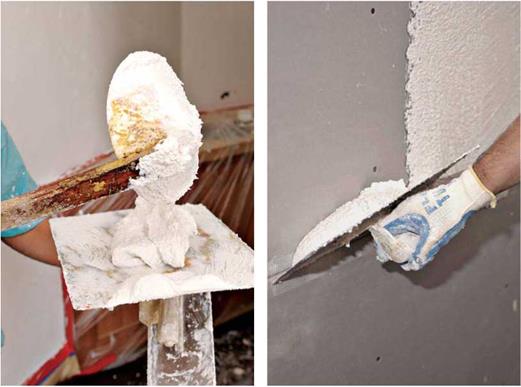
2. Mix the plaster to the consistency of soft – serve ice cream before ladling it onto a mason’s hawk. For skim-coat plaster, follow the manufacturer’s mixing instructions, which typically recommend adding 12 qt. to 15 qt. of water for each 50-lb. bag of plaster.
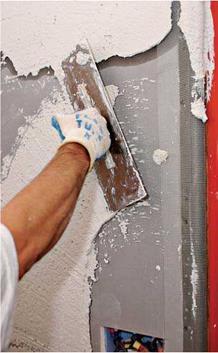
3. To prevent cracking, cover blueboard seams with self-adhering mesh tape. Load your trowel from the hawk and…
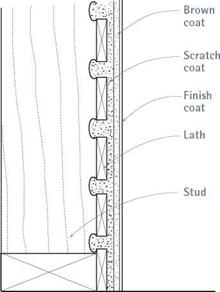
the gaps in the lath and becomes a mechanical key when it hardens.
3. Trowel on, then roughen the brown coat after it has set slightly.
4. Trowel on a finish, or white coat, which becomes the final, smooth surface.
In the old days, plasterers often mixed animal hair into scratch and brown coats to help them adhere. Thus old plaster that’s being demolished is nasty stuff to breathe. The finish coat was usually a mixture of gauging plaster and lime, for uniformity. Scratch coats and brown coats were left rough and were often scratched with a plasterer’s comb before they set completely, so the next coat would have grooves to adhere to. Finish coats were quite thin (Иб in.) and very hard.
Lath can be a clue to a house’s age. The earliest wood lath was split from a single board so that, when the board was pulled apart (side to side), it expanded like an accordion. Although metal lath was available by the late 1800s (it was patented in England a century earlier), split wood lath persisted because it could be fashioned on-site with little more than a hatchet. By 1900, however, most plasterers had switched from lime plaster to gypsum plaster, which dried much more quickly. And about the same time, plasterers began using small paper-coated panels of gypsum instead of wood or metal lath. Called gypsum lath or rock lath, the panels were so easy to install that they dominated the market by the 1930s. But time and techniques march on. As mentioned earlier, after World War II, drywall all but replaced plaster as a residential surface.
|
|
This plaster cross section shows how the scratch coat of plaster oozes through the lath and hardens to form keys, the mechanical connection of plaster to wood.


Leave a reply