SLOPING AND PLACING GUTTERS
Ideally, gutters should slope down toward downspouts 1 in. per 16 ft., but this is not always possible. For starters, this may not look good: Next to a level fascia board, the steeper the slope of the gutter, the more it looks out of whack. As long as there is a slight pitch—say, І2 in. in 20 ft.—with no low spots en route to the downspout, a gutter will drain. If a house settles so that its roof edge or trim slopes away from downspouts, either install new gutters with downspouts properly located or raise or lower the gutters so they slope toward existing downspouts.
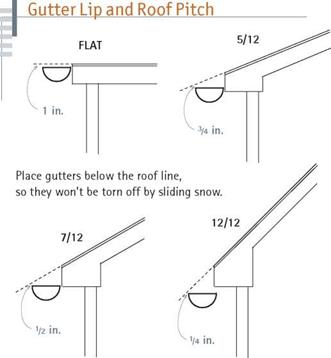
Place the front lip of the gutters below the roof plane, low enough so the sliding snow won’t tear them off yet high enough so the rain runoff won’t overshoot them. The distance below the projected roof plane varies with pitch: For a gently sloped 5/12 pitch, place the front lip of the gutter % in. below the projected roof plane; for a steeper 7/12 pitch, h in. below the plane; for a 12/12 pitch, /a in. The front lip of a gutter should always be about 1 in. lower than the back. That way, if the gutter overflows, water will spill over the front lip rather than soaking the fascia and siding behind.
Reconnoiter the roof. Measure the length of the roof the gutter will service, and check the fascia (if any) and roof edge for level. Try to place the downspouts in an inconspicuous place, away from foot traffic. In positioning downspouts, the biggest challenge is usually on the uphill side of the house, where downspouts often require
underground drains to carry water beyond the outside house corners.
Next determine where you want seams, which should also be placed inconspicuously. Because gutter stock comes in 10-ft. or 20-ft. lengths, it might look better to join a 15-ft. length and a 10-ft. length to achieve a gutter 25-ft. long, rather than tacking a 5-ft. length onto the end of a 20-ft. length, if that joint would be near the front door.

 |
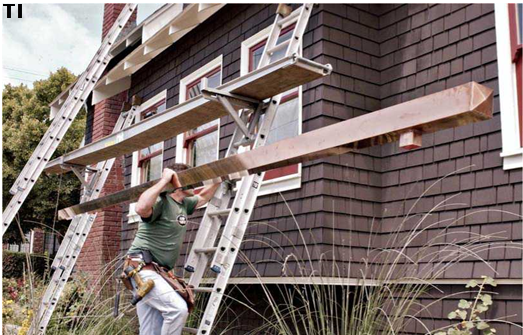
Although gutter sections are light enough for one person to carry, the job is safer and more


predictable with two workers, especially if it’s windy. Snap a chalkline along the fascia to indicate the level of the hanger brackets and install a bracket at either end of the roof. Otherwise, snap a chalkline to indicate the back lip of the gutter.
If your gutter hangers fit into the gutters, position them before you carry gutter sections aloft; also, preassemble the end caps, downspout takeoffs, and so on.
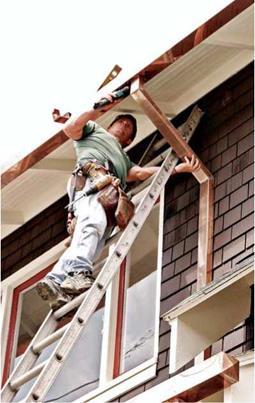
Once you’ve secured either end of the gutter and checked its position, add hangers every 32 in. (every other rafter); in snow country, install a hanger every 16 in. The hangers you choose will determine exactly how you secure gutters. Most modular gutter systems can be cut to length with a hacksaw and joined with poprivets or selftapping sheet-metal screws. A disadvantage of screws: Their points protrude, snagging leaves and causing blockages. An advantage: Screws can be removed to disconnect the sections.
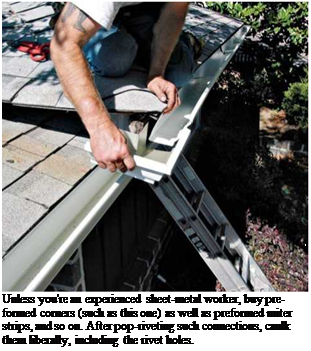
Consequently, use rivets to join the gutter sections, downspout outlets, and miter strips. And use the shortest screws feasible to join the downspouts to the gutter outlets. To avoid galvanic corrosion, use screws that are the same material as the gutter; otherwise, use stainless-steel screws. Because elbows slow water and tend to clog, use as few as possible. Place the vertical sections above the elbows so falling water can pick up speed to flush debris out of elbows. Apply gutter caulk freely to seal the joints, rivet holes, and the like. And where you see holes left by earlier gutter hangers, fill them with exterior wood filler or color-matched acrylic latex caulk.
If gutters are rusty but otherwise intact, use a wire brush to remove rust. Then rinse well and allow the gutters to dry. Paint gutters with an elastomeric roof coating such as Gacoflex acrylic latex, which can handle the expansion and contraction of metal gutters.
You may be able to get a few more years from metal gutters beginning to rust through by patching them with a compatible-metal patch. First, vigorously wire-brush the rusted area till you uncover solid metal, wipe the area clean with a rag damped with paint thinner, and prime with metal primer. After the primer dries, spread epoxy around the hole, and press the patch into it. Or simply wire brush the rusted area clean and apply a foil-faced, self-adhering bituminous membrane; such waterproofing membranes are often used to flash skylights, plumbing pipes, and other roofing elements. They’re easily shaped to the contour of a gutter.
Wooden gutters should be inspected every year for deterioration and repainted every 2 years or 3 years. They must be thoroughly dry before painting; otherwise, paint will seal in moisture and promote rot. So it’s best to paint gutters after a dry spell, after allowing the morning dew to evaporate.
Begin work by sanding the wood well and wiping away grit with a rag dampened with paint thinner. Next, apply a water-repellant preservative, prime, and apply two finish coats of paint.
If you find rot, your problem is compounded if the gutter also doubles as exterior trim and abuts sheathing or framing. Short of replacing such integral gutters, you may be able to prolong their life by lining them with peel-and-stick waterproofing membrane.


Leave a reply