SHINGLE REPAIRS
To remove wood shingles, use scrap blocks to elevate the butt ends of the course above. Work the blade of a chisel into the butt end of the defective shingle, and with twists of your wrist, split the shingle into slivers. Before fitting in a new shingle, remove the nails that held the old one. Slide a hacksaw blade or, better, a shingle ripper (also known as a slate hook) up under the course above and cut through the nail shanks as far down as possible. If you use a hacksaw blade, wear a heavy glove to protect your hand.
Wood shingles should have a!4-in. gap on both sides, so size the replacement shingle lA in. narrower than the width of the opening. Tap in the replacement with a wood block. If the replacement shingle won’t slide in all the way, pull it out and whittle down its tapered end, using a utility knife. It’s best to have nail heads covered by the course above, but if that’s not possible, place a dab of urethane caulk beneath each nail head before hammering it down. Use two 4d galvanized shingle nails per shingle, each set in 14 in. from the edge.
|
GOT |
Moss-covered shingles and shakes are common in moist, shaded areas. Hand scrape or use a wire brush to take the moss off. Keep it off by stapling 10-gauge or 12-gauge copper wire to a course of shingle butts all the way across the roof. Run one wire along the ridge and another halfway down. During rains, a dilute copper solution will wash down the shingles, discouraging moss. A nice alternative to toxic chemical treatments.
Although this section contains a few modest repairs a novice can make, most of the roof types discussed here should be installed by a roofing specialist. You’ll also find suggestions for determining the quality of an installation as well as a few inspired tips.
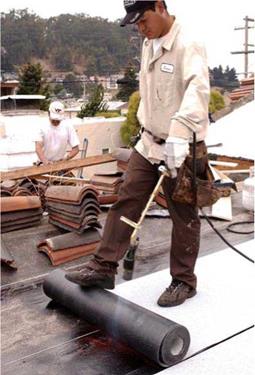
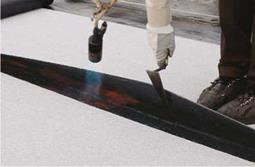
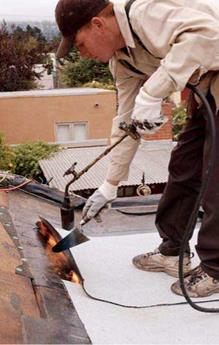
Actually, no roof should be completely flat, or it won’t shed water. But flat roof is a convenient term for a class of multimembrane systems. At one time, builtup roofs (BURs) once represented half of all flat roof coverings. BURs consisted of alternative layers of heavy building paper and hot tar. Today, modified bitumin (MB) is king, with cap membranes torched-on to fuse them to fiberglass-reinforced interplies or base coats. MB systems are durable and adhere well to dissimilar materials and difficult joints, but an inexpert torch user can damage the membranes and set a house on fire. For that reason, future roofs are likely to employ hot-air welding, cold-press adhesives, and roll membranes with self-sticking edges.
Causes of flat-roof failure. Whatever the materials used, flat roofs are vulnerable because water pools on them, people walk on them, and the sun degrades them unless they’re properly maintained. Here are the primary causes of membrane damage:
► Water trapped between layers, because of improper installation. This is caused by installing roofing too soon after rain or when the deck was moist with dew. The trapped water expands, resulting in a blister in the membrane. In time, the blister is likely to split.
► Inadequate flashing around pipes, skylights, and adjoining walls.
► Drying out and cracking from UV rays— usually after the reflective gravel covering has been disturbed.
► People walking on the roof, or roof decks placed directly on a flat roof membrane. Roof decks should be supported by "floating posts" bolted through the sheathing to rafters and correctly flashed.
Repairing roof blisters. If there are no leaks below and the blister is intact, stay away from it! Don’t step on it, cut it, or nail through it. However, if it has split, press it to see what comes out. If the roof is dry, only air will escape; if the roof is wet, water will emerge. In the latter case, let the inside of the blister dry by holding the side open with wood shims; if you’re in a hurry, use a hair dryer. Once the blister has dried inside, patch it.
|
|
|
|||
|
|||||

Professionals repair split blisters with a three – course patch, which requires no nails.
1. Trowel on a J4-in.-thick layer of an elastomeric mastic, such as Henry 208 Wet Patch®, carefully working it into both sides of the split. Extend the mastic at least 2 in. beyond the split in all directions.
2. Cut a piece of "yellow jacket” (yellow fiberglass roofer’s webbing) slightly longer than the split and press it into the mastic; this reinforces the patch.
3. Apply another!4-in. layer of mastic over the webbing, feathering its edges so it can shed water.
A three-course patch is also effective on failed flashing, where dissimilar materials meet, and for other leak-prone areas.


Leave a reply