Shimming Windows
ALL window frames must be shimmed securely. Pairs of tapered shims allow you to plumb and level window frames in out-of-square openings; supporting frame jambs and preventing deflection even as you drive screws or nails through them.
Ideally, you should shim each side jamb within 4 in. of its top and bottom corners, and every 16 in. in between—a minimum of three shim points along each jamb.
If the rough sill is level and uniformly supports the windowsill, don’t shim underneath it. Window makers disagree about shimming the head jamb. Some recommend that you shim head jambs at the same intervals as side jambs; others suggest not shimming at all because if the header sags, shims beneath it could deflect the head jamb. To be safe, follow the installation instructions that come with your window.
As explained on p. 94, you can nail through or below shims as long they’re snug.
At each shimming point, use a pair of 10d galvanized finish nails or 3-in. galvanized or stainless-steel trim-head screws to keep the jambs from twisting. Screws are more expensive but allow you to make adjustments easily. If the shims are green or "yard wet," there’s no need to predrill them to avoid splits; otherwise, predrill. You can easily fill and paint dimpled nail heads and countersunk screw heads in the jambs. Or you can remove the inside window stops, nail through the jambs, and replace the stops to hide the nails.

Old houses often have ailing windows, unopen – able because they’re swollen shut or entombed in paint. Try to repair windows during a sunny stretch, but have a roll of sheet plastic on hand to
tack over the openings in case a storm catches you by surprise. Above all, be patient, use force very sparingly on balky windows, and wear goggles and gloves.
The window may just be painted shut. Rap around the perimeter of the sashes with a hammer, using a wooden block to prevent marring. Then run a scraper or a putty knife along the sash edges.
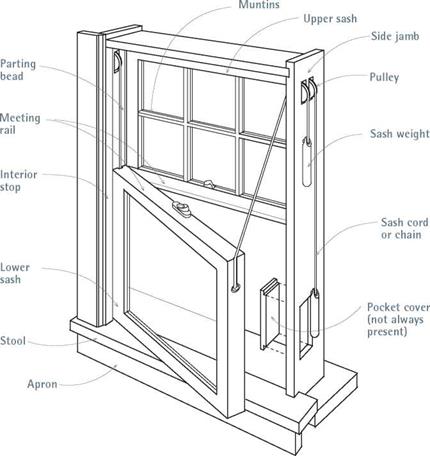
If the lower sash still won’t move, remove the inside stop, which is usually screwed on, if you can find the screws under all that paint. If you can’t pry up the stop, use a chisel to cut it out; stops are easy to replace. But try not to damage the jamb. Once the inside stop is out, pull out the lower sash and disconnect the sash cord if it hasn’t already rotted away. Use a narrow scraper to remove paint or debris from the sash channel. With a putty knife, clean up the sash channels, and then lightly sand them. Try the sash to see if it now slides more smoothly. If so, wax the chan-
PROnP
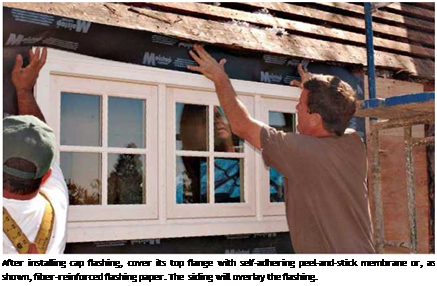
Retrofitting cap flashing takes dexterity. Cut back the siding nails 2 in. to 4 in. above the opening, and pry up the siding so you can slide the top flange of the Z-bar cap flashing under the building paper and siding, while simultaneously holding up the window unit. You can nail the top flange of the Z-bar through the siding, but that’s not imperative. Wedged into place, the cap flashing won’t go anywhere.
 1111
1111


nels (a piece of candle works fine) and the sides of the sash, replace the sash, and reattach the inside stop.
If a sash weight has come loose from its cord or chain, reattach it while the sash is out. Access to these weights varies, but there is often a removable panel toward the bottom of each jamb. If there is no such panel, pry the jamb trim off.


Leave a reply