Replacing a Water Heater
Most municipalities require a permit to replace a water heater, primarily because they want to ensure that the heater’s TPR valve is correctly installed. Even though most local codes allow homeowners to replace water heaters, unless you have a lot of plumbing experience, hire a licensed plumber for this job. Plumbers know which brands and hookups require the fewest service calls and can assess the condition of vent pipes and replace them if needed. Besides, thanks to wholesale discounts, plumbers can probably install a new unit for only slightly more than it would cost you if you bought the heater and fittings at retail prices.
|
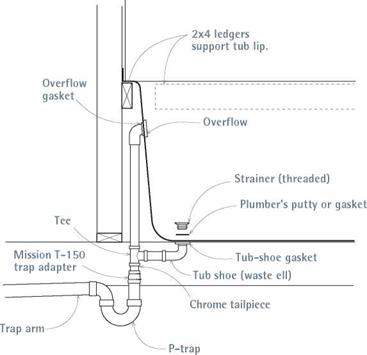
If the tub drain is not accessible, plumbing codes require that joints be glued together, to prevent leaks. To join the tub tailpiece to the trap assembly, use a Mission T-150 trap (1V2-in. tubular to 1V2-in. pipe). |

A plumber should also be willing to peer through the vent thimble with a flashlight and mirror to check the chimney’s interior. All manner of debris can accumulate in the bottom of a chimney—from soot to nests—and that debris can block a chimney, hamper flue draft, and possibly force carbon monoxide into living areas. The National Fire Protection Association suggests annual chimney and flue inspections, and
|
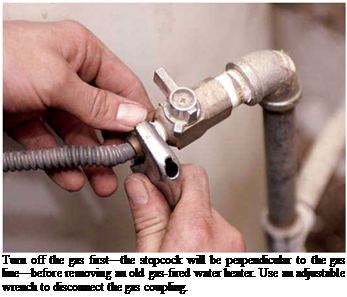
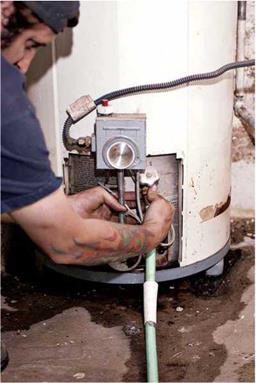
Once the gas line is disconnected, attach a hose to the drain at the bottom of the water heater and drain the tank. |
whenever a new type of burning appliance is vented into the flue, but inspection is really not a plumber’s job. The Chimney Safety Institute of America offers a state-by-state listing of chimney services with certified staff (check out their Web site at www. csia. org).
Above all, installers should follow the water – heater manufacturer’s installation instructions closely to ensure a safe installation and to safeguard the unit’s warranty should the water heater fail to function properly.
Draining the old water heater. The specifics of disconnecting power or fuel to the old unit will vary, depending on whether the water heater is gas fired, fuel-oil fired, or electric. Once the installer has disconnected the fuel or power source, the water should be shut off and the tank drained. Typically, a hose will be attached to the drain valve at the bottom of the tank. Using a pair of pipe wrenches, unions (if any) on the hot – and cold-water pipes will be taken apart; if there are no unions, pipes will be cut 6 in. to 12 in. above the top of the heater—or a couple inches above the cold-water shutoff valve—by means of hacksaw or a wheeled cutter. Caution: Reciprocating saws aren’t used because the vibration may weaken nearby pipe joints and cause leaks.
Make way for the new. If the unit is gas or oil
fired, the installer will disconnect the draft hood and vent pipe and either wire them up out of the way or set them to one side. As noted earlier, the plumber should inspect the vent pipes. If the hood or pipes are rusty or corroded, they should be replaced. When the old tank is empty, it can be walked out of the way. Be mindful of sharp edges on the newly cut pipes and the area around the old tank. Note: If codes require strapping the unit, steel straps should be bolted to the wall behind before putting the new unit in place. Finally, if the pad beneath the old tank is in poor condition or badly tilted, consider installing a new prefab concrete pad. Then the new water heater can be walked into position.
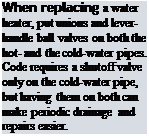
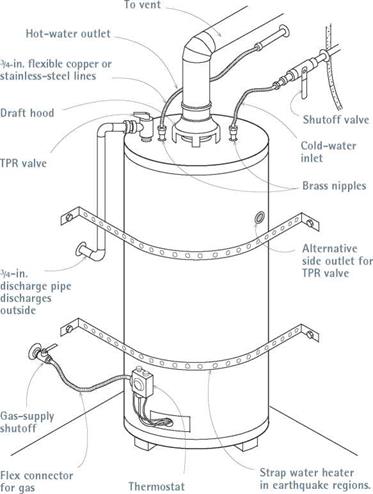
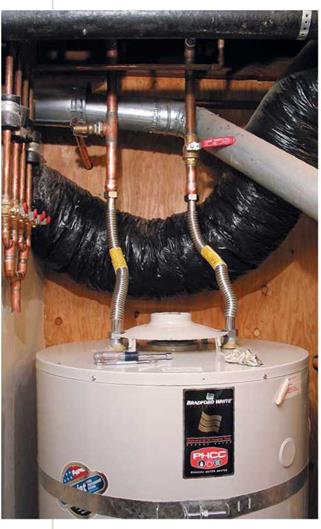
Making connections. What the installer does next depends on the size and condition of the pipes, what fittings are present and, of course, what type of water heater it is. There’s no single right way to assemble pipes, but the photos at left show a typical installation in progress for a gas – fired unit. There are 14-in. brass nipples screwed in the tank inlet holes, flexible stainless-steel lines, sweat-to-threaded male adaptors, valves, and (at the top) 14-in. rigid-copper trunk lines exiting to the upper floors. Flexible stainless-steel or flexible copper supply lines are highly recommended for top-of-tank connections: Female nuts
![]()
on both ends make them easy to disconnect for future repairs.
Installing a TPR valve. Many new water heaters have preinstalled TPR valves. If there is none, the plumber will install a TPR valve into the threaded outlet atop the unit or in a side outlet a few inches down from the top of the tank, lightly coat the TPR valves threads with pipe compound, and then use a pipe wrench to install the valve. Next, the plumber will install a discharge pipe into the TPR valve’s threaded outlet; the pipe may be galvanized or rigid copper—but not plastic!—and must slope downward. The discharge pipe should be terminated about 6 in. above the floor, at a safe location, where it won’t scald anyone if it discharges.
Note: Threaded pipe fittings should be coated with pipe compound or wrapped with Teflon™ tape to ensure a positive seal.
Final steps. The plumber will check the water heater for level, shim the base as needed, and tighten the earthquake straps, if any. When all fittings are connected, turn on the cold water to fill the tank. Open the hot-water faucets to expel air. When the tank is full, water will gush from the faucets. At that point, shut the faucets, and reconnect the fuel or power source as specified in the manufacturer’s instructions. Note: If the installer disconnected the bonding jumper wires from the hot – and cold-supply pipes, those wires should be reclamped now to ensure proper grounding for the house’s electrical system.
|
|
|
|
|


Leave a reply