REMOVING OLD FOUNDATIONS
To tear out an old foundation, you’ve got several options. All require safety glasses, hearing protection, heavy gloves, a mask, patience, and a strong back. Before acquiring heavy and expensive equipment, try to break out a section of the old foundation using a 9-lb. sledgehammer and a 6-ft. pointed steel bar. Old concrete without rebar is often cracked and soft. Once you’ve removed a small section, the rest may come out easily.
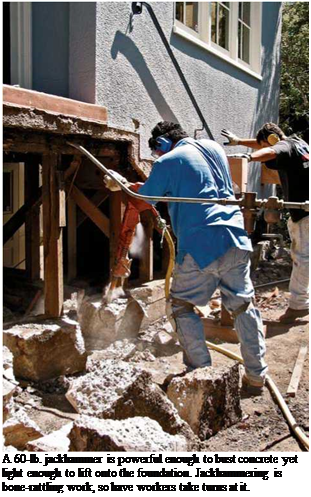
If the concrete is too thick and hard, rent a towable air compressor and jackhammer. A 90-lb. jackhammer will break almost anything, but it’s a beast to maneuver; a 60-lb. hammer is light enough to lift onto a foundation wall and almost always strong enough to break a wall apart. A 60-lb. electric jackhammer is less powerful than a compressor-driven one, but it may have enough muscle to get the job done.
Or you can rent a gas-powered saw with a 10-in. concrete-cutting blade that cuts 4 in. to 5 in. deep, letting you cut the concrete into manageable chunks. A third option is rotohammering a line of 58-in. holes across the foundation and then splitting along that line with a large mason’s chisel and a hand sledge.
Should you encounter rebar, you’ll either need an acetylene torch to cut through it or a metal abrasive wheel in a circular saw or grinder. Rebar cutting is monstrously hard work. With the old foundation removed, you can excavate new footings from outside the house and install forms for the concrete.
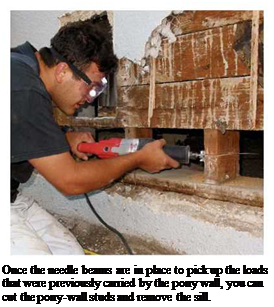
![]()
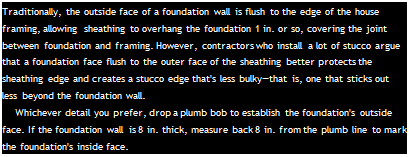
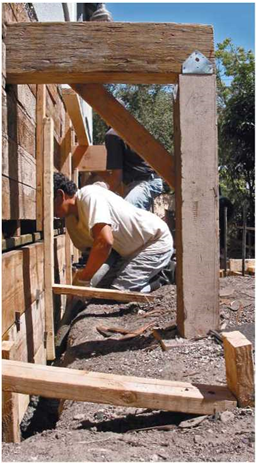
Correctly positioning 1 ^-in.-thick form boards can be tricky, and there are myriad ways to do so. Here’s a relatively foolproof method, in which you first erect the inner (house side) form walls, by nailing them to 2×4 form-hangers nailed to joists. This method also enables easy access for tying rebar, reattaching sills, and the like.
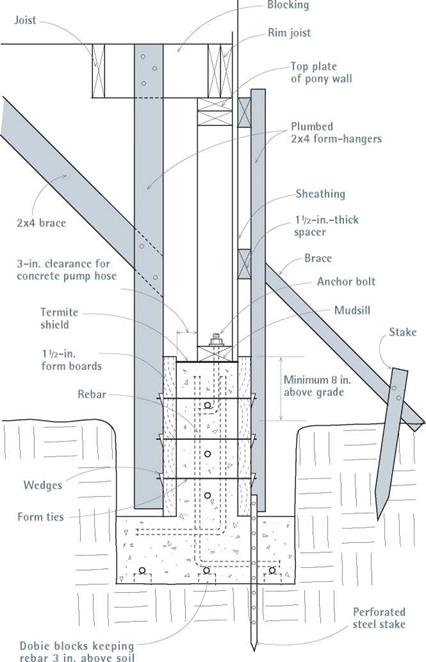
Inner form walls. If floor joists run perpendicular to the foundation wall, start by nailing 2×4 form-hangers into the joists at both ends of the foundation wall section being replaced. The 2x4s should extend down into the foundation trench, stopping 1 in. or 2 in. above the tops of footing forms, if any. Position each 2×4 so its edge is exactly 9/2 in. from the outside face of the foundation (8-in.-thick concrete plus "2-in.-thick form board). First nail the bottom form board to the 2x4s; then add 2×4 form-hangers between the first two. Spacing 2×4 form-hangers every 32 in., use two 16d nails to nail them to each joist. Then stack additional form boards atop the first until the top board is slightly above the bottom of the mudsill. As shown in "Concrete Forms for a Shallow Foundation,” on p. 217, run diagonal 2×4 braces from joists to the 2×4 form-hangers to stiffen the inner form wall, thereby keeping it plumb and in place (see also the photos on p. 200 and on p. 216, left).
If the joists instead run parallel to the foundation, first add blocking between the rim joist and the first joist back, across the top of the pony wall. Nail the 2×4 form supports to the blocking, much as just described for perpendicular joists. Once the inside forms are complete, you can cut, bend, and assemble the rebar; attach the mudsill
to the pony-wall studs; and insert anchor bolts before building the outside form walls. Even if local building codes don’t require steel-reinforced foundations, adding steel is money well spent (see "Adding Steel,” on p. 217).
Outer form walls. If your foundation is shallow and the sides of its trenches are cleanly cut, you may not need form boards for footings. But if your footings will have form boards, install them before building the foundation’s outer form walls.
If there are no footing form boards, drive 4-ft.-long perforated steel stakes down into the footing area to secure the bottom form boards for the outer form walls. Plumb and space these stakes out 1 ‘h in. from the outside face of the foundation, to allow for the thickness of the form boards. Use two stakes per form board to get started.
Use 8d duplex nails to attach form boards to the steel stakes.
Install this first outer form board a little higher than the inner form board initially; then hammer the stakes down to achieve level. Note: You may need several tries to drive stakes that are plumb and accurately positioned because, during driving, stake points are often deflected by rocks. Use a magnetic level to plumb the stakes.
Once the steel stakes are correctly positioned and the bottom form boards are nailed to them, add 2×4 form-hangers so you can hang additional form boards above. But first, nail spacers to the pony-wall studs, to compensate for the thickness of the U2-in.-thick form boards. If the pony-wall studs are sheathed,
 nail 1 й-in.-thick spacer boards to the studs, so the back face of the form boards lines up with the exterior sheathing. If the studs aren’t presently sheathed, nail up 2-in.-thick spacers to accommodate the thickness of the form boards and the sheathing to come. If the outer face of the foundation wall aligns to the face of the sheathing, you can easily cover that often- troublesome joint with siding.
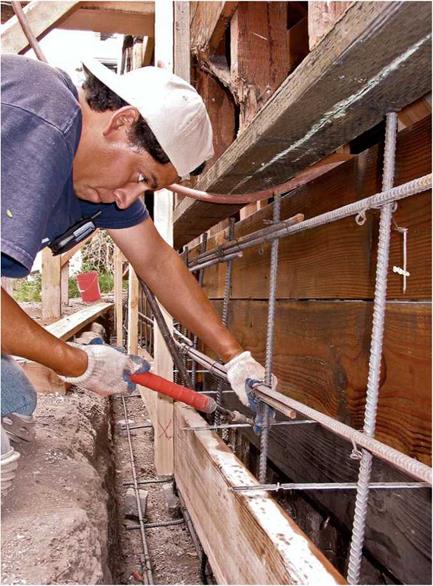
As you install each form board atop the preceding one, set the form ties that tie together inner and outer form boards. Form ties are designed to space the form boards exactly the right distance apart; they are available in 6-in., 8-in., 10-in., and 12-in. lengths. Use wire to tie the form ties to each vertical rebar, typically spaced 32 in. on center. At the ends of each form tie, insert metal wedges into the slots to keep
forms from spreading when filled with concrete. The top form board should overlap the mudsill slightly.
The outer form boards are braced by the plumbed 2×4 form-hangers, which are in turn supported by diagonal braces running back down to perforated steel stakes or to 2×4 stakes driven into the ground. Under the house, diagonal braces run from the inner form-hangers to the joists.
 |
 |
Note: After the pour, you’ll be able to remove form boards and steel stakes if you first sprayed them with form-release oil. But be careful not to spill the oil onto the rebar, anchor bolts, or old foundation, because the oil will weaken the bond with new concrete.
 |
 |
 |
Structural steel used in renovated foundations includes rebar, anchor bolts, to attach framing to concrete; pins (or dowels), which tie old foundations to new ones; and a plethora of metal connectors, including the popular Simpson Strong-Ties), which strengthen joints against earthquakes, high winds, and other racking forces.
Rebar. Rebar in foundations is not specified by all building codes, but it’s cost-effective insurance against cracking caused by lateral pressures of soil and water against foundations. Rebar can also eliminate concrete shrinkage cracks. Common sizes in residential construction are No. 3 (58 in. in diameter), No. 4 (52 in.), and No. 5 (58 in.). One common configuration is No. 4 rebar spaced every 32 in. or 48 in. on center.
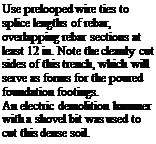
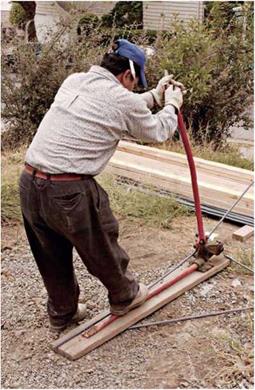
In footings and foundation walls below grade, place rebar back 3 in. from forms and at least 3 in. above the soil. On the inner side of the foundation walls, rebar can be within 152 in. of the forms. You should run rebar the length of a foundation, tying the lengths together after overlapping them at least 12 in. Use prelooped wire ties to join them. (Wire ties don’t lend strength; they simply hold the bars in place before and during the pour.) Use wire ties to attach rebar to the anchor bolts, pins, form ties, and the like. Use a cutter-bender to cut and bend bars on small jobs. When rebar is delivered, store it above the ground—dirty rebar doesn’t bond as well.
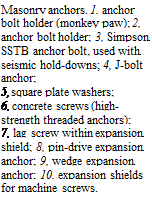
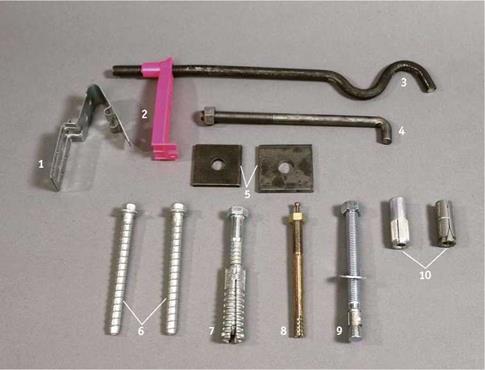 Anchor bolts. Place й-in. or й-in. anchor bolts no more than 6 ft. apart in one-story house foundations and no more than 4 ft. apart in two-story foundations. In earthquake zones, 4-ft. spacing is acceptable, but conscientious contractors space the bolts every 3 ft. There should also be an anchor bolt no farther than 1 ft. from each end of the sills. For maximum grip, use square washers. When pouring a new foundation, use J-type anchor bolts; the plastic bolt holders shown in the photo on p. 202 will position the anchor bolts in the middle of the foundation wall.
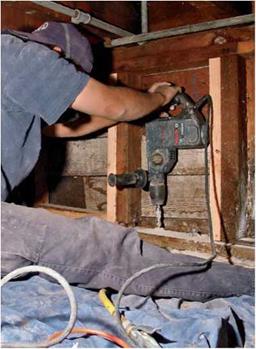
When retrofitting bolts to existing foundations, use 58-in. all-thread rod cut to length. Rod lengths will vary according to code specs and sill thickness. For example, a 10-in. rod will accommodate a washer, nut, and l-in.-thick mudsill and will embed 7 in. in the concrete. You can also buy precut lengths of threaded rod, called retrofit bolts, which come with washers and nuts. Drill through the mudsill into the concrete, clean out the holes well, inject epoxy, and then insert the rods and bolts. The procedure is essentially the same for epoxying rebar pins to tie new concrete to old.
Because bolts, all-thread rods, and other tie-ins are only as strong as the material around them, you should center bolt holes in the top of the old foundation and drill them 6 in. to 8 in. deep, or whatever depth local codes require. Use an impact drill if you’re drilling concrete. Drill
holes 58 in. larger than the diameter of the bolt so there’s room for epoxy. For example, for 58-in. all-thread rod, drill 54-in. holes; for 58-in. rod, drill 58-in. holes. Even if you oversize such holes, the bond probably won’t be weaker, but you may waste a lot of expensive epoxy.
Note: To anchor mudsills in retrofits, threaded rod and epoxy have largely replaced expansion bolts. These chemical bonds are almost always stronger than mechanical ones, and epoxy’s compressive strength is roughly four times greater than that of concrete.
Pins. Concrete cold joints are inherently weak. Cold joints occur when new concrete is butted against old or when separate pours create seams. To keep cold joints from separating, you need to join them with rebar pins. When drilling lateral holes to receive rebar pins that tie old walls to new (or secure a foundation cap), angle the drill bit slightly downward, so the adhesive you’ll inject into the hole won’t run out and so pins will be less likely to pull out.
Local codes and structural engineers will have the final say on sizing and spacing rebar pins. But, in general, drill 5й-іп. holes for й-in. rebar to be epoxied; drill holes at least every 58 in. and embed rebar at least 7 in. into the top of foundations, and at least 4 in. into the side of 8-in.-thick walls. Extend rebar epoxied into the old foundation at least 18 in. into new formwork, and overlap rebar splices at least 58 in.
|
Retrofitting anchor bolts requires drilling in tight spaces. Bolts should be centered in the sill and embedded at least 7 in. into the concrete. |


Leave a reply