RELINING A CHIMNEY
 |
 |
While inspecting a chimney, you may find that it has no flue-tile lining or that existing tiles are cracked or broken and too inaccessible to replace. Because superheated gases can escape
through gaps, such a chimney is unsafe to use. In this case, your options are:
► Seal up the chimney so it can’t be used and add a new, properly lined chimney elsewhere. Or tear that chimney out and replace it.
► Install a poured masonry liner. In this procedure, a heavy-gauge tubular rubber balloon is inflated inside the chimney, and the void is then filled with a cementitious slurry. After the mixture hardens, the tube is deflated and removed. Poured masonry creates a smooth, easily cleaned lining and can stiffen an old chimney whose strength is suspect. Poured masonry systems are usually proprietary, however, and must be installed by someone trained in that system. Finally, this method is expensive.
► Which brings us to stainless-steel pipe, a sensible choice if you want a solution that’s readily available, quickly installed, effective, and about one-third the price of a poured masonry liner. Interchangeable rigid and flexible pipe systems enable installations even in chimneys that aren’t straight.
Installing a stainless-steel liner. Steel flue liners and woodstoves are often installed in tandem, correcting flue problems and smoky fireplaces at the same time.
Start by surveying the chimney’s condition, including its dimensions. After steel flue pipe is installed, there should be at minimum 1 in. clearance around it. Thus a 6-in. pipe needs a flue at least 7 in. by 7 in. Note jogs in the chimney that might require elbows or flexible sections. Also note obstructions, such as damper bars, that must be removed before you insert the pipe.
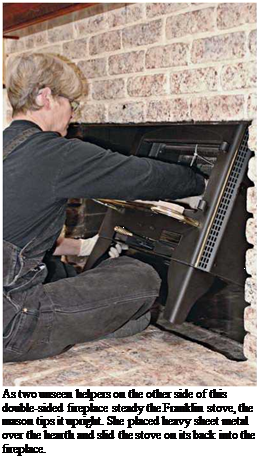
If you’re installing a woodstove, too, measure the firebox carefully to be sure the stove will fit and that there’s room for the clearances required by local code and mentioned in the stove manufacturer’s instructions. You’ll also need room to insert the stove, with or without legs attached, and raise it up into its final position. Stoves are heavy—300 lb., on average—so give yourself room to work. Fireboxes often need to be modified to make room for a fireplace insert or stove. Install the stove or fireplace insert before installing the flue liner.
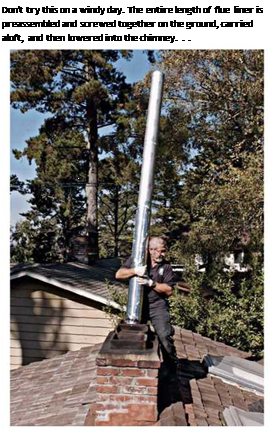
Assemble the flue pipe on the ground, joining pipe sections with four stainless-steel sheet-metal screws per joint, so the sections stay together as you lower them down the chimney. Although pop rivets could theoretically join such pipe, they’d likely fail under the stress and the corrosive chemicals present in wood smoke.
![]()
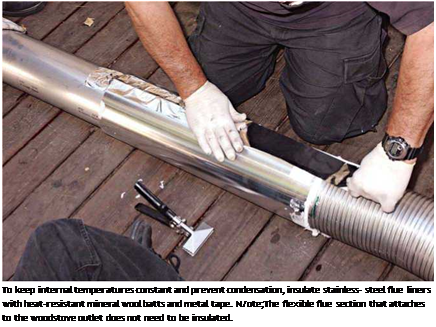
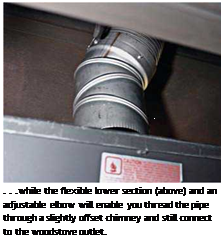

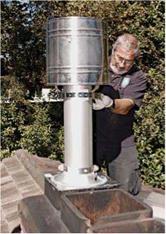 Next insulate the flue pipe, as necessary, with heat-resistant mineral batts and metal joint tape.
Heat ratings vary. Temperatures inside flue pipes intermittently reach 2,000°F. Thus flue pipes are insulated to keep temperatures constant inside and prevent condensation, which also prevents accretion of creosote and creosote’s corrosive effects. Generally, the first pipe section coming off the woodstove is not insulated because temperatures are so high that there’s little danger of condensation. Toward the top of the pipe, stop the insulation just before the pipe clears the chimney—you don’t want to expose the insulation to the elements.
Carry the flue-pipe assembly onto the roof and lower it down the chimney. This is a two – person job, especially if it’s windy. Once the lower end of the flue pipe nears the woodstove, one team member can go below to fit the lower end over the woodstove’s outlet.
NINE Fixes FOR SMOKING FIREPLACES
► Open a window. New houses are often so tightly insulated that there’s not enough fresh air entering to replace the smoke going up the chimney. So smoke exits only sluggishly if at all. Alternatively, you can install an air-intake vent near the hearth.
► Use dry wood. Burning wet or green wood creates a steamy, smoky fire whose low heat output doesn’t create enough of an updraft and promotes creosote buildup.
► Clean chimneys at least once a year, so their flue diameters aren’t choked down with creosote. Cleaning also removes obstructions, such as nests.
► Have a properly sized flue. Flues that are too large won’t send volatiles upward
at a fast enough rate and often allow smoke to drift into living spaces. Although flue pipes are sized to match woodstove flue outlets (6 in. or 8 in.), sizing fireplace flues is trickier. In general, a fireplace flue’s cross section should be one-eighth to one-tenth the area of a fireplace opening.
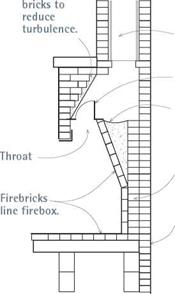
► Reduce air turbulence inside the smoke chamber, above the metal damper by giving the corbeled bricks on the front face a smooth parge coat. To do this, brush, vacuum, and wet the corbeled bricks before applying a smoothening heat-resistant mortar such as Ahrens® Chamber-Tech 2000. (You’ll need to remove the damper for access.)
► Replace the chimney rain cap. Clogged or poorly designed metal or masonry caps can create air turbulence and prevent a good updraft.
► Increase the height of the chimney. A chimney should be a minimum of 3 ft. above the part of the roof it passes through and a minimum of 2 ft. above any other part
of the roof within 10 ft.
► Rebuild the firebox with Rumford proportions. Count Rumford was a contemporary of Ben Franklin and almost as clever; however, he bet on the British and left the colonies in a hurry. But not before he invented a tall, shallow firebox that doesn’t smoke and radiates considerably more heat into the living space than low, deep fireboxes. Search the Internet for companies that sell prefab Rumford-style fireplace components—or build your own.
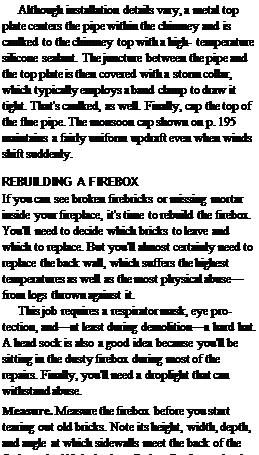
► 

![]()
![]()

![]()

 Install a Franklin woodstove. Charming as they are, fireplaces are an inefficient way to heat a house. Install an efficient, glass-doored stove and you can watch the flames without getting burned by wasted energy costs.
 |
to determine how much off-plumb it is. Finally, note the height and dimensions of the chimney throat, the narrowed opening at the top of the firebox, usually covered by a metal damper. Knowing the location and dimensions of the throat is particularly helpful—it tells you the final height of the back wall of the firebox.
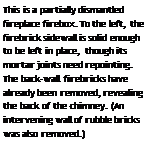
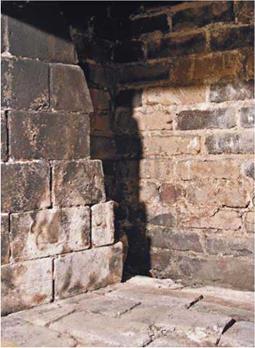
Tear out. Starting with the back wall of the firebox, use a flat bar to gently dislodge loose firebricks—most will fall out—and place them in an empty joint-compound bucket for removal. Rebuild with only new firebricks. Remove the damper, and if it’s warped, replace it. As you remove firebricks from the back wall, you may find an intermediate wall of rubble brick between the firebox and the outer wall of the chimney. And, as likely, the rubble bricks will also be loose, their mortar turned to sand. You can save, clean, and reuse these bricks when you rebuild the rubble wall.
Next remove loose or damaged firebricks from the sidewalls and floor of the firebox. But, again, if the bricks are intact, it’s a judgment call. If repointing the joints is all that’s needed, leave the bricks in place. Firebricks on the floor, which have been protected by insulating layers of ash, often need only repointing. Once you’ve removed loose bricks, sweep and vacuum the area well. (Rent a shop vacuum.) Using a spray bottle, spritz all surfaces with clean water till they’re damp.
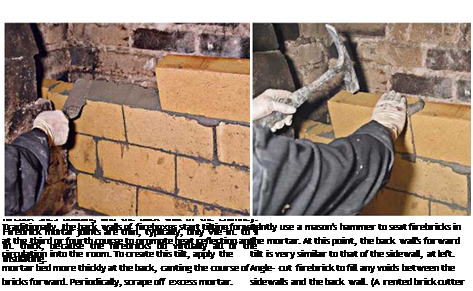
Bricks and mortar. Firebricks (refractory bricks) are made of fire clay and can withstand temperatures up to 2,000°F. They’re bigger and softer than conventional facing bricks and less likely to expand and contract and hence are less likely to crack from heat. Yet, because they are soft, they can be damaged by logs thrown against
them. Firebrick walls need tight joints of he in. to ‘/ in. thick and thus require exact fits. To achieve this, rent a lever-operated brick cutter.
For firebricks, two kinds of mortar are used. Until recently, most masons just threw a few handfuls of fire clay into a conventional portland cement-based mortar, such as Quikrete® Mason Mix. (Fire clay helps resist burnout and smoothes easier.) However, adding too much fire clay makes a mix so sticky it’s difficult to scrape off your trowel. The second mortar, refractory mortar, comes premixed in cans or pails and is roughly the consistency of joint compound. With names such as Heat Stop® and Alsey Air-Set Refractory
Fireplace Mortar, these mortars can withstand high temperatures without degrading. Heat tolerance aside, the biggest difference between the two mortar types is drying time: Refractory mortars set very quickly—in 15 seconds or 20 seconds—so there’s little time to re-adjust bricks once in place. If you’re new to bricklaying, a conventional mix will be more forgiving.


Leave a reply