PROnP
Tape dispensers hold paper or mesh tape and clip to your belt, so your tape is always ready to roll. Bigger dispensers hold a 500-ft. roll.
 1111
1111

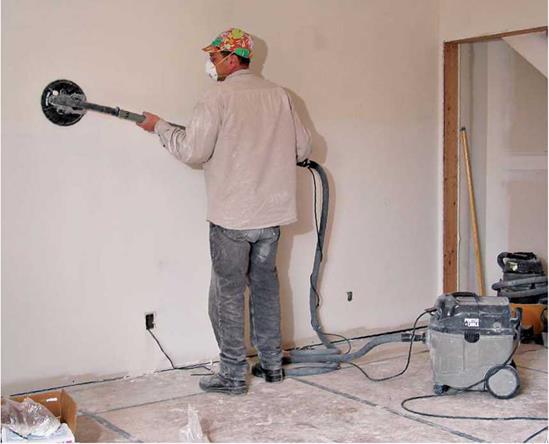
Finally, tape up sheet plastic to isolate the rooms you’re sanding, especially if you’re living in the house. Painter’s tape will do the least damage to trim finishes and paint.
This chapter began with sizes and types of dry – wall. Now let’s look at screws, joint tape, corner beads, and joint compound before planning and estimating supplies.
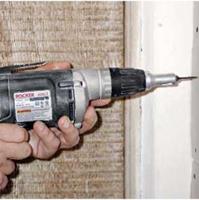
Drywall screws have all but replaced nails.
Here are the three principal types:
► Type-W screws have a coarse thread that grips wood well. They should be long enough to penetrate framing at least 58 in. In doublelayer installations (two h-in. panels), use type-W screws at least 1 /4 in. long.
► Type-S screws have fine threads and are designed to attach drywall panels to light-steel framing and steel-resilient channels. At least
% in. of the screw should pass through metal studs, so 1-in. type-S screws are commonly used for single-ply li-in. or 58-in. drywall installations. If you’re attaching drywall to heavy-gauge (structural) steel, use self-tapping screws.
► Type-G screws are sometimes specified to attach the second panel of a fire-rated,
double-layer installation. That is, the first panel is the substrate to which the second panel is screwed and glued with construction adhesive. Ideally, screws should also penetrate framing, so ask building inspectors about installation requirements if your local code specifies type-G screws.
Nails are still used to attach corner bead and to tack panels in place. Ring-shank drywall nails hold the best in wood; don’t bother with other nail types. Nails should sink M in. into the wood.
Wet -SANDING
Using a large sponge to wet-sand drywall joints will definitely reduce dust, but wet-sanding isn’t feasible for a project of any size because you must rinse the sponge and change the water continually. Also wet-sanding soaks the paper facing, sometimes dislodges the tape, and tends to round joint compound edges rather than taper them. That said, if you’re drywalling a small room and don’t like moving the furniture out of the room, wet-sanding is a cleaner way to go.
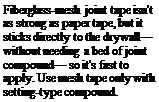
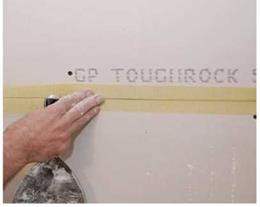
Joint tape is used to reinforce drywall seams and is available as 2-in.-wide paper tape and 1/2-in.- or 2-in.-wide fiberglass mesh tape. Selfadhesive mesh tape is popular because it’s quicker. You can apply it directly to drywall seams and then cover it with joint compound in one pass. Whereas, with paper tape, you must first apply a layer of joint compound, press the paper tape into it, and then apply a coat of compound over that. If there’s not enough compound under paper tape, it may bubble or pull loose.
Still, many professionals swear by paper tape because it’s cheaper than fiberglass mesh, it’s stronger than mesh and less likely to be sliced by a taping knife, it won’t stretch, and it is lightly creased up the middle, making it easier to install and align in an inside corner. Consequently, pros use mesh tape only with setting-type compounds, which cure harder and stronger than drying-type compounds, described on p. 358.
However, self-adhesive mesh is perfect for drywall repair. If you press the mesh over a crack or small hole, you may be able to hide the problem with a single layer of joint compound.
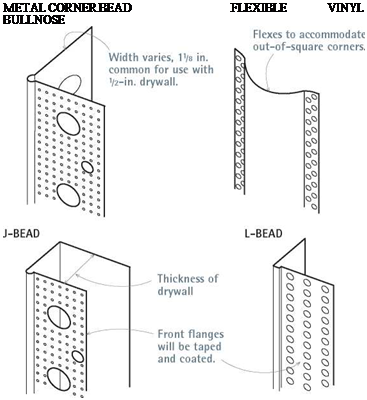
Comerbeads and trim beads finish off and protect drywall edges. They’re available in metal, vinyl, PVC plastic, and paper-covered variations. Most attach with nails or screws.
Cornerbeads are used on all outside corners to provide a clean finish and protect otherwise vulnerable drywall corners from knocks and bumps. (As noted earlier, inside corners are formed with just tape and compound.) Cornerbeads come in a number of different radii; larger bullnose varieties give you a dramatic curve. Whatever type you choose, though, install it in one piece.
J-beads keep exposed ends of drywall from abrading. These beads are typically used where panels abut tile or brick walls, shower stalls, or openings that won’t be finished off with trim—in other words, where the edge of the drywall is the
|
Drywall Fasteners |
|||
|
ATTACHING TO™ |
FASTENER USED |
DRYWALL THICKNESS (in.) |
MINIMUM FASTENER LENGTH (in.) |
|
Wood studs, ceiling joists, rafters |
Type-W drywall screws (coarse thread) |
38, У2, 5/ |
1, 1‘/8, 1‘/4 (penetrate framing У in.) |
|
Wood studs only |
Ring-shank drywall nails |
38, ‘/2, У |
1‘/8, 1/4, 138 (penetrate framing 5/8 in.) |
|
Light-gauge metal framing |
Type-S drywall screws (fine thread) |
38, ‘/2, 5/ |
3/4, 7/8, 1 |
![]()

finished edge. L-beads are similar; they’re used where panels abut windows, suspended ceilings, paneling and so on. In general, L-beads are easier to install on panels already in place. J – and L-beads are sized to drywall panel thickness; some types require joint compound, some don’t.
Flexible arch beads often come in rolls that are presnipped, so as you unroll them, they assume the shape of the arch you’re nailing or stapling them to. Apply joint compound and finish them as you would any drywall seam.
Joint compounds can be broadly divided into drying types and setting types. They differ in ease of use, setting (hardening) time, and strength.
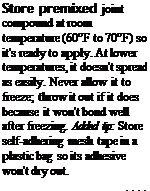
Drying-type joint compounds are vinyl based and dry as water evaporates from them. They usually come premixed and are easy to apply and sand. Typically, you can apply a second coat 24 hours after the first, if you maintain a room temperature of 65°F. There’s little waste with
drying-type compound. And, once opened, it will keep for a month if you seal the bucket tightly.
Setting-type joint compounds, which contain plaster of paris, are mixed from powders. They set quickly and so allow you to apply subsequent coats before the compound is completely dry. In general, they bond better, shrink less, and dry harder than drying types. They harden via a chemical reaction, hence their nickname, "hot mud.” Depending on additives, they’ll set in 30 minutes to 6 hours. However, setting-type compound sets up so quickly and so hard that it can be a monster to sand. Once it’s mixed, you’ve got to use it up. It won’t store.
So, unless you’re a drywalling whiz, use a premixed, all-purpose, drying-type joint compound. A 5-gal. bucket will cover 400 sq. ft., roughly, a 12-ft. by 12-ft. room. with 8-ft. ceilings. The compound is ready to use right out of the bucket. It’s reasonably strong, and each application should dry in a day.
One further distinction: Drying-type and setting-type joint compounds are further formulated as either taping compounds—used for the first coat, in which you embed the tape—or topping compounds, used for the second and third coats because it feathers out (thins) better and dries faster. Again, all-purpose compound can be used for all three coats, but you might want to experiment with the two types once you’ve had some practice. Some pros use setting-type joint compound for the first and second coats and drying – type for the third (and last) coat.
Before estimating materials, walk each room and imagine how best to orient and install panels. These five rules, known to drywall pros, will save you a lot of pain.
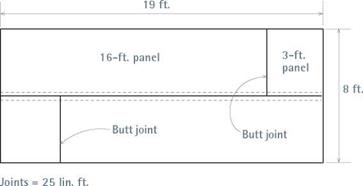
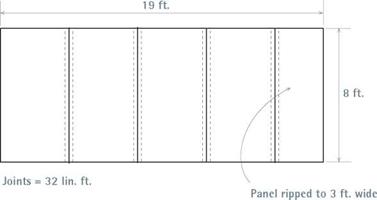
Rule 1: Use the longest panels possible. This minimizes the number of joints. A 4-ft. by 14-ft. or 4-ft. by 16-ft. panel is heavier and less wieldy than a 4-ft. by 8-ft. panel. But hanging larger panels is relatively fast, compared to the time it takes to tape, coat, and sand the joints of the smaller panels.
Rule 2: Think spatially. Running panels hori – zontally—perpendicular to studs and ceiling joists—can reduce the number of joints and promote stronger attachments. For example, two 4-ft. by 12-ft. wall panels run horizontally will reach an 8-ft. ceiling and create only one horizontal seam to be filled. Two 54-in.-wide (4/2-ft.) panels run horizontally will reach a 9-ft. ceiling. However, if ceilings are higher than 9 ft., you may be able reduce the number of joints by installing wall panels vertically (parallel to studs).
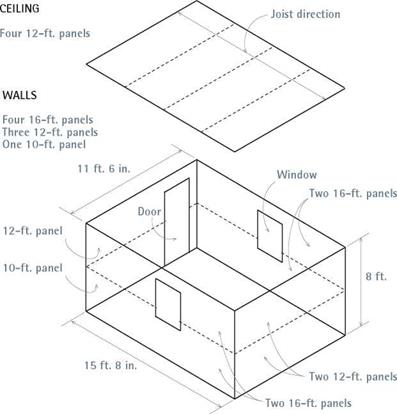
Rule 3: Minimize butt joints. Long edges of panels are beveled to receive tape joints, but the short edges (butt edges) are not. Consequently, butt joints are difficult to feather out, and they are likely to crack. So try to minimize the number of butt edges. Where you can’t avoid them, position them away from the center of a wall or ceiling. Last, always stagger (offset) butt joints; never align them. Otherwise, you may need to feather joint compound out 3 ft. wide to get a barely acceptable joint.
Rule 4: Install drywall that’s thick enough.
Otherwise spans may sag between ceiling joists and bow between studs. For example, if you’re running panels parallel to ceiling joists spaced 24 in. on center, 58-in. drywall is much stronger and less likely to sag than ’/2-in. panels. For this, be sure to comply with local codes.
Rule 5: Don’t scrimp on panels. Expect a certain amount of waste, especially if you’re installing around stairs or sloping ceilings. It’s a mistake to try to piece together remnants, because that creates a lot of butt joints and looks awful. Likewise, scrimping on screws or joint compound results in weak joints and screw pops.


Leave a reply