Planning
If you’ll be adding or moving fixtures, you’ll need to install pipes, and that will require permits and planning. Start by assessing the condition of existing pipes (see Chapter 1), which you can connect to if they are in good shape. Create a scale drawing of proposed changes, assemble a materials list, and then ask a plumbing-supply store clerk or a plumber to review both. If you’re well organized, clerks at supply stores will usually be glad to help. However, if you need help understanding your existing system, hire a plumber to assess your system. He or she can also explain how to apply for a permit and which inspections will be required.
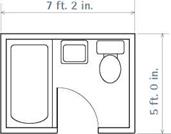
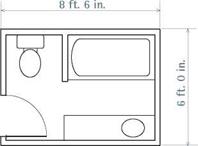
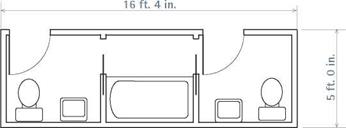
If you’re adding a bathroom, first consider the overall size of the room. If there’s not enough space, you may need to move walls. Layouts with pipes located in one wall are usually the least disruptive and most economical because pipes can be lined up in one plane. On the other hand, layouts with pipes in three walls are rarely sensible or feasible unless there’s unfinished space above or below in which to run pipes.
Once you have a general idea if there’s enough room, focus on the code requirements for each fixture, which dictate where fixtures and pipes
PIPES IN TWO WALLS
|
|
|
|
|
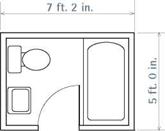
must go. It would be aggravating and expensive if code inspectors insisted that you move fixtures after finish floors and walls had been put in place. So install fixtures and pipes to conform with code minimums. The drawings on these two pages show typical drainpipe and supply pipe centers for each fixture and, in most cases, minimum clearances required from walls, cabinets, and the like.
On toilets, the horn—the integral porcelain bell protruding from the bottom—centers in the floor flange. The flange, and the closet bend to which it attaches, should be centered 12 in. from the finish wall for most toilets or 1212 in. from an exposed stud wall. Codes require at least 15 in. clearance from the center of the toilet to walls or cabinets on both sides: In order words, install toilets in a space at least 30-in. wide. There must also be at least 24 in. clear space in front of the toilet.
Toilets with 10-in. and 14-in. rough-in dimensions are available to resolve thorny layout issues (such as an immovable beam underneath) or to replace nonstandard toilets. For example, if you replace a wall-hung toilet with a standard
|
|
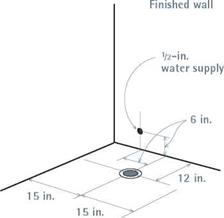
Center the toilet drain 12 in. from the finished wall behind the unit. Allow at least 15 in. of clearance on both sides of the toilet, measured from the center of the drain.
(close-coupled) unit, there would be an ugly 2-in. gap between the toilet and the finish wall. By installing a 14-in. rough toilet, whose base is longer, you can use the existing floor flange and eliminate the gap behind the toilet.
Install water-supply risers on the wall behind the toilet, 6 in. above the floor and 6 in. to the left of the drainpipe. If there’s a functional riser sticking out of the floor, use it. But floor risers are seldom installed today because they make mopping the floor difficult. Clearances around bidets are the same as those for toilets.
Lavatories and pedestal sinks should be a comfortable height for users. Typically, lavatory rims are set 32 in. to 34. in. above the finish floor; but if a family is tall, raise the lav. (But if you do, remember to raise drain and supply pipe holes an equal amount.) Codes require at least 18 in. clearance in front of a sink; 24 in. is better.
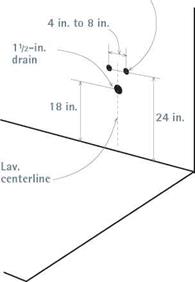
Lavatory drains are typically 18 in. above the floor and centered under the lavatory, although adjustable P-traps afford some flexibility in positioning drains. Center supply pipes under the lav, 24 in. above the floor, with holes spaced 4 in. on center. Pedestal sink drains are housed in the pedestal, so tolerances are tight; follow the manufacturer’s installation instructions when positioning pipes.
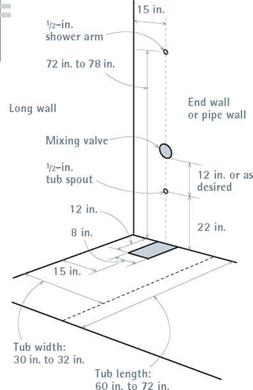
Bathtubs and showers vary greatly, so follow the manufacturer’s guides when positioning the pipes. Most standard tubs are 30 in. to 32 in. wide and 5 ft. to 6 ft. long. Codes require a minimum of 18 in. clearance along a tub’s open side(s); 24 in. is better.
Freestanding tubs have exposed drain and overflow assemblies, so their 112-in. drains can be easily positioned to avoid joists and other design constraints. Standard tubs require a hole approximately 12 in. by 12 in. cut into the subfloor under the tub drain end, to accommodate the drain and overflow assembly. If an existing joist is in the path of the tub drain, you may need to cut through the joist and add doubled headers, as explained further on p. 287.
Positioning supply pipes and valve stems is easier because they’re smaller and typically centered on an end wall—although, again, follow the manufacturer’s rough-in dimensions for code-required pressure-balancing valves and the like. Place the shower arm 72 in. to 78 in. above the floor so taller users won’t need to stoop when taking a shower. Place the tub spout 22 in. high. Tub faucet handles (and mixing valves) are customarily 6 in. above the spout.
|
1/2-ІП. water supply
|
Tub/Shower Rough-In Dimensions
|
|
The tub drain and stubs in the end wall should be centered 15 in. from the long wall. Mixing valves are typically set 12 in. above the tub spout, whereas individual valve stems are set 6 in. above the spout, 8 in. o. c., or follow the manufacturer’s recommended rough-in specs.
|
|
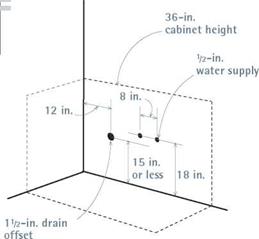
Double sinks are most often installed in kitchens, so the drain is often offset under one sink, as shown in the drawing on p. 295. Braided stainless-steel supply lines are very flexible, so you can rough-in water supply stub-outs at any convenient height; 18 in. is common.
Kitchen sinks frequently have double basins, so you can center or offset drainpipes. In standard 36-in.-wide base cabinet, the drain is often offset so that it is 12 in. from one cabinet sidewall, leaving room to hook up a garbage disposer. To make cabinet installation easier, have the drain exit into the wall rather than the floor. A drain that exits 15 in. above the finish floor will accommodate the height of a garbage disposal (11 in.) and the average depth (9 in.) of a kitchen sink. Sink faucet holes are typically spaced 8 in. on center, so align supply pipes with their centerline, roughly 2 in. above the drain height. Supply-pipe height is not critical because risers easily accommodate varying heights.
Make a separate sketch of each floor’s plumbing; include the basement and attic, too. The easiest way to do this to create an accurate outline of the house’s footprint, using graph paper and a scale of /a in. per 1 ft. Then use tracing-paper overlays for each floor’s plumbing layout. Indicate existing fixtures, drains, supply pipes, water-using appliances, and the water heater. Where pipes are exposed, note the size and dimension of drains and stacks and where the supply pipes exit into
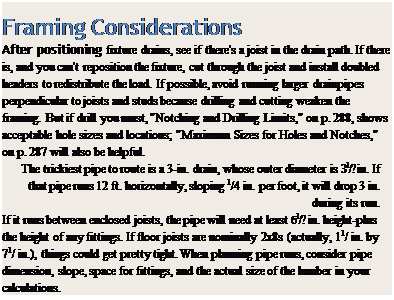
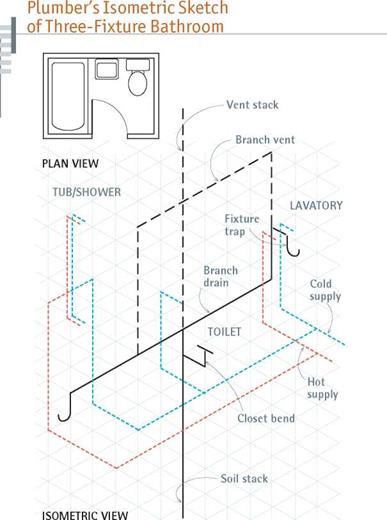
Try to obtain sheets of plumber’s isometric paper so you can show bathroom rough-ins in three dimensions. Art or engineering supply stores may carry the paper, but the Internet is probably a better bet.
the floor above. Especially note the location of 3-in. main drains and vents: If you can cluster fixtures around larger DWV pipes within a room—or from floor to floor—you’ll shorten the distance that fixture drains must travel and thus reduce the amount of framing you may have to cut or drill when running the new pipes.
If you’re moving or adding fixtures, make separate floor sketches for them, too. By laying tracing-paper sketches of old and new plumbing atop each other, you can quickly see if fixtures cluster and, if you’re adding fixtures to an existing system, the closest part of a drain or supply pipe to connect to and extend from. Plumbers use isometric paper to draw pipe runs, as shown in "Plumber’s Isometric Sketch of a Three-Fixture Bathroom,” at left, but any to-scale sketch will give you an approximate idea how long pipe runs will be. Sketches also tell you where you’ll need fittings because the pipes change direction, connect to branches, or decrease in size.
With a modest tool collection, you’ll be ready for most plumbing tasks.
Pipe wrenches tighten and loosen threaded metal joints, such as %-in. nipples (short pipe lengths) screwed into a water heater, galvanized pipe unions, and so on. A pair of 10-in. or 12-in. pipe wrenches should handle most tasks. Get two: Most of the time, you’ll need one wrench to hold the pipe and the other to turn the fitting.
Adjustable wrenches (also called Crescent wrenches) have smooth jaws that grip but won’t mar chrome nuts and faucet trim. Get several:
A 4-in. adjustable wrench is right for the closet bolts that anchor toilet bowls, a 12-in. wrench gives extra leverage for stubborn nuts, and an 8-in. wrench is appropriate for almost everything else.
Strap wrenches aren’t a must-have tool but are useful when you need to grip polished pipe without scarring it.
Slide-nut (sliding-jaw) pliers are good utility tools for holding nuts, loosening pipe stubs, and holding a pipe section while it’s being soldered.
The jaws of locking pliers (or Vise-Grip pliers) adjust and clamp down on fittings, for example, so you can have both hands free to hold a torch and apply solder.
Basin wrenches are about the only tools that can reach water-supply nuts on the underside of sinks and lavs, where supply pipes attach to threaded faucet stems.
Tub-strainer wrenches tighten tub strainer and tailpiece assemblies.
No-hub torque wrenches tighten stainless – steel band clamps on no-hub couplings. Many
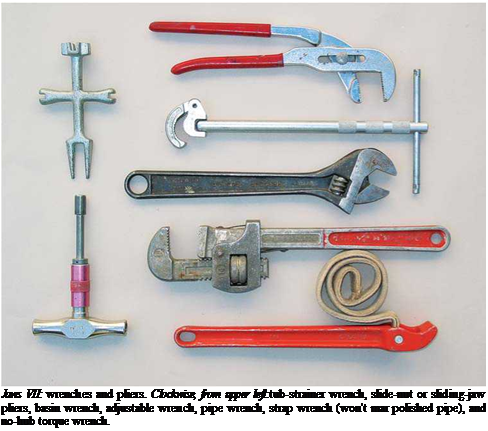
plumbers use a cordless drill/driver to do most of the tightening, but code requires that final tightening be done by hand.
Pipe cutters (also called wheeled tubing cutters) are the best tools for a clean, square cut on copper pipe. Tighten the cutter so that its cutting wheel barely scores the pipe; then rotate the tool around the pipe, gradually tightening until the cut is complete. Many types have a foldaway deburring tool. Use a close-quarters cutter (thumb cutter) where there’s no room for a full-size one. If you’re installing CPVC plastic supply pipe, use tubing shears for clean, quick cuts. A hacksaw works, but not as well.
A reaming tool (if your cutter doesn’t have one attached) is used to clean metal burrs after cutting copper. Use a round wire brush to polish the inside of copper fittings after reaming and plumber’s sand cloth to polish the pipe ends.
If you’re cutting plastic pipe, use a rounded file to remove burrs—the steel jaws of an adjustable wrench also work well for deburring plastic pipe.
Wide-roll pipe cutters open wide to receive the larger diameters of plastic DWV pipe. Plastic-pipe saws have fine teeth that cut ABS and PVC pipe cleanly—and squarely, if used with a miter box. If you need to cut into cast iron, rent a snap cutter, also known as a cast-iron cutter. It’s the only tool that cuts cast iron easily. Some models have ratchet heads for working in confined places.
A cordless drill and cordless reciprocating saws are must-haves if you’re working around metal pipes that could become energized by electricity and when working in tight, often damp crawl spaces. Old lumber can be hard stuff to drill or cut, so 14.4-volt cordless tools are minimal. Cord
less drills are perfect for attaching plumber’s strap, drilling holes in laminate countertops, and so on.
If you need to drill 2-in. (or bigger) holes, use a corded drill. Heavy-duty drilling takes sustained power and more torque than most cordless drills have. A 12-in. right-angle drill supplies the muscle you need in close quarters.
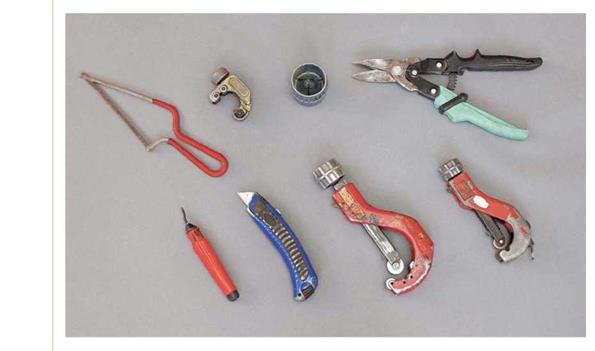 Cutting and reaming tools. Top row, from left:miniature hacksaw, close – quarters cutter, combo chamfer and reamer (cleans burrs from pipe ends after cutting), and aviation snips. Bottom row:reamer, utility knife, large-wheeled tubing cutter (cuts up to 2-in. plastic pipe), and wheeled tubing cutter. The cutting wheels can be changed for different pipe materials.
|
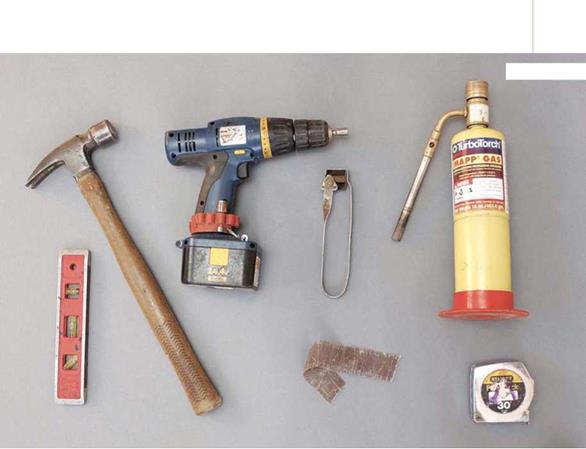
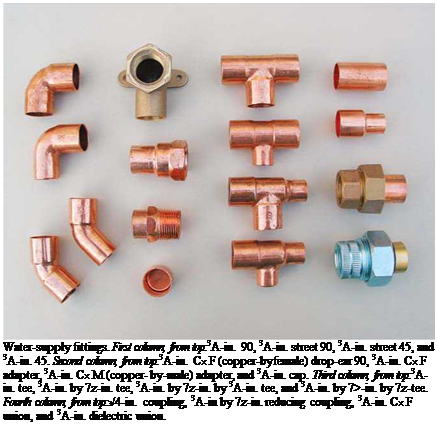
MAPP (methylacetylene propadiene) gas torches have generally replaced propane units (once popular with do-it-yourselfers) and even larger professional rigs with tanks, hoses, and fancy nozzles. MAPP gas torches are perfect for soldering the ’/2-in. or %-in. fittings encountered most often in house plumbing.
Nonasbestos flame shields protect wood framing when soldering joints. It is also important to have a fire extinguisher nearby.
Your plumbing kit should also include a handful of other tools. Aviation snips are used for cutting perforated strap and trimming gaskets, and a torpedo level helps with leveling stub-outs (pipe stubs protruding into a room), sinks, and toilet bowls. You’ll also want a hacksaw, screwdriver with interchangeable magnetic bits, utility knife, and hammer.


Leave a reply