On Priming Painted Surfaces
Primers bond to substrates and provide a stable base for finish coats. Thus it’s wise to prime previously painted surfaces in the following situations:
► You’re switching paint types—say, applying latex over oil-based.
► The old paint is flaking, chalking, stained, or otherwise in bad shape.
► The old paint is glossy and thus would prevent the new paint from adhering well.
Before applying primer, scrape, fill, sand, wash, and rinse the surface and allow it to dry thoroughly.
In general, like bonds best to like. That is, latex paint bonds best to latex primer, oil-based to oil-based. But a quality acrylic latex primer is a good all-purpose choice because it bonds well and suppresses water stains, crayon marks, smoke, rust, and creosote. However, if you get severe bleed-through, switch to an oil-based sealer-primer instead.
Stickability test
Here’s how to test old paint before selecting a new paint, to ensure that the new paint will stick:
► Bend a paint chip that’s coming off.
If it cracks, it’s oil-based; if it flexes, it’s latex.
► Duct-tape a wet sponge to the wall; then wait 15 minutes. If there’s paint on the sponge or you can rub any off the wall, it’s latex.
► Put a few drops of latex solvent such as Goof-Off® on a painted windowsill; if the paint bubbles, it’s latex.
sashes off-site or in an on-site "stripping room” will isolate a major source of lead dust. Old trim can be relatively brittle and tedious to remove and reattach, so strip it in place. Finally, shut off the central heating system during demolition and lead-abatement so it won’t recirculate lead dust throughout the house
Contain and clean up the mess. Use sheet plastic to isolate and contain the mess. Duct tape it across door openings to seal off work areas from living space, and cover floors with a double layer of 6-mil plastic duct taped to baseboards to keep it in place. If two layers of plastic prove too slippery, protect the floor with rosin paper or heavy cardboard instead, and cover that with plastic.
The top layer of plastic will catch the debris and dust, so roll it up and discard it when demolition is done.
Outdoors, sheet plastic is also indispensable for lead abatement: Run a drop cloth of 6-mil plastic at least 8 ft. out from the building, to catch paint chips and the like. Duct-tape it to the foundation so it will stay put. Because it’s not feasible to physically isolate the outside of a building, you’ll need power tools with vacuum attachments to capture lead dust generated by a sander or power scraper. A HEPA-filtered vacuum will capture about 95 percent of the dust; the plastic drop cloth needs to catch the rest.
After stripping and vacuuming interior or exterior surfaces, hand wash contaminated areas to remove any residual lead dust. Don’t use a power washer, which can soak the walls and scatter the debris you’ve worked so hard to contain. Rather, use a three-bucket clean-up: (1) Spray on detergent, using either a spray bottle or a gardener’s pump sprayer before scrubbing the surface with a dampened sponge or a sponge mop. (2) Squeeze out the dirty water into the first bucket before dipping the sponge in a second rinse bucket and squeezing it again. (3) Dip a mop into a third bucket of clean water, squeeze, and you’re ready to repeat the process. Change the water in all three buckets often. Follow the NEPA’s NLIC suggestions for disposing of waste water.
If you see water stains, widespread peeling, mold, or large cracks that suggest structural movement, attend to the underlying causes first.
When painting interiors, it’s best to move the furniture out. If that’s not possible, group it in the center of the room and cover it with a plastic tarp. Remove drapes, wall hangings, and mount-


 ing hardware, and fill holes. О Turn off electric power to the room—use a voltage tester to be sure it’s off—and remove the cover plates of electrical outlets and switches. Light fixtures or hardware left in place should be masked off or wrapped in plastic. Finally, cover the floor with canvas drop cloths—plastic is too slippery to work on.
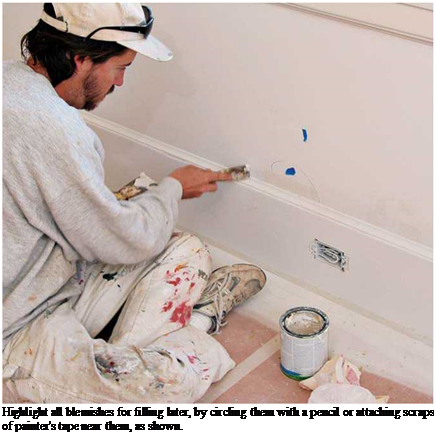
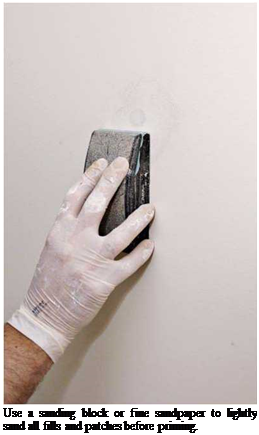
Previously painted surfaces don’t need much preparation if they are intact: Sand lightly with 150-grit sandpaper or a sanding block. If paint’s flaking or loose, remove it with a paint scraper or spackling knife. Then sand rough paint edges with 120-grit to 150-grit sandpaper. Use spackling compound to fill holes, and sand it when dry. Apply a bead of paintable caulk (acrylic latex) to fill gaps where the trim meets walls, smoothing it with a moist finger. Caulking makes the finished paint look much better.
Before you apply paint, lightly sand all painted surfaces so successive coats will adhere better. After sanding, dry mop or vacuum surfaces to remove dust. Then sponge wash them with a mild detergent solution and rinse with clear water. If the walls are especially greasy (kitchen walls, for example), use a more aggressive cleaner like TSP (trisodium phosphate). After rinsing, allow walls to dry thoroughly before painting.
A good test of dryness is to check whether a piece of transparent tape will stick or not.
Unpainted drywall and plaster must always be primed. You can prime drywall as soon as the final, top coat of joint compound has dried and has been sanded. Some pros still prefer an oil – based primer for drywall, but today’s acrylic latexes seal as well and are far easier to clean up.
 |
 |
Plaster surfaces must be cured thoroughly before painting. Although latex primers can be applied as soon as the plaster is dry to the touch, it’s better to wait 3 weeks to 4 weeks. Latex paint allows some migration of moisture, so plaster can continue to "breathe off’ water vapor. Restorationists familiar with plaster recommend
diluting latex primer 15 percent with water so its coating is thinner and even more permeable.
Oil-based paints are another story. Because the alkali in plaster can remain "hot” for up to 3 months, wait that long before using oil-based paints. Otherwise, free alkali in the plaster will attack the paint. Akaline-resistant primers formulated for new plaster may shorten your wait somewhat, but they must be special ordered.
But before ordering, make sure that primer will be compatible with your final-coat paint.
Before painting, read this chapter’s earlier sections on equipment (especially respirator masks), safety concerns, and painting basics. All offer tips that can save you hours and keep you safe.


Leave a reply