Needle Beams

When replacing a mudsill or sections of a foundation whose joists run perpendicular to that foundation wall (see p. 210), place a 4×8 or 4×10 carrying beam on edge under the house, within 2 ft. of the foundation. A jack every 6 ft. under the beam should suffice.
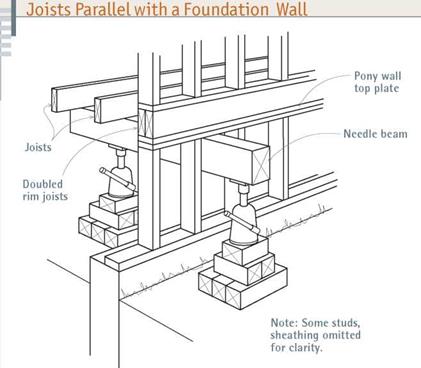
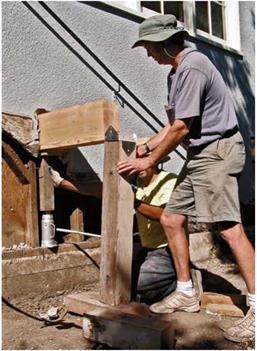
When joists run parallel to the foundation wall being replaced, you’ll need to run needle beams through exterior walls, and support each beam with one post underneath the house and a second post outside, roughly 2 ft. beyond the foundation wall. For this, you’ll need to remove sections of siding so you can insert a beam every 6 ft. to 8 ft. If the siding is stucco, you’ll need to punch large holes through it. To keep the rim (outer) joist from deflecting under the load, nail a second rim joist to it, doubling it before jacking. Also, add solid blocking from those doubled rim joists to the first adjacent joist. Use metal connectors to affix the blocking and 10d nails to face-nail the rim joists.
![]()
![]()


![]()


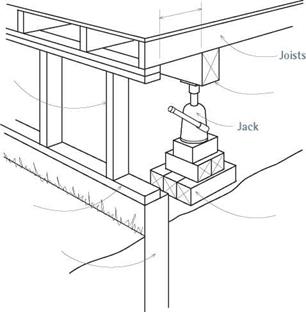 Supporting the structure: When joists run perpendicular to the foundation wall you’re working on, support their load with a beam parallel to the wall. Allowing yourself room to work, put this beam as close to the wall as possible – in most cases, 2 ft. is optimal.
2. Level and set the footing blocks or cribbing on compacted soil. Each jack base should be about 2 ft. by 2 ft. Or, if you’re using a single timber block, use a 4×12 at least 3 ft. long or, if the soil is crumbly, at least 4 ft. long. If you spend a little extra time leveling the footings, the posts will be more likely to stay plumb. To support a single-story house, set posts every 5 ft. or so beneath an adequately sized beam—typically, a 4×8 or 4×10 set on edge.
3. Positioning a jacking beam requires prep work. Ideally, the crew should raise the beam into place and then immediately plumb and set the jacks. But they may need to catch their breath or gather equipment before setting the jacking posts. In that event, cut two 2x4s approximately h in. longer than the distance from the underside of the beam to the top of the cribbing plates and use a sledgehammer to wedge a 2×4 under each end of the beam. Caution: This setup is inherently unstable, so workers should monitor both 2x4s continually to make sure they don’t kick out.
4. As soon as the beam is in place, cut posts 10 in. shorter than the distance from the underside of the beam to the top of the footing blocks. This 10 in. is roughly the (closed) height of a hydraulic jack plus a little room to move. With a helper, place jacks and posts under both ends of
the beam, plumb the posts, and start jacking. Center each jack on its footing blocks so there’s plenty of room for the shoring post(s) that will follow shortly. (If you use hydraulic jacks, you can position the shoring posts 3 in. to 4 in. from the jacking posts.) As you jack, try to raise both ends of the beam evenly, using a 4-ft. or 6-ft. spirit level to check for level.
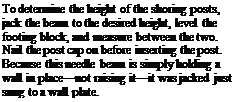
The amount you raise the beam beyond that depends on whether you’re leveling floors, taking weight off joist ends before replacing a foundation, or just supporting the structure where it is. When the beam is at the desired height, measure down to the tops of footing blocks to determine the height(s) of the shoring posts. (If you jack up an additional ‘/ in., you’ll find it easier to slide shoring posts in.)
5. After you’re done jacking, install the shoring posts, which are more stable than jacks on posts. To keep the shoring posts in place, nail steel caps to their tops before installing them. Once you’ve placed the posts under the footing beams, attach the post caps to the beams, and add cross bracing or plywood gussets to keep the beam from rotating. Once you’ve plumbed the shoring posts and braced the beams, lower the jacks slowly till they no longer bear weight, and then remove them.
With shoring supporting all necessary bearing members, you’re ready to begin repairs.
Note: Some foundation contractors install two shoring posts—one on either side of the jacking post—for greater stability. Once the jack is removed, nail two 3-ft. long 2×4 diagonal braces between the two shoring posts; for this, use a pneumatic nailer. Hammer blows could dislodge the posts.
6. When your repairs are finished, begin to remove the shoring by reinserting the jacking apparatuses and then simultaneously raising all the jacks slowly and evenly to take weight off the shoring. Leave the cross bracing in place till those loads are removed. Then, keeping the jacking posts plumb, carefully remove the post-and – beam bracing and carefully lower and remove those elements. Gradually lower the building onto its new pads, posts, and foundation, and then remove the jacks.
The category minor repairs includes anything short of replacing a failed foundation, which is covered in the next section. Repairing surface cracks is explained on p. 205.
If floors slope down to a single point, there’s a good chance that a post or pad has failed. If a floor slopes down to an imaginary line running down the middle of the house, there’s probably a girder sagging because of multiple post or pad failures. Fortunately, the cures for both conditions are relatively straightforward.
Post repairs. The most common cause of wooden post failure is moisture wicking up through a concrete pad, rotting the bottom of the post. To replace a damaged post, use the techniques just described in "Jacking and Shoring.” Place footing blocks as close as possible to the existing pad, and jack just enough to take the load off the post—plus ‘/ in. Remove the rotted post, measure from the underside of the girder to the pad (remembering to subtract the ‘/ in.!), and cut a new post—preferably from pressure-treated lumber.
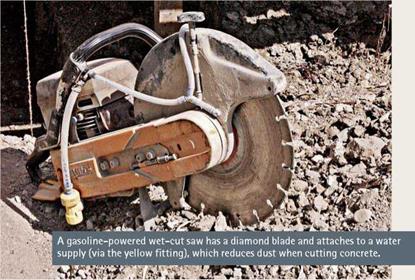
 To keep this new post from rotting, cut a sheet-metal plate to put under the bottom of the post; use aviation snips to cut the 22-gauge sheet aluminum. The metal will prevent moisture from seeping up through the concrete. Place the plate


Leave a reply