Measuring and Fitting Pipe
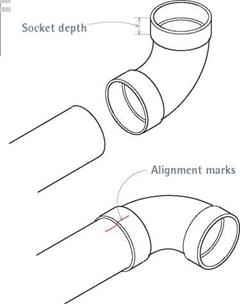
When measuring water-supply or dwv pipe runs, keep in mind that most pipe slides into fitting sockets. The depth of the socket is its seating distance (seating depth), which you must add to the face-to-face measurements between pipe fittings. When running pipe between copper fittings with a seating depth of VI in., for example, add 1 in. to the overall measurement. Rigid 3/4-in. copper fittings have a 3/4-in. seating depth.
As important, after you dry-fit pipes so fittings point in the correct direction, use a grease pencil or a builder’s crayon to create alignment marks on the pipes and fittings. That way you’ll be sure the fittings are pointing in the right direction when you make the final connections. Alignment marks are particularly important when cementing plastic pipe because you must turn plastic pipes one-quarter turn after inserting them into fittings; the marks tell you when to stop turning.
Socket Depths of ABS/PVC Fittings*
|
SOCKET |
SOCKET |
|
DIAMETER (in.) |
DEPTH (in.) |
|
IV2 |
3/4 |
|
2 |
7/S |
|
3 |
V/2 |
|
* Fitting sockets vary, always measure depth to be sure. |
threaded end. A sweat/female adapter has a threaded receiving end. Adaptors are also called transition fittings because they allow a transition in joining, as just described, or a transition in pipe materials. A dielectric union can join galvanized and copper, without the electrolytic corrosion that usually occurs when you join dissimilar metals.
Valves are specialized fittings with moving parts. Gate valves are the most common type of shutoff valve, although lever-handled ball valves are gaining popularity because they are easier to operate. Hose bibs have a threaded outlet that you can screw a garden hose to. Angle stops are shutoff valves that control water flow to lavatories, sinks, bidets, and toilets. TPR (temperature – and pressure-relief) valves are spring-loaded safety valves that keep water heaters from exploding should the water get too hot or the tank pressure too great.
WORKING WITH COPPER SUPPLY PIPE
Type M rigid copper is the most commonly used copper supply pipe in houses, although type L, which is thicker, may also be specified. Type K, the thickest of the three, is usually specified for commercial and industrial jobs.
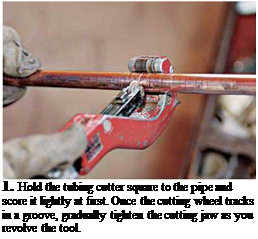
To cut rigid copper, place a tubing cutter on the pipe, so that its cutting wheel is perpendicular to the pipe. Score the pipe lightly at first, till the cutting wheel tracks in a groove. Gradually tighten the cutting jaw as you rotate the tool, until you cut through. If you tighten the tool too aggressively, you will flatten the pipe or score erratically, thus creating a weak joint.
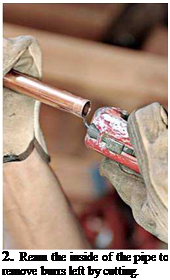
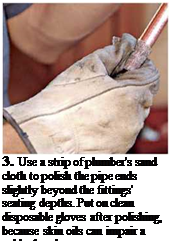
When the cut is complete, clean the end of the pipe with the deburring attachment on the cutter so that you get a good, solid joint. Leftover burrs also increase turbulence and thus decrease flow through the pipe. Use plumber’s sand cloth or
|
|
When measuring pipe, allow for socket depths. Also when dry-fitting pipe assemblies, draw alignment marks on pipes and fittings to help you point the fittings in the right direction when assembled. This is particularly helpful when giving plastic fittings one – quarter turn after glue is applied.
emery paper to polish both ends of the pipe, and a round wire brush to clean the insides of fittings.
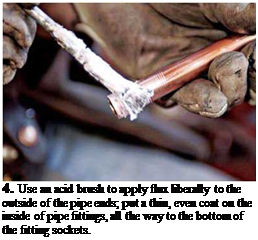
To solder copper pipe, first use a flux brush to apply self-tinning flux (soldering paste) to the outside of the pipe and the inside of the fitting. Then slide the fitting over the pipe. If the fitting is a directional fitting, such as a tee or an elbow, make sure that the fitting points in the correct direction.
Heat the fitting (not the pipe), moving the soldering torch so that all sides of the fitting receive heat directly. The flux will bubble. From time to time, remove the torch, and touch solder to the fitting seam. When the fitting is hot enough, the solder will liquefy when touched to it. After a few trials, you’ll know when a fitting is hot enough. When the fitting is hot, some fluxes change color, from milky brown to dull silver.
![]()
 |
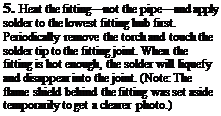
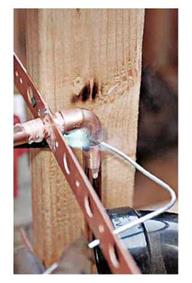
 Two passes with the solder, completely around the joint, will make a tight seal; more than two passes is a waste. The solder is sucked into the joint, so don’t worry if you don’t see a thick fillet of solder around the joint. Let solder cool before putting pressure on a joint. After a soldered joint
 has cooled for a minute, you can immerse it in water to cool it completely; but be careful when handling hot metal.
Soldering in tight spaces can’t always be avoided. If a fitting has several incoming pipes— at a tee, for example—try to solder all pipes at the same time. That is, reheating a fitting to add pipes will weaken earlier soldered joints. Clean and flux the pipes, insert them in the fitting, and keep the torch moving so you heat both ends of the fitting equally. If you must reheat a fitting to add a pipe later, wrap the already soldered joint in wet rags to keep its solder from melting. When soldering close to wood, wet the wood first with a plant spritzer filled with water and then use a flame shield to avoid scorching or igniting it.


Leave a reply