LAYOUT, STARTER ROWS, AND BEYOND
There are two places to install a starter row. The first and most obvious place is along a long wall. The second place is down the center of the room, which is recommended when rooms are wider than 15 ft., when rooms are complex, when several rooms converge, and when walls are out of parallel by 1 in. or more.
Flooring usually runs parallel to the length of a room, so start by measuring the width of the room at several points to see if the walls are parallel. If the walls aren’t parallel, split the difference eventually by ripping down the final row of boards on both sides of the room.
Use baseboards to conceal the expansion gaps. If baseboards aren’t thick enough to conceal the gaps, you may need to cut back the drywall as shown in "Concealing Floorboard Edges,” below.
Installing the starter row along a long wall. At
both ends of the room, measure out from the wall the width of a floorboard plus % in. for expansion. Snap a chalkline through those two points so you’ll have a straight line to align the starter row to. Place the groove edges of the first
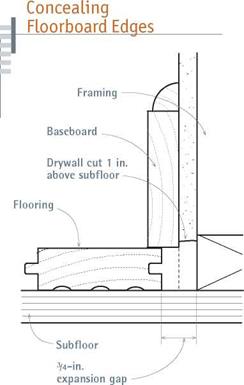 |
When walls are out of square, baseboards or shoe molding may not be wide enough to cover the 3/4-in. gap wood floors require. In that case, trim the bottom of the drywall about 1 in. to gain additional space.
row toward the wall, so the boards’ tongues face into the room. If you pick straight boards for the starter row, successive rows will be more likely to stay straight. Face-nail the boards in the starter row, driving pairs of 6d or 8d nails every 10 in. to 12 in., and placing them in 1 in. from the boards’ edges.
If you use a pneumatic finish nailer to face – nail the boards, you’ll be unlikely to split them.
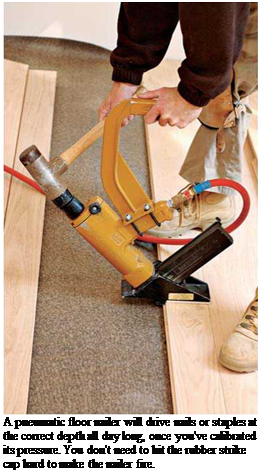
If you hand-drive the face nails, use a Me-in. bit to predrill for 6d spiral nails. In either case, sink the nail heads below the surface of the wood, and eventually fill holes with wood putty. Next, use the pneumatic flooring nailer to blind-nail (nail through tongues) boards every 10 in. to 12 in. To further avoid splits, don’t nail within 2 in. to 3 in. of a board’s end. Once the starter row is secured, blind – nail subsequent floorboards till you reach the opposite wall and run out of room to use the pneumatic nailer.
Installing the starter row in the middle of the room. Measure out from both long walls to find the approximate center of the room. If walls aren’t parallel, the centerline should split the difference of the measurements between the two walls. Snap a chalkline to indicate the centerline; line up the starter row to it. Because you don’t face-nail a starter course in the middle of a room, screw temporary blocks—scrap flooring is fine— along the chalkline to keep starter-row boards in place. Otherwise, they could drift as you drive nails through the tongues. Nail down five or six rows, before removing the temporary blocks.
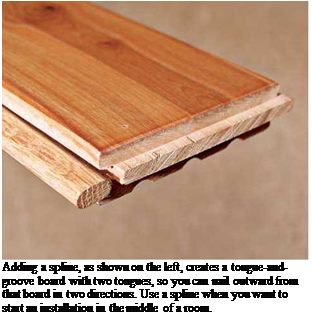
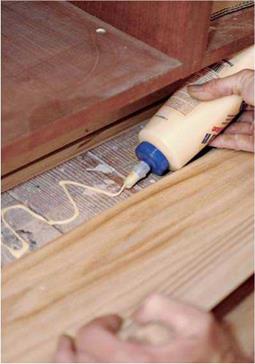
Next, add wood splines (also called slip tongues) to the grooves of starter-row boards, which most flooring stores carry. Adding splines allows you to blind-nail toward the opposite wall as well. Glue splines to board’s grooves, using scrap flooring to drive the splines snug without damaging them.
Installing the rest is straightforward. To speed the installation and ensure that board ends are staggered at least 6 in. between rows, have a helper rack (spread out) floorboards so you can quickly tap boards into position with the flooring mallet and nail them down. Floorboards come in regular lengths from 12 in. to 36 in. So to create a random joint pattern, use board remnants with irregular lengths to start rows.
Continue blind-nailing boards every 10 in. to 12 in., checking periodically to make sure the
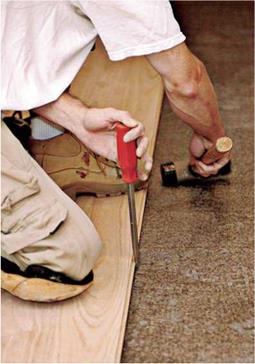
rows are straight. If milling irregularities or warping prevents boards from seating correctly, use a large flat screwdriver to lever the boards snug, as shown in the top left photo on the facing page. Set aside boards that are too irregular to use; professional installers typically order 5 percent extra to allow for warped or poorly milled boards and waste.
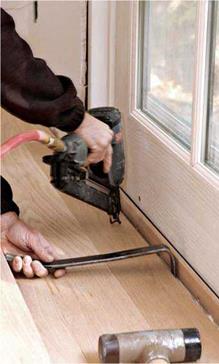
As you approach within a foot or two of the opposite wall or next to a base cabinet, you won’t have room to use the pneumatic flooring nailer, so switch to a pneumatic finish nailer. Nor will you have room to swing your flooring mallet, so use a pry bar to draw the boards’ edges snug. As you get within 6 in. to 8 in. of the wall, measure the distance remaining, including 3з4 in. for an expansion joint. In most cases, you’ll need to rip down the last row of floorboards. If they are less than 1 in. wide, first glue them to the next-to-the – last row and install the two rows as a unit. Or, if you’re installing floorboards of varying widths, rip down a wider board. The last row of boards should be face-nailed and glued to the subfloor as well. Finally, install prefinished transition pieces such as thresholds, reducer strips (strips that taper to accommodate differing floor heights) and so on. When you’ve sanded and finished the flooring, reinstall the baseboards.
Store extra flooring in a dry location. If the flooring has a warranty, file it in a safe place, along with the flooring’s code number and floor care information.
|
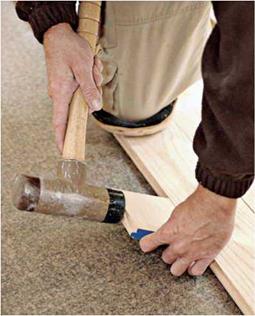
Using a piece of scrap to avoid damaging the tongues, drive the boards snug before nailing them. The friction between the tongues and the grooves will usually hold them during nailing. |
|
|
|
|||


Leave a reply