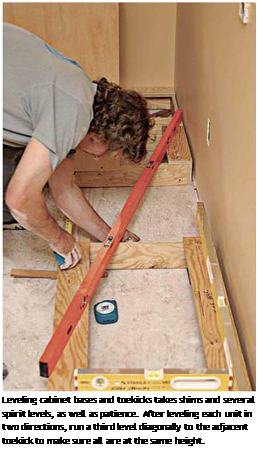
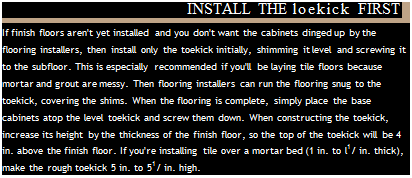
LAYING OUT CABINETS
Using a long level atop a straightedge, locate the high point of the floor. It’s easier to set a base cabinet (or rough toekick) at the floor’s high point and shim up the other cabinets to that level than it is to cut down cabinet bases and toekicks. From the floor’s high point, measure up the height of a base cabinet (usually 34h in. high) and mark the wall. Use a laser level, as shown in the top left photo on p. 45, to transfer the base cabinet mark to other walls, creating a level line around the room, which we’ll call the base cabinet layout line.
Marking off elements. Along the base cabinet layout line, mark off fixed elements, such as the stove, range hood, and refrigerator. Often, a sink cabinet will center under a window. If upper cabinets are to frame a window evenly on both sides, mark the edges of those cabinets. Once the large elements are marked onto the walls, mark off the widths of the individual cabinets. For frameless cabinets, measure from the outside of the side panels. The frames of face-frame cabinets extend slightly beyond the side panels, creating slight gaps between the boxes. Much of the time, the sides of wall and base cabinet units will line up vertically because they are the same width.
Wall cabinets. Use the base cabinet layout line to establish the bottoms of wall cabinets, too. Because wall cabinets are normally placed 18 in. above the finish countertop, measure 19h in. up from the base cabinet layout line to position the bottoms of the wall cabinets; shoot a laser level through that mark and lightly pencil a second level line around the room, which is the wall cabinet layout line. Over refrigerators and stoves, the bottoms of the wall cabinets will be higher. If you are also installing full-height pantry or broom cabinets, make sure their tops align with the tops of the wall cabinets; if they don’t, raise or lower the wall cabinets till the tops line up. Next mark off the width of the wall cabinets along the wall cabinet layout line.
Scribe locations. Layout marks should also include scribe locations, where you must install a narrow scribe piece (filler strip) to cover a gap between cabinets and an appliance or a space between an end cabinet and an irregular wall. Where cabinets meet at inside corners, 1 h-in.- or 2-in.-wide scribes are often needed to offset drawers or doors slightly, so they have room to pull past the cabinet knobs or appliance handles sticking out from the adjacent bank of cabinets.


 |
Marking studs. Finally, find and mark stud centers, to which you’ll screw the cabinets. To find studs, either use an electronic stud-finder, rap the walls with your knuckles, or drive small finish nails into wall areas that will be covered by cabinets. Whatever works! Use a spirit level to plumb light pencil lines that indicate the stud centers. It’s desirable to screw into as many studs as you can to secure wall cabinets, but screwing into only one stud is acceptable for base cabinets and for narrow wall cabinets that don’t reach two studs.


Leave a reply