INSTALLINGм SQUARE-CUT DOOR CASING
Few frames are perfectly square, so use a framing square to survey the corners. Note whether a corner is greater or less than 90°, and vary your cuts accordingly when you fine-tune the corner joints. Note, too, whether the floor is level, because side casing usually rests on the floor.
First, rough cut the casing. To determine the length(s) of side casings, measure down from the reveal line on the head frame to the finish floor.
(If finish floors aren’t installed yet, measure down to a scrap of flooring.) Cut the side casings about h in. long so you can fine-tune the joints; then tack the casings to the reveal lines on the side frames. (Use 18-gauge or 20-gauge brads.) Next measure from the outer edges of the side casings to determine the length of the head casing. If the ends of the head casing will be flush to the edges of the side casing, add only h in. to the head-casing measurement for adjustments. But if the head casing will overhang the side casing
slightly—a 14-in. overhang is common if head casing is thicker than side casing—add overhangs to your head-casing measurement. Cut the head casing, place it atop the side casings, and tack it up.
Fine-tuning casing joints. Because you cut the
side casings У in. long, the head casing will be that much higher than the head reveal line. But
|
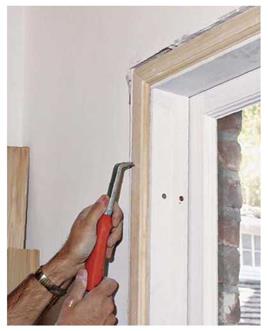
Use a scraper with replaceable carbide blades to shave drywall high spots and hardened joint compound. Use a utility knife to cut back shims still protruding around frames. |
|
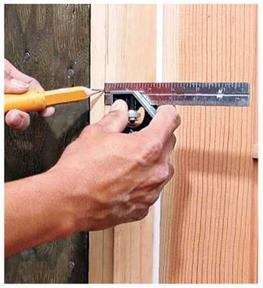
Using a combination square as a marking gauge, make light pencil marks on the jamb edges to indicate casing reveal (offset) lines. By offsetting casing and jamb edges, you avoid the frustrating and usually futile task of trying to keep the edges flush. |

INSTALLING SQUARE-CUT DOOR CASING
Square-cut head casing can easily span ganged windows or, as shown, a double door with windows on both sides. Here, a carpenter tacked up the door side casings before eyeballing the head casing to be sure the joints were flush.
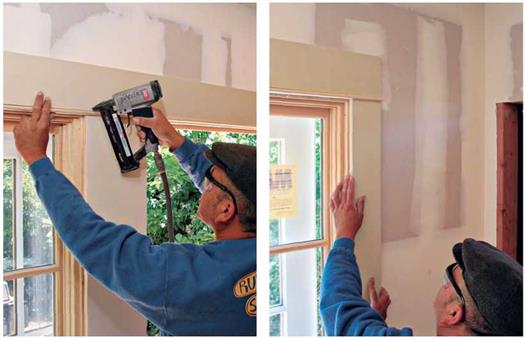
Use a pin-tacker (brad nailer) to tack the head casing till you’re sure all joints are tight. When that’s done, secure the casing with 6d finish nails.
Slightly back-cut the side casings to ensure a tight fit to the underside of the head casing.
with all casing elements in place, you can see if the head casing butts squarely to the side casings, or if they need to be angle trimmed slightly to make a tight fit. Use a utility knife to mark where the head reveal line hits each side casing, and then remove the side casings and recut them through those knife marks. Retack the side casings to the frame; then reposition the head casing so it sits atop the newly cut side casings. Finally, use a utility knife to indicate final cuts on both ends of the head casing, either flush to the side casing or overhanging slightly, as just discussed.
Gluing joints. Butt joints are particularly prone to spreading, so remove the tacked-up casing, and splice the joints with biscuits, as described earlier in this chapter. Spread glue on all joint surfaces, and nail up the side casing. (Insert biscuits, if used.) Draw the head casing tight to the side casing by angle-nailing a single 4d finish nail at each end. To avoid splits, predrill the two nail holes or snip the nails’ points. Then remove excess glue with a damp cloth.
INSTALLING MITERED DOOR CASING
Before installing the casing, first use a framing square to see if the doorway corners are square. If they aren’t, use an adjustable bevel to record the angles and a protractor to help bisect them. Then cut the miter joints out of scrap casing till their angles exactly match the door frame’s. You
|
SIMPLE BUTT JOINT
|
|
|
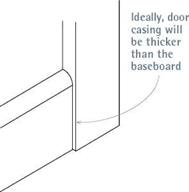
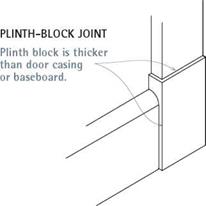
If baseboards are the same thickness as door casings, simply butt them together, or shape the end of the baseboard slightly to reduce its thickness.
can install mitered casing by first cutting the side casing and then the head casing, as you would with square-cut casing. But some carpenters maintain that the best way to match mitered profiles is to work around the opening. That is, start with one side casing, cut the head casing ends exactly, and finish with the second side casing.
Mark the first piece of the side casing, and
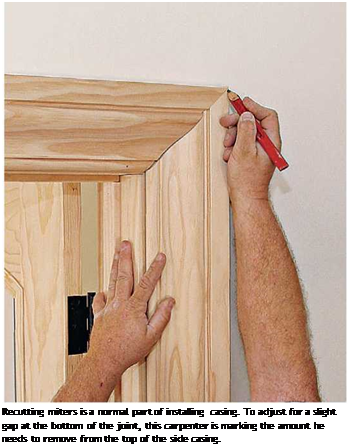
then cut it. After marking a!4-in. reveal around the frame, align a piece of casing stock to a reveal line on a side frame. Where head and jamb reveals intersect in the corner, make a mark on the casing, using a utility knife. (Or make the utility-knife mark!4 in. higher if you’re not confident you can cut the correct angle on the first try.) Miter-cut the top of the side casing so it matches the bisecting angle you worked out earlier on the scrap. Square-cut the bottom of the casing, and tack it to the frame using 18-gauge or 20-gauge brads.
Cut one end of the head casing in the same bisecting angle, leaving the other end long for the time being. Fit the mitered casing ends together, and align the bottom edge of the head casing to the head reveal line. Then, using a utility knife, mark the head casing where side and head reveals intersect in the second corner. You’ll cut through that mark, using the bisecting angle for the second corner (which may be different from the first corners). Again, there’s no shame in recutting, so you may want that utility-knife mark to be in. proud. When its miter is correct, tack up the head casing, and then line up the inside edge of the second side casing to the side reveal line. Use a utility knife to locate its cutline. Back-cutting miters slightly can make fitting them easier.
Whether you simply glue mitered joints or biscuit join them, remove all three pieces of casing before securely nailing them. If biscuit joining, after slotting each piece, reinstall the leg jambs, apply glue and biscuits, and fit the head casing down onto the biscuits. You can use miter clamps or 18-gauge brads to draw the joint together till the glue dries. Be sure to wipe up the excess glue immediately.
![]()

 |
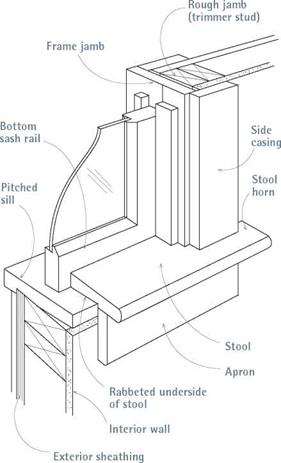
The casing of windows is essentially the same as the casing of doors, so review earlier sections about prepping frames and installing casing. The main difference is that the side casing of windows stands on a window stool, rather than on the floor. Consequently, most of this section
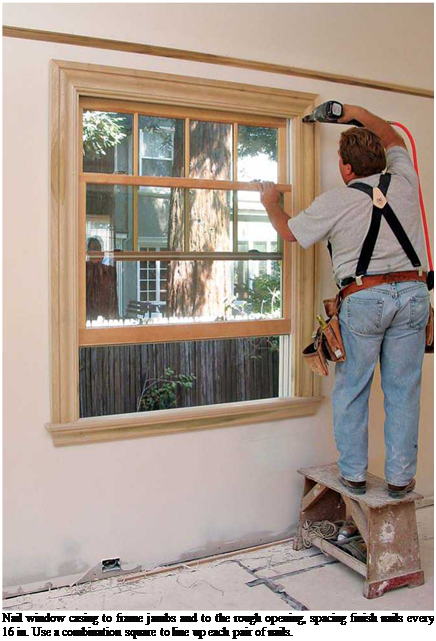 describes measuring and cutting the stool, which covers the inside of a windowsill, and the apron beneath the stool. Sills and stools vary, as described in "Windowsills, Stools, and Aprons,” on the facing page. The following text focuses on installing replacement stools appropriate to older windows.
Before you start, decide how far the stool "horns” will extend beyond the side casings and how far the interior edge of the stool will protrude into the room. Typically, horns extend И in. beyond ЗИ-in.-wide side casings, but use the existing casings as your guide.
To determine the overall length of the stool, mark И-in. reveals along both sides of the frame jambs. Then measure out from those reveals the width of side casings plus the amount that the stool horns will extend beyond that casing. Make light pencil marks on the drywall or plaster. Rough – cut a piece of stool stock slightly longer than the distance between the outermost pencil marks.
Next, hold the stool stock against the inside edge of the windowsill, centered left to right in the window opening. Using a combination square, transfer the width of the window frame, from the inside of one jamb to the other, to the stool stock. Use a jigsaw to cut along both squared lines, stopping when the sawblade reaches the square shoulder in the underside of the stool. So you’ll know when you’ve reached that shoulder, lightly pencil the width of the shoulder onto the top of the stool, using a combination square as a marking gauge. Next, cut in from each end of the stock to create the stool horns. Carefully guide your saw along the shoulder lines, being careful to stay on the waste side of the line. Clean up cutlines with a chisel, if needed.
The cutout section of the stool should now fit tightly between the frame jambs. Now, rip down the rabbeted edge of the stool so that it will be snug against the window sash, and the stool horns will be flush to the wall (and jamb edges). Push the stool in till it touches the bottom of the sash, and then pull the stool back Иб in. from the sash to allow for the thickness of paint to come. Finally, measure the distance between the stool horns and the wall, which is the amount to reduce the width of the stool, along the rabbeted edge.
Use a table saw to rip down the width of the stool, then test-fit it again. If it is parallel to (but Иб in. back from) the sash rail, you are ready to cut each horn to its final length. If your stool is flat stock, that’s the last step. But if the stool is molded (has a shaped profile), miter returns to hide the end grain of the horns, as shown in the photo on p. 414.


Leave a reply