INSTALLING WALL CABINETS
Wall cabinets must be leveled, plumbed, and solidly anchored, so transfer the locations of stud centers to the back of each wall cabinet, and predrill screw holes in the mounting rails, as you did for base cabinets. Remove the doors and shelves so the cabinets will be easier to lift and position next to the alignment marks you drew earlier along the wall cabinet layout line. Before lifting anything, however, use a 6-ft. spirit level to refresh your memory as to where the wall’s surface is out of plumb and where it bulges or recedes. Make light pencil notations on the wall.
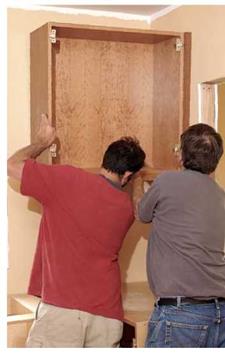
Supporting cabinets. It’s better to have a helper hold wall cabinets in place as you mount them. But if you’re working solo, the simplest support is a temporary support strip, a straight, predrilled M-in. by Hi-in. plywood strip placed immediately below the wall cabinet layout line and screwed to each stud with a #8 wood screw (see "Cabinet-Mounting and Edge Details,” on p. 306). With the cabinet bottom sitting atop it, the strip will support the box’s weight, freeing one of your hands to screw the top mounting rail to a stud. That first screw will hold the cabinet in place, but don’t sink it so deep that it bends the mounting rail.
Plumbing and shimming. Once that first screw is in, the cabinet should stay put, so you’ll have both hands free to shim the cabinet and check for plumb. A cabinet sitting on a leveled strip should have a level bottom and plumb sides— but check to be sure. The front of the cabinet must also be plumb. So if it’s not, insert shims between the wall and the cabinet. Although you can easily shim behind the top mounting rail, the support strip will prevent shimming from underneath; instead, shim the bottom corners from the side. If the top of the cabinet needs to come forward, slightly back out the screw in the top mounting rail. Once all the cabinet faces are plumb, drive a second screw through the top mounting rail and a third screw through the bottom rail, near the shim point. You will add another screw to the bottom rail later, after you remove the support strip and shim behind the fourth corner of the cabinet box.
Ideally, each wall cabinet should be secured to at least two studs with two #8 wood screws through the top mounting rail and two screws through the bottom rail. However, many wall cabinets are too narrow to reach two studs. Screwing cabinet boxes to each other lends additional support and spreads the load. But if a cabinet will be heavily loaded or if you’re uneasy
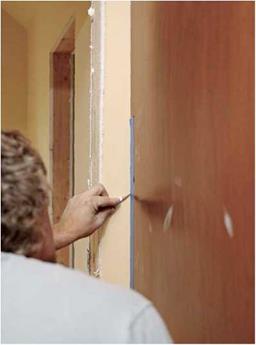
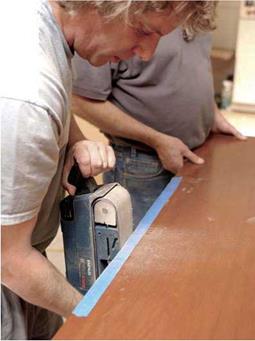
SCRIBING A PANEL TO AN IRREGULAR WALL
|
|
|
|
|
|

hanging it on only one stud, cut open the wall and let in (mortise) a piece of 1 x blocking into at least two studs. You’ll need to repair the wall—a rough patch is fine if it’s hidden by cabinets—but you’ll have plenty to screw to.
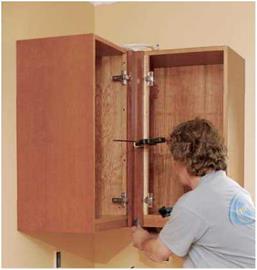
Tying cabinets together. Install the wall cabinets in roughly the same order you did base cabinets. If the cabinet layout is L – or U-shaped, start with a corner cabinet and work outward.
As you set successive cabinets, place a straightedge or a 6-ft. level held on-edge across several cabinet faces to make sure they’re flush. You may need to back out screws or drive them deeper to make the cabinets flush. Once they’re flush, clamp and screw them together as you did for the base cabinets. At that point, you can remove the support strip. With the strip gone, the space
behind the bottom mounting rail will be accessible, so add shims and screws as needed.
Finishing touches. Patch holes left by the support-strip screws or cover them with trim. Custom cabinetmakers often use a piece of trim with the same finish as the cabinets as a support strip and just leave it in place. Thus if the front of the cabinet has a 1 %-in.-wide trim piece running along the bottom to hide a lighting strip, use a piece of HCin.-wide trim as a support strip. Cover the cabinet-mounting screws with wood plugs or stick-on screw covers. Finally, install the shelves, drawers, doors, and hardware such as pulls or knobs.
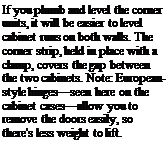
These days, most cabinets use European – style door hinges (shown at left), which are easy to remove, reattach, and adjust. Hinges are set into 35mm-diameter holes bored precisely into the door frames. The doors are attached to the cabinet box via baseplates; these hinges easily clip on and off the baseplates without the need to remove any screws. Once the cabinets are installed, clip on the doors and use the adjustment screws to raise the hinges up or down, in or out, until the reveals (gaps) between the doors are equal and the doors lie flat.


Leave a reply