INSTALLING AND FLASHING SKYLIGHTS
Follow the manufacturer’s instructions when installing and flashing your skylight, so the warranty will be honored should the unit leak. Installations shown are fairly typical.
Screw the mounting brackets to the sides of the skylight curb; most brackets are adjustable. Then, with one worker on the roof and one in the attic, pass the skylight out through the opening. As the worker outside raises or lowers the brackets till the top and bottom of the unit are level, the worker inside centers the unit in the opening.
|
|
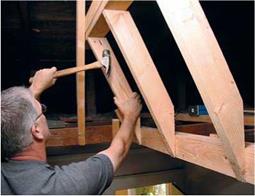
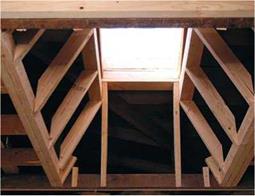
Different skylight, same installer. Here, he frames out the lightwell before cutting a hole in the ceiling because it was raining. First he headered off the ceiling joists, then the rafters around the roof opening, before angle cutting the studs between the two openings. (He cut the four corner studs first.)
|
|
 The same lightwell after the roof has been opened: Note the doubled headers around all sides of the opening. Because all walls flare, this is a complicated piece of framing.
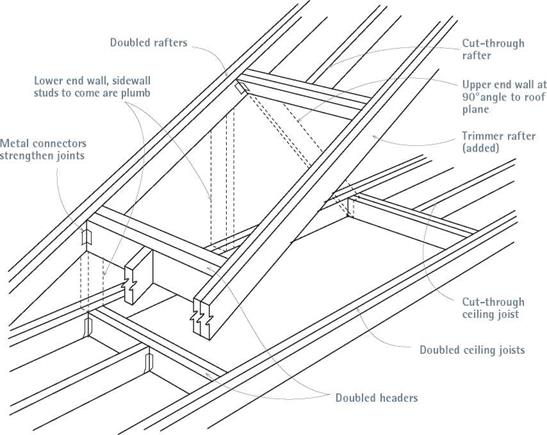
In addition to doubling headers at the ends of rough openings, double up rafters and joists running along the sides of openings. Framing out a lightwell will be somewhat easier if side walls and the lower end wall of the lightwell are plumb.
|
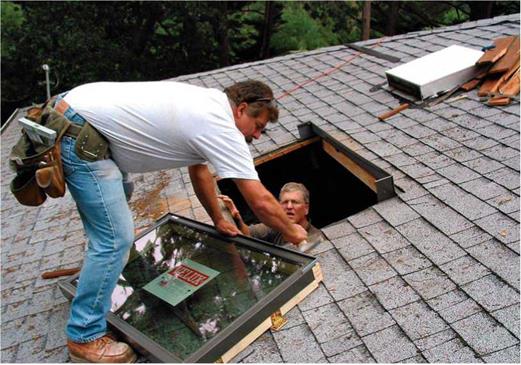
That done, the outside installer screws the bottom legs of the brackets to the sheathing.
Wrapping the curb with building paper or selfadhering membrane underlayment gives you an extra layer of protection before installing the unit’s apron, side flashing, and head flashing. Apply four 12-in.-wide strips of underlayment, one on each side, folding each so that it runs up onto the curb about 2 in. Apply the bottom piece first, which overlaps the shingles below; then place the side pieces and, finally, the top piece. If possible, slide the top piece of self-adhering membrane up under the building paper so you adhere it directly to the sheathing. Slit the folded strips where they overlap the curb corners so the strips lie flat, and apply a dab of roofing cement to adhere the slit pieces.
Install the apron flashing first, which runs along the lower edge of the skylight and overlaps the shingles below it. Holding the apron snug against the curb, attach it to the curb—not the roof—using a single screw (or nail) on each side. Although it’s usually not necessarily to caulk under the apron’s lower flange, follow the manufacturer’s advice for your unit. Ideally, the apron will line up with a course of shingles, but in renovation that’s not always possible.
Install step-flashing along the sides, weaving the L-shaped flashing between the shingle courses. Ideally, shingle courses should stop 14 in. shy of the curb so that water can run freely along the sides. The vertical leg of each piece of step-flashing
should extend up high enough so it will be protected from rain by curb caps; the horizontal leg should extend under the shingles at least 4 in. As with all flashing, avoid nailing in the channel where water will run. Rather, nail overlapping pieces of step-flashing to the curb only and high enough so the nails will also be protected by curb caps. If necessary, trim the last (uppermost) pieces of step-flashing so they don’t extend beyond the curb.
Install the head flashing by slipping its upper flange under the next full course of shingles above and pressing the head flashing snug to the curb. Attach the head flashing to the curb with one screw or nail at each corner. Then install a strip of building paper—or a second strip of selfadhering membrane—over the head flashing’s flange before shingling over it. Note: Stop the flashing strip and shingles 2h in. to 4 in. above the skylight curb, so there is a clear expanse of metal to clear leaves and accelerate runoff.
Installing cladding (curb caps) is the last step. These pieces cover and seal the tops of apron and side (step-) flashing and, on some models, the top of the head flashing as well. Follow your skylight’s installation guide religiously. In some fixed models, the head flashing is the last piece to go on, covering the upper ends of the side cladding pieces. Details vary, but caps snap or screw on. Note: Better-quality units have self-sticking foam gaskets that are applied to the top of the curb before the caps are installed, which reduces air and dust infiltration.
Once the unit’s mounting brackets are screwed to the sheathing, wrap the curb with building paper or selfadhering membrane as described in the text. (Note: Because rain began falling during this photo session, the curb wasn’t wrapped until later.) Here, the apron’s bottom flange overlays the shingles below.


Working from the bottom up, apply L-shaped step flashing along the side. Each overlaps the one below and is nailed with a single nail to the side of the curb. The last pieces of step-flashing slide up under the head flashing. When all the step-flashing is placed, counterflashing strips fit down over them, sealing the unit.
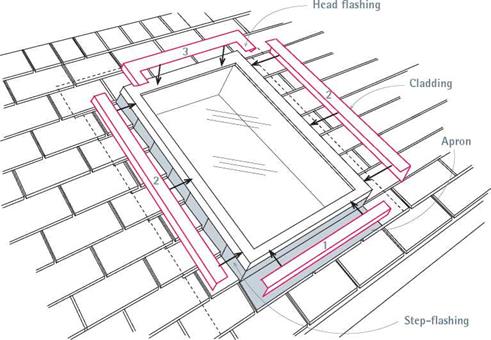 |
Cladding covers and seals the top legs of apron and step-flashing and—on some operable models—it covers the head flashing as well. Read installation instructions closely. Numbers on the cladding indicate the installation sequence.
Finish off with a couple more tasks. To reflect light, lightwells should be covered with drywall and painted a light color. Insulate around the lightwells to reduce heat loss and condensation. Because condensation is common around sky
lights, cover the lightwell with water-resistant (WR) drywall, often called greenboard for its color. Stiffen the well’s outside corners with metal cornerbeads.


Leave a reply