Installing a Basic Window
Some of the terminology for doors and door frames is common to windows and window frames. For example, frames are made of jambs, a head, and a sill, with stops to guide or seat window sashes. Window sashes, like door frames, have horizontal rails and vertical stiles.
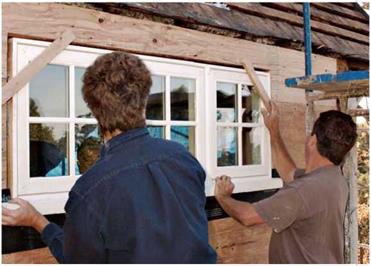
Windows arrive installed in a preassembled frame, complete with the hardware necessary to operate them. Unlike door installation, there is no need to trim window jambs, so the sill is always preattached. You can order windows precased (casing preattached), but such units can be tricky to shim properly. Uncased units are better suited to renovation: Local mills will offer a wider range of casings than window manufacturers, and you’ll have more latitude in adjusting casings to irregular walls or out-of-square frames.
Wood windows are the sentimental favorite. They’re also pleasant to work with and good looking, but they take a lot of maintenance. On the other hand, vinyl-clad and aluminum-clad wood units are virtually maintenance-free, though they cost more. Of late, all-vinyl units have become popular, and are an especially good choice in rainy regions. Metal windows, on the other hand, seldom look good as retrofits in older houses; and because they encourage condensation and heat loss, they’re a poor choice in cold climates.
Clad window units come in a variety of durable prefinished colors, eliminating costly exterior painting. Many manufacturers will customize a range of factory-built window units to your specifications. Options include a choice of fixed, double-hung, single-hung, sliders, bow, bay, casement, awning, and hopper styles; single – or double-glazing; many configurations of lights and muntins; custom glass for sound or UV light attenuation; safety glass; custom jamb widths; extended sill horns to accommodate various exterior casing details; and mulled units (windows
 |
ganged together to create larger units). These factory-built wood windows are generally made to tighter tolerances than shopbuilt windows, ensuring good weather tightness and insulation values.
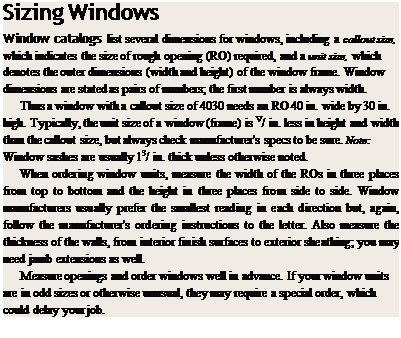
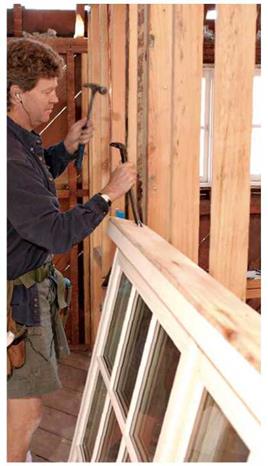
Before ordering windows and again just before installing them, check the ROs for level and plumb. Most window units will need some shimming, but if the sill is level, the rest of the installation will be relatively easy. Typically, an RO is 1 in. taller and wider than the window frame.
Water is persistent, so always wrap exterior wall openings with moisture barriers before installing windows, and use cap flashing on the frame heads to direct water around the opening. The order in which you install weatherproofing materials depends on several variables: Is exterior sheathing exposed or covered by building paper
|
Before installing windows, carefully remove the packaging and shipping blocks. |
and siding? And are window units uncased, precased, or surrounded by a continuous nailing flange?
If the sheathing is exposed, run housewrap or building paper at least 4 in. into the RO, and staple it to the framing. However, leave the housewrap over the top of RO unstapled because it will overlap the window’s cap flashing later.
Alternatively, you can first flash the perimeter of the RO with strips of fiberglass-reinforced flashing or with self-adhering membrane. Selfadhering membrane is more expensive, so it’s often reserved for flashing sills and head casing, which are more likely to leak. Flash the sill first, folding the strip ends so they extend at least 6 in. up onto the jack studs. Then flash the jack studs, overlapping the upturned ends of sill flashing. (But don’t flash the head of the opening yet; that needs to wait till the window is installed.) Then run housewrap or building paper up to the edges of the opening, overlapping the strip flashing just installed.
If the exterior is already covered with building paper and siding, you’ll need to fit flashing strips and cap flashing under it. If there’s lap siding such as clapboards, or wood shingles, this is relatively easy: Drive a shingle ripper up under siding courses to cut the nails holding them, slide flashing strips under the existing building paper and siding, and then caulk and install the unit, as described in the next section. Cut siding nails back at least 4 in. around the opening, although you may want to cut back shingles 12 in., allowing you to offset the shingle joints correctly.


 Replace and renail the siding, as necessary; then caulk and install the window as described in the next section.
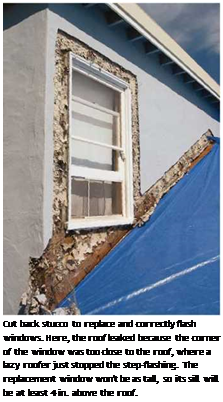
If there’s stucco, the only way to retrofit flashing successfully is to cut back the stucco and wire lath 6 in. to 8 in. around the opening, using an electric chipping hammer (see the top photo on p. 145). After installing the new unit, insert flashing beneath the existing building paper (especially the cap flashing), tie new wire to the old, and patch the stucco.


Leave a reply