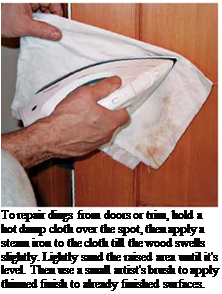
Finishing Tips
Details on stripping trim, prep work, stains, dear finishes, and paints are given in Chapter 18. Here’s a handful of additional tips:
► Most trim stock comes smooth enough to paint or stain. If you find rough spots, sand them with 120-grit to 180-grit sandpaper before finishing. If molding has only a few rough spots, wrap sandpaper around a block for flat trim or use a sanding sponge for shaped stock. Use a palm sander or an orbital sander on flat trim with a lot of rough spots.
► If you apply a first coat of finish or paint to the trim before installing it, you won’t need to worry about getting finish on painted walls and ceilings. Cut and attach the trim, sand and fill joints as needed, sink nail heads, fill holes with crayon putty, and lightly final sand. Apply the final coat in place, using long brushstrokes to achieve a smooth finish.
► After cutting prefinished trim, wipe sawblades with solvent to clean them.
► If you decide to finish the trim in place, tape 12-in.-wide masking paper to the area around the trim. When the finish is dry, peel off the masking paper.
► Use wax crayon putty to fill holes in prefinished trim. Avoid wood fillers because their solvent can partially dissolve the finish. However, if the wood is unfinished, apply filler before staining it. Filler can be stained and sanded, but be sure to test the colors on scrap blocks first.
► Use the smallest possible brads or nails to attach the trim, and you’ll have less to fill. On dark wood, brad holes are almost invisible.


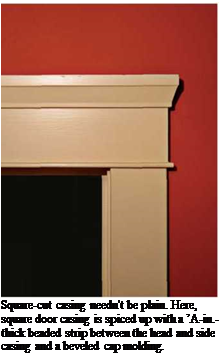
ing profiles as they converge at a corner; square cut, made with basic butt joints; and corner block, a variation of square cut with discrete blocks at the top corners and sometimes bottom corners as well. (Bottom corner blocks are also called plinths. Top corner blocks are called caps.)
Frame edges should extend no more than Zu in. beyond finish surfaces. If they protrude more, sink any nails, and then plane down the frame. If frame edges are level or, say, Уїв in. below the wall surfaces, leave them alone. If the edges are sunk more than that, build them up with shim strips ripped from stock of the same thickness. Scrape the old frame so that it’s flat, glue on the strips, tack with brads if you like, and wipe up the excess glue at once. Also survey the walls around the frame, scraping down globs of joint compound or hammering down (compressing) high drywall spots that would make the trim cockeyed.
Boards are rarely perfectly straight, and frame jambs and casing stock are no exception. So instead of trying to nail board edges flush, set the inside edge of casings back ‘/ in. from the frame edges. This setback is called a reveal: It looks good and will spare you a lot of frustration. Use the rule of your combination square as a depth gauge. Set the rule to І4 in., and slide along the edge of the frame, making pencil marks as you go. Where head reveals intersect with side reveals, mark the corners carefully.


Leave a reply