Cubic Yards of Concrete in Slabs of Various Thicknesses* t
|
/ |
 |
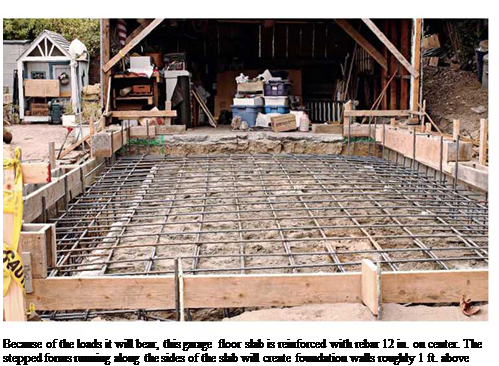
slabs consist of 4 in. of concrete poured over 4 in. of crushed rock, with a plastic moisture barrier between. In addition, garage floors are often reinforced with steel mesh or rebar to support greater loads and forestall cracking.
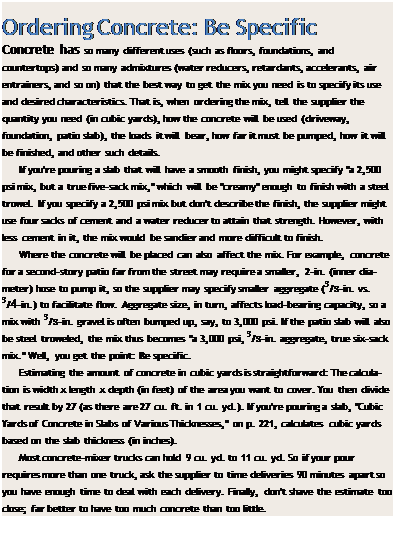
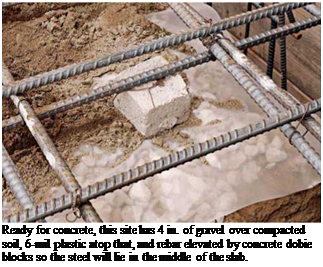
As with any concrete work, get plenty of help. Concrete weighs about 2 tons per cubic yard, so if your slab requires 10 cu. yd., you’ll need to move and smooth 40,000 lb. of concrete before it sets into a monolithic mass. Time is of the essence, so make sure all the prep work is done before the truck arrives: Tamp the crushed stone, spread the plastic barrier (minimum of 6 mil), and elevate the steel reinforcement (if any) on
dobie blocks or wire high chairs so it will ride in the middle of the poured slab. Finally, snap level chalklines on the basement walls or concrete forms to indicate the final height of the slab— you’ll screed to that level.
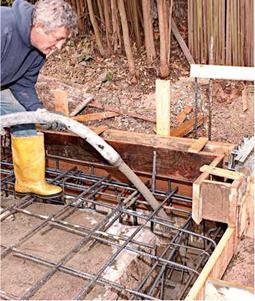
To pour concrete with a minimum of wasted energy, use a 2-in. (interior diameter) concrete – pump hose. A hose of that diameter is much lighter to move around than a 3-in. hose. Another advantage: It disgorges less concrete at a time, allowing you to control the thickness of the pour better. And a 2-in. hose gives easier access to distant or confined locations. Important: As you place concrete around the perimeter of the slab, be careful not to cover up the chalklines you snapped to mark the slab height. And as you
 place concrete in the slab footings, drive out the air pockets by using a concrete vibrator.
Establishing screed levels. If the slab is only 10 ft. or 12 ft. wide, you can level the concrete by pulling a screed rail across the top of form boards. Otherwise, create wet screeds (leveled columns of wet concrete) around the perimeter of the slab and one in the middle of the slab to guide the screed rails. The wet screeds around the perimeter are the same height as the chalklines; pump concrete near those lines and level it with a trowel. This technique is very much like that used to level tile mortar beds, as explained in Chapter 16.
The wet screed(s) in the middle should be more or less parallel to the long dimension of the slab. There are several ways to establish its height, but the quickest way is to drive 18-in. lengths of rebar into the ground every 6 ft. or so, and then use a laser level or taut strings out from perimeter chalklines to establish the height of the rebar. In other words, the top of the rebar becomes the top of the middle wet screed. When you’ve troweled that wet screed level, hammer the rebar below the surface, and fill the holes later.
Screeding is usually a three-person operation: two to move the screed rail back and forth, striking off the excess concrete, and a third person behind them, constantly in motion, using a stiff rake or a square-nose shovel to scrape down high spots or to add concrete to low ones. You can use a magnesium screed rail or a straight 2×4 to strike off, but the key to success is the raker’s maintaining a good level of concrete behind the screeders, so the screed rail can just skim the crest of the concrete, without getting hung up or bowed by trying to move too much material.
Screeding levels the concrete but leaves a fairly rough surface, which is then smoothed out with a magnesium bull float, a long-handled float that also brings up the concrete’s cream (a watery cement paste) and pushes down any gravel that’s near the surface. This creates a smooth, stone-free surface that can be troweled and compacted later.
A bull float should float lightly on the surface. As you push it across the concrete, lower the handle, thereby raising the far edge of the float. Then, as you pull the float back toward you, raise the handle, raising the near edge. In this manner, the leading edge of the bull float will glide and not dig into the wet concrete.
 |
 |
 |
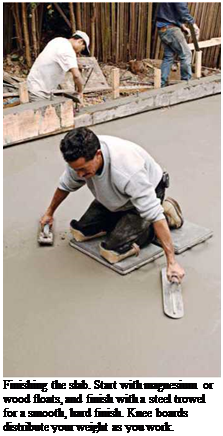
After the bull float raises water to the surface, you must wait for the water to evaporate before finishing the concrete. The wait depends on the weather. On a hot, sunny day, you may need to wait less than an hour. On a cool and overcast day, you might need to wait for hours. Once the water’s evaporated, you have roughly 1 hour to trowel and compact the surface. When you think the surface is firm enough, put a test knee board atop the concrete and stand on it. If the board sinks % in. or more, wait a bit. If the board leaves only a slight indent that you can easily hand float further and then trowel smooth, get to work.
As the photos show, knee boards distribute your weight and provide a mobile station from which to work. You’ll need two knee boards in order to move across the surface, moving one board at a time. Then, kneeling on both boards, begin sweeping with a magnesium hand float or with a wood float, if you prefer a rougher finish. Sweep back and forth in 3-ft. arcs, raising the far edge of the float slightly as you sweep away and raising the near edge on the return sweep. The “mag” float levels the concrete.
After you’ve worked the whole slab, it’s time for the steel trowel, which smooths and compacts the concrete, creating a hard, durable finish.
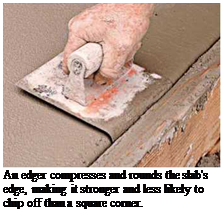
As the concrete dries, it becomes harder to work, so it’s acceptable to sprinkle very small amounts of water on the surface to keep it workable. Troweling is hard work, especially on the back. When the concrete’s no longer responding to the steel trowel, edge the corners and then cover the concrete with damp burlap before calling it a day. If the weather’s hot and dry, hose down the burlap periodically—every hour, at
 least—and keep the slab under cover for 4 or 5 days. At the end of that time, you can remove the forms. Concrete takes a month to cure fully.


Leave a reply