CREATING A TEMPLATE
Bring resilient flooring sheets onto the job site at least 24 hours before working with it, so it has time to acclimate to room temperatures (at least 68°F) Resilient materials are more pliable when they have warmed and less likely to crimp or crease. As you roll and unroll resilient sheets, be careful not to crimp the material, which could crease its surface and be visible forever after.
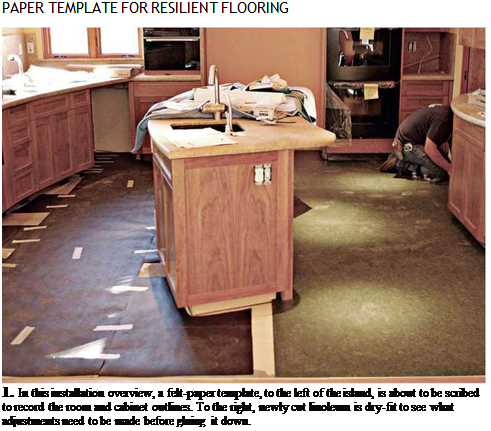
There are several ways to transfer a room’s dimensions to resilient flooring sheets, but none so accurate as creating a template, especially if there are refrigerator alcoves or base cabinets to work around. Create the template with 15-lb. felt paper, which is inexpensive and, being stiffer than rosin paper, is not likely to tear as you transfer the room’s outline to the resilient flooring. Using a utility knife, rough-cut pieces of the paper so they approach within 1 in. of all walls, cabinet bases and the like. Beyond that, don’t agonize about fitting the paper too accurately. That is, the paper doesn’t need to butt against walls and cabinets because the scribing tools will span small gaps between the edge of the paper and the perimeter of the room. If the jaws of the scribing tool are 1 ‘A in. wide, they will scribe a guideline onto the paper that is uniformly 112 in. away from the base of walls, cabinets, etc.
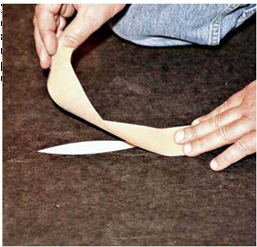
As you roll out individual pieces of paper, overlap their edges about 2 in. and use duct tape to join them. Once you’ve covered the floor with felt paper, use a utility knife to cut small (2-in. by
5- in.) boat-shaped holes in the paper every 3 ft. to 4 ft., as shown in the top right photo on p. 504.
As you cut each boat-shaped hole, cover it with duct tape, which adheres through the holes to the subfloor. This will keep the paper from moving as you scribe the perimeter of the room.
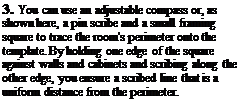
Many installers use a scribing tool or a compass set at about 112 in. to trace the shape of the
room and cabinets onto the paper to create a template that they will later transfer. But the installer shown on the following pages preferred a small framing square and a pin scribe. The 112-in. width of a framing square’s blades (legs) ensured a uniform scribing distance, and the square fit easily under the cabinet toekicks. Holding one edge of the square flush to the wall, he ran the point of the pin scribe along the other edge— scribing a light line in the felt paper 1 ‘A in. away from the wall. Because the square’s blades are straight, along curved surfaces he moved the square often, making a number of scribe marks to indicate the arc of the curve.
 |
 |
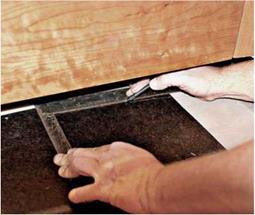 It’s okay to use several sections of felt paper if a room is large or unusually complex. In this case, be fastidious about marking section edges so you can reassemble and tape them to the resilient sheeting before transcribing the room outline. On a room of any size, you’ll probably need to use several sheets of resilient flooring as well. (Sheet widths vary from 6 ft. to 12 ft.) Important: When you’re done scribing, gently lift the template—but leave the duct tape stuck to the paper. Loosely roll up the template and carry it to the room where the resilient sheet has lain unrolled on the floor, face up, to warm and flatten. Line up template edges to trimmed flooring edges. Then carefully unroll the template so it lies flat atop the resilient material (Step 4). Press down the “boats” so the duct tape sticks to the resilient flooring, anchoring the template.


Leave a reply