Common Interior Glues
|
COMMON, CHEMICAL NAME(S) |
PROS |
CONS |
BRANDS |
|
White carpenter’s, Polyvinyl acetate |
Moderate strength; inexpensive |
Runny; poor initial tack; clogs sandpaper |
Elmer’s® Glue-All® |
|
Yellow carpenter’s, polyvinyl acetate |
Strong; good initial tack; sands well |
Titebond® Original |
|
|
Polyurethane |
Bonds to most materials; sands well; takes stain; fills gaps; water resistant |
Glue expansion can spread joints not tightly clamped; slow tacking time; stains skin |
Gorilla Glue®; Titebond |
|
Cyanocacrylate |
Instant bond; great for nonstructural joints; bonds many materials |
Expensive; can’t adjust pieces once placed, skin/eye hazards |
Super Glue™; Hot Flash; Turbo Flash |
|
Hot glue |
Quick-tack glue to create thin plywood templates |
Limited strength, but okay for temporary positioning; low-stress joints |
Hotstik; Bostick HotMelt |
|
Contact cement |
Instant bond; resists heat and water; best for attaching plastic laminate and veneers |
Can’t adjust once sheet and substrate make contact; volatile solvent; needs good ventilation |
DAP® Weldwood™; 3M® Fastbond® |
* Several Web sites offer interactive product selectors. Specify how and where you’ll use the adhesive, and the selector will choose a product (www. titebond. com is particularly good).
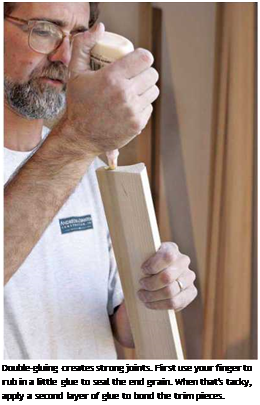
the trim. But splicing joints with biscuits is by far the better way to keep them from spreading. Use a biscuit joiner to cut slots into mating edges; then inject glue into the slots and spread it evenly on the casing ends. Place biscuits in the slots and reassemble the joints, drawing the joints tight with a single 4d or 6d finish nail angled into butt joints or end-nailed through miter joints. Use a damp cloth to wipe off excess glue.
Drive nails into framing whenever possible.
If framing members are spaced 16 in. on center, nail trim to every stud or ceiling joist it crosses. Where trim runs parallel with the framing, as with side casing, nail the trim at the ends and roughly every 16 in. in the field. Equally important is using the right nail or screw to avoid splitting the wood trim. (The table on p. 415 recommends sizes for most trim applications.)
To attach narrow molding such as quarter – round, use a single row of finish nails. On wider molding, use two nails to prevent cupping: Set the nails at least ‘A in. from the edge, and use a square to line up nail pairs.
It’s usually not necessary to predrill softwood trim to prevent splits. If you use a pneumatic nailer, do not nail too close to the edge, and don’t use to too big a nail. However, when nailing hard-

![]()
![]()
![]()
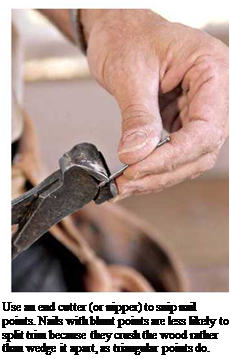
 wood trim or nailing the ends of boards, predrilling is smart. Use a drill bit whose shank is thinner than the nail’s. Alternatively, you can minimize splits by using nippers to snip off the nail points, as shown in the photo at right. It’s a bit counterintuitive, but it works.
Before painting, caulk all gaps between the casing and the wall.
Before casing doors and windows, review "Assessing and Prepping the Opening,” on p. 92, particularly the remarks on margining, centering jambs in relation to a wall’s thickness. Then survey the door and window frames to be cased; use a 4-ft. level and a square to see if the frame jambs are plumb, margined, and square.
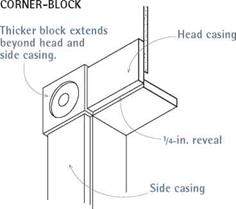
Door casing is trim that covers the gaps around a door frame. It thus goes on after a door has been hung. Most often casing consists of three pieces: two side casings (leg casings), which cover frame jambs, and one piece of head casing, which goes over the frame head. Six pieces, if you count both sides of a doorway.
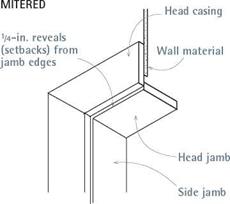
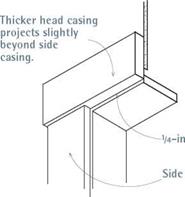
There are three common casing joints: mitered, preferred for trim that is molded (shaped) because it enables you to match mold


Leave a reply