CLEANING UP MOLD
Mold can’t grow without moisture, so first identify and correct the source(s) of the excess moisture before you start cleaning up. Otherwise, the mold can return.
Necessary precautions. Limit your exposure to mold spores by wearing a respirator mask with N95 (or higher) filters, rubber gloves, eye protec-
![]()

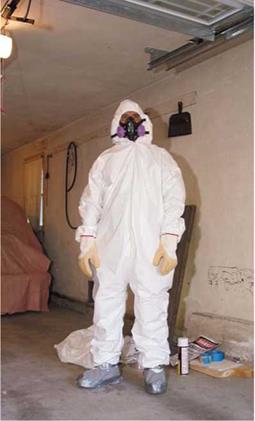
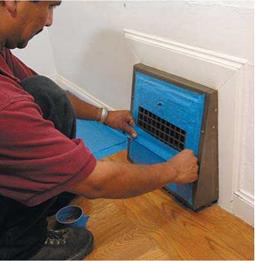
tion, and disposable coveralls, which you should discard at the end of each day. After assessing the mold’s extent, determine the shortest way out of the house for contaminated materials—maybe out a window—to minimize spreading mold spores to clean areas. Use sheet plastic to seal doorways and heating registers in affected areas, and turn off central HVAC systems till the remedial work is complete. Seal damaged materials in plastic before transporting them from the site. Never sand moldy materials because that will spread spores. Finally, rent a commercial-grade vacuum with HEPA filters; if possible, vent it to the outside.
Assessing the extent. If mold is limited to small areas at the top of a bathroom or exterior wall, it may be surface mold caused by condensation or inadequate ventilation. However, if mold is widespread around windows or doors, bathroom drywall is crumbling, or tiles mounted on dry – wall are loose, there’s probably mold growing in the walls. Start looking at the base of the walls. О Turn off the electrical power to the area, remove the baseboard, and use a utility knife or a hole saw to cut small holes in the drywall. If there’s no mold, you can easily patch the holes and cover them with the baseboard. More likely, you’ll find stained or rotted wall plates and extensive mold colonies.
Throw out moldy drywall or hardboard. On the other hand, moldy lumber and engineered wood products such as plywood, particleboard, and OSB (oriented strand board) may just have surface mold, so probe them with an ice pick or
|
|
pocketknife to see how sound they are. If they are spongy, replace them. Engineered wood products are particularly susceptible to rot because they contain adhesive binders that fungi feed on.
Remediation. Wash surface mold with soap and water and let it dry well. There’s no need for caustic bleaches to kill mold spores (and irritate your lungs) because washing should remove mold. After the surface has dried, paint it with a stain killer such as B-I-N.® If mold has caused the drywall’s paper facing to roughen or delaminate, cut back the drywall at least 1 ft. beyond the damaged area and replace it.
If your inspection revealed mold growing inside wall cavities, use sheet plastic to seal off the affected area, including the heating registers; then cut back damaged drywall to the nearest stud center on both sides, and cut out damaged framing, if any. If you must replace more than one stud, erect temporary shoring to support the loads above (see Chapter 10). To contain sporeladen dust, have a helper hold the hose of the commercial-grade vacuum near the materials being cut. Using soapy water, scrub the surface mold from the framing, and allow all materials to dry before installing new drywall—framing moisture content should be 15 percent to 20 percent


or less. (Borrow or buy a moisture meter to check.) Wrap moldy debris in 6-mil plastic and have it carted away.
Seal air leaks before installing insulation because insulation won’t be an effective thermal barrier if air can move freely around and through it.
As you’ll see, stopping air is also a major consideration in choosing insulation that’s right for the renovation.
There are dozens of insulating materials, which can be classified into four groups: batt (in precut lengths or continuous rolls), blown in, rigid foam, and sprayed on.
Batts are made of recyled cotton, mineral wool, and fiberglass; but fiberglass batts are the giant
|
Insulation Values |
|
|
TYPE OF |
R-VALUE |
|
INSULATION |
PER INCH |
|
Batts and blankets |
|
|
Fiberglass |
3.2 |
|
High-density fiberglass |
3.8 |
|
Cotton |
3.2 |
|
Mineral wool |
3.2 |
|
Loose fill (blown in) |
|
|
Cellulose |
3.2 |
|
Fiberglass |
3.2 |
|
Mineral wool |
3.1 |
|
Cotton |
3.2 |
|
Rigid board |
|
|
Expanded polystyrene (EPS) |
4.0 |
|
Extruded polystyrene (XPS) |
5.0 |
|
Polyisocyanurate |
6.5 |
|
Spray on (contractor applied) |
|
|
Polyurethane |
6.0 |
|
Open-cell polyurethane |
3.6 |
|
Wet-spray cellulose |
3.5 |
|
Magnesium silicate |
3.9 |
to Fight moi
R-Values of Common Building Materials
|
MATERIAL |
R-VALUE |
|
8-in. concrete (solid) |
0.90 |
|
4-in. common brick |
0.80 |
|
31/2-in. wood stud (on edge) |
4.5 |
|
‘/2-in. plywood sheathing |
0.63 |
|
3/,-in. plaster or ‘/2-in. drywall |
0.40 |
|
Glass |
|
|
Single pane |
0.89 |
|
Double pane |
1.91 |
|
Triple pane |
2.80 |
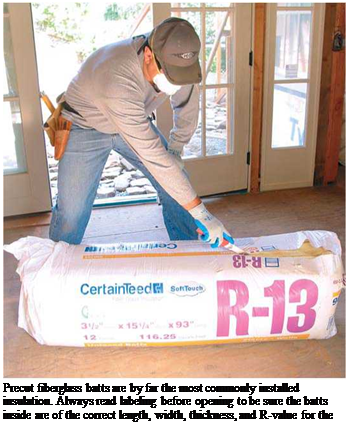 of the group, accounting for three-quarters of all residential insulation. As a group, batts are easy to install; cost effective; and available in a variety of widths, thicknesses, and densities. Batts faced with kraft paper, foil, or plastic are installed by stapling facing flanges to framing edges; unfaced batts are friction fitted between studs, joists, or rafters. In attics, unfaced batts are instead laid perpendicularly atop existing batts to improve heat retention.
Batt insulation is an effective thermal barrier if it’s installed correctly and fills cavities completely. Unfortunately, framing is often irregular in older houses, and batts with precut widths may not totally fill the cavities. Consequently, if installers don’t fill gaps, cut batts a bit short, allow facing flanges to pucker, or don’t take time to fit insulation behind pipes and electrical cables, air movement can dramatically reduce the insulation’s R-value.
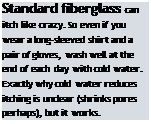
That caveat noted, batts are safer to work with and more insulative, thanks to numerous innovations. In response to eye, skin, and lung irritation caused by loose glass fibers, insulation makers now offer fiberglass batts encapsulated in perforated or woven plastic wrapping—particularly
helpful when you’re insulating ceilings and don’t want fiberglass fibers raining down on you. In some products, such as Miraflex®, the fiberglass has been reformulated so that it’s soft, itchless, and formaldehyde free. And there is a slew of high-density fiberglass batts: 3h-in.-thick batts that are rated at R-ll, R-13, and R-15 and 51/2-in.- thick batts rated at R-21. Note: If you compress batts into the cavities, you’ll decrease the insulation’s loft and thus reduce its R-value slightly.
Cotton batts (usually unfaced) are formaldehyde-free, absorb sound well, block air infiltration, insulate well, and won’t make you itch. Cotton batts are treated with a natural biostat (borate) to inhibit mold and make them fire resistant. Wear a disposable paper mask when installing cotton: Although its lint is more benign than airborne glass fibers, avoid breathing it anyway. Mineral wool (also called rock wool) is spun from natural stone such as basalt or from blastfurnace slag and is the most fire resistant of any insulation. Mineral wool batts are installed mainly in commercial buildings because they are costly, heavy, and raise health-related concerns similar to those of fiberglass.
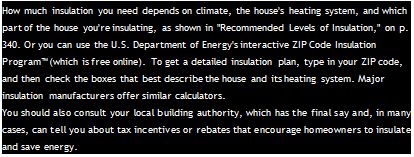
Blown-in insulation is the best insulation for wall cavities when you don’t want to rip out finish surfaces. It’s also good for insulating attic floors for the first time and adding to insulation that’s already there. Loose-fill fiberglass is occasionally blown in, but cellulose is by far the material most often blown in. At low densities (1.5 lb./cu. ft.) cellulose traps air and is an effective insulator (R-3.5). And when it’s dense packed (3 lb. to 4 lb./cu. ft.), that increased density effectively seals air leaks. In fact, some New England contractors report that old houses retrofitted with dense-packed cellulose are as airtight as new houses with polyethylene vapor barriers under the drywall.
Blowing-in insulation is dusty work, so most contractors prefer to gain access to wall cavities by prying off small sections of exterior siding and drilling through exterior sheathing. You can work from the inside, drilling discrete holes in the plaster or drywall, but empty the room first. In either case, a successful insulation depends on filling all cavities completely—not so easy if walls contain nonstandard framing, diagonal bracing "let into” studs, or fire-stop blocking.
Most blown-in cellulose is environmentally friendly and reasonably pleasant to work with if you wear a dust mask. Made from recycled paper, cellulose doesn’t itch, and is often treated with borates to make it more resistant to mold, insects, and fire. Treated cellulose will not rot if it becomes wet, but it will absorb water. If leaks or condensation are minor, moisture will migrate
out of the walls in time. But cellulose doesn’t dry quickly, so if it gets soaked, remove it; otherwise, drywall installed over it could get moldy and deteriorate. For this reason, although cellulose can be wet-sprayed into open cavities, only an experienced installer should do so.
Rigid-foam panels are the best choice for insulating below-grade areas such as basement and crawl space walls, where there’s sometimes seepage or condensation, and for retrofitting insulation to exterior sheathing or foundations. In other words, use panels wherever batt, blown-in, or sprayed-on insulation can’t do the job. Conversely, don’t use rigid foam where odd spaces and air infiltration require insulation that can be shaped. Rigid-foam panels boast some of the highest R-values per inch, but the poorest UV and fire resistance, so consult local codes to determine how to fireproof rigid panels.
Expanded polystyrene (EPS), extruded polystyrene (XPS), and polyisocyanurate (polyiso) are the panels most commonly installed in homes. Panels come in widths of 12 in., 16 in., 24 in., and 48 in.; lengths in multiples of 2 ft., up to 12 ft.; and thicknesses from h in. to 4 in. EPS is the least expensive and has the lowest R-value (R-4 per inch); it is usually unfaced. XPS is intermediate in price and R-value (R-5 per inch); often faced with foil or polyethylene film, it is the most water resistant of the panels discussed here and hence the best for insulating foundations. Polyiso is the most costly, has the highest R-value (R-6.5 per inch), and has the lowest compressive strength of the three materials—though its foil
facing improves its durability. Since the insulation industry switched from ozone-depleting blowing agents to pentane in manufacturing it, polyiso has been considered an environmentally friendly material.
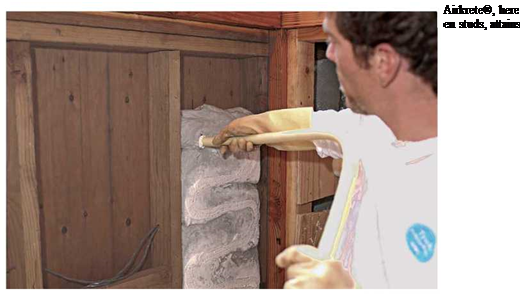
Sprayed-on foams should be applied only by contractors with specialized training and equipment. Most foams are two-part compounds that mix at the applicator nozzle. If the components don’t mix properly or the nozzle partially clogs, you can end up with a substance that won’t cure completely or insulate well. But correctly applied, sprayed-on foams fill even the oddest – shaped cavities, achieve high R-values, and block air movement effectively.
Permeability—the ability of water to permeate and migrate through the foam—is another critical factor. Basically, permeability depends on the
![]()

 |
![]()
amount the foam expands. Open-cell foams, which use water as a blowing agent, expand as much as 100 times and so are quite permeable (high-perm ratings). Use open-cell foams where you want moisture to migrate through wall or ceiling cavities or on the inside of foundation walls that haven’t been damp proofed adequately on the exterior. Closed-cell foams, manufactured with pentane as a blowing agent, expand roughly 30 times, and thus are less permeable (low-perm ratings).
It’s not always obvious what type of foam to install where. In warm regions, for example, high-perm, open-cell foam is typically sprayed under roof sheathing, to allow moisture to migrate freely. But in very cold regions, low-perm, closed-cell foam is sprayed to the underside of roof sheathing. So ask reputable local insulation contractors for their recommendations.


Leave a reply