Adding Outlets to Existing Circuits
Adding an outlet may be relatively simple if you can access an existing outlet and run a length of cable to a new outlet in the same wall cavity. But even the simplest setup needs a bit of planning— and some exploration—beforehand.
Here are some tasks to do before working in an existing circuit:
► Check local electrical codes, which may not allow extensions of ungrounded circuits. The NEC forbids tying into specialized kitchen, bathroom, or dedicated-appliance circuits.
The circuit you tie into must be a 15-amp or
20- amp general-use or lighting circuit.
► Using a circuit map like that shown on
p. 234 will help you calculate how much power the new circuit will draw. Add up the wattage of all lights and appliances you’ll use on the circuit—plus that of tools if it’s an outdoor outlet. If the total exceeds 1,440 watts for a 15-amp circuit, you’re better off installing a new circuit to serve the new outlets.
►0 Turn off the power and test all affected outlets—including switches—with a voltage tester to make sure the power is off (see "Using a Voltage Tester," on p. 235). If you flip a circuit breaker to cut power, tape the service-panel door shut and put up a sign warning others of work in progress.
► Using cordless tools with plastic housings also reduces the risk of shock. Wear protection if you use power tools.
► After testing verifies that the power is off, unscrew the receptacle and gently pull it from the wall so you can check the capacity of the box. If the box is already crowded—which you can tell just by looking—there may not be room for an additional cable. Consult the table "Box Fill Worksheet, " on p. 240, to be sure. It is possible to replace the existing box with a larger one, but that will complicate
the task.
After deciding where you’d like a new outlet, find an existing outlet close to it. Think spatially: The closest outlet may be on the other side of a wall or on a floor above or below. Any existing outlet
is a likely candidate as long as it is live all the time—and not controlled by a switch upstream.
That decided, next figure out how to run cable with a minimum of drilling, wire fishing, and destroying of finished surfaces. If the nearest existing outlet is on another floor, look for a wall that contains plumbing that runs from floor to floor (a “pipe chase”). Also, there’s often room to run cable in the voids around stairwells. Closets that line up vertically are also good places to hide cable, patched walls, and discrete holes.
Drilling through wall plates. If there’s an unfinished attic or basement, you may be able to locate a wall in which to run cable by noting where existing cables or pipes emerge, where sole plates have been nailed through a subfloor, or where attic joists rest on wall top plates. When dropping cable down from above, first drill two pilot holes in the top plate—one hole to shine a flashlight into, the other to look into—to see if
A 4-ft. flexible drill bit is one way to drill through wall plates to reach a power source below. Because its diameter is less than ’A in., the bit shaft tends to wander. Wear heavy gloves so you can guide the bit without hurting your hands. Drill slowly.
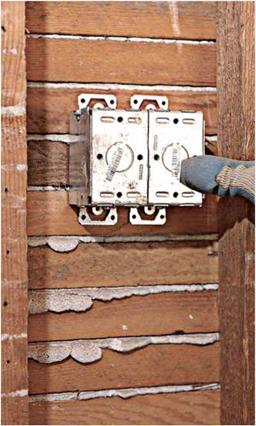
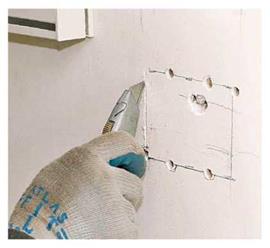
INSTALLING A CUT-IN BOX
|
|
|

there are obstructions such as fire-stops in the stud bay. Professionals sometimes have a helper stand near an outlet they’re drilling toward, who lightly places his or her hand on the wall to tell if a bit is on target. (You can feel the vibration of the bit.) Obviously, this takes skill and slow, careful drilling to avoid goring the helper.
Another approach: Drill exploratory holes by facing the outlet and angle drilling a Мб-in. hole at the base (or top) of the wall. Once the Мб-in. bit hits open space, insert a length of coat hanger or wire to find the hole more easily, above or below. If exploratory holes are in the right place, use a 18-in. bit to enlarge the holes.
If there’s no accessible attic or basement, you may need to cut small holes at the top or base of finish walls so you can angle-drill through wall plates and fish cable. For this you may need to pull back carpeting or remove baseboard molding temporarily.
Behind baseboards. Running cable behind baseboards may be the best way to minimize damage to plaster or drywall. О First, turn off power to the area, and check to be sure it’s off; then remove the baseboard trim. If you use a nail set to drive finish nails through the trim, you’ll be less likely to break it. Once the baseboards are off,
use a cordless circular saw to cut along the bottom of the finish wall, 3 in. to 4 in. up from the floor. Set the sawblade to the depth of the finish surface so you don’t cut into studs or through electrical cables hidden in the walls. (Wear safety glasses.) Use a flat bar to pry up the finish wall slot.
Next, create a pathway for running the cable by drilling holes through studs; by notching stud edges !2 in.; or by cutting a slot in the back of the baseboard, if it’s thick enough. Whatever approach you choose, install Иб-in. steel nail – protection plates afterward to keep screws or nails from puncturing the cable.


Leave a reply