Adding Outdoor Receptacles
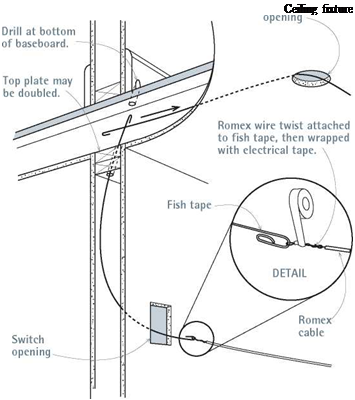
© To add an outdoor receptacle, find the nearest wall cavity that contains a general-use or lighting circuit, turn off the power, disconnect the receptacle, and fish wire to the new outdoor outlet. However, do not tap into kitchen or bathroom circuits or circuits dedicated to a single appliance. To position the outdoor box, use a utility knife to cut back drywall 2 in. on one side of the existing box; then push aside the insulation in the wall and drill a %-in. hole through the sheathing and the siding. Note anything in the wall that would obstruct a new box. If you can’t find a good spot, caulk the hole with urethane, and try another location.
Trace the back of the new outlet box onto a flat section of siding. Then use a reciprocating saw to cut out the siding and—depending on the type of weather-tight box you install— sheathing within that outline. All outdoor receptacles must be GFCIs, housed in "waterproof while in-use" covers. Feed cable into a clamp at the back of the box (12 in. of cable should stick out of the new box), tighten the cable clamp, mount the weatherproof box, and caulk around its perimeter with silicone or urethane caulk.
Wire an outdoor GFCI receptacle as you would an interior one. After screwing the wired receptacle to the new box, attach the gasket and the waterproof cover, splice the new cable to the existing one, and reconnect the indoor receptacle. Turn the power back on, and then test both receptacles to be sure they’re correctly wired.
Then use a drywall circle cutter to cut it out. (If you must use a utility knife, the fixture’s trim collar will cover up a less-than-perfect hole.)
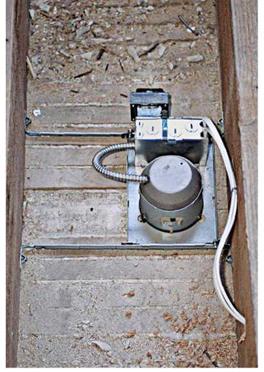
Open the fixture’s junction box. Then strip and splice incoming cable wires to the wires inside the junction box, using the twist-on wire nuts provided. Connections are standard: black wires to black, white wires to white, ground wire to green screw. Close the junction box and feed it through the hole in the ceiling first. Then insert the fixture can into the opening and rotate it till its spring mounting clips engage the ceiling. Insert the fixture’s inner baffle, whose mounting springs fit into slots inside the can. Install a light – bulb and the unit’s trim collar. Then turn the power on to test.
Mounting heavier fixtures is easier if there’s an unfinished attic above. In this case, simply drill an exploratory hole through the ceiling to approximate the desired fixture location. Then go up in the attic and decide whether it’s easier to nail a ceiling box to the nearest joist or to run a bar-hanger box between the joists and mount a ceiling box to it. Bar-hanger boxes allow you to position fixtures exactly where you want them, because you can slide the box along the bar. That decided, from the attic, cut out an opening for the ceiling box, which is almost always round.
Use a drywall circle cutter for drywall, a cordless jigsaw for plaster.
There are dozens of types of ceiling boxes, from flat 4-in. pancake boxes that screw to the edges of joists to deeper nail-in boxes with brackets that nail to the sides of joists to bar-hanger boxes. Attach the box, fish cable to the location, feed the cable through a knockout in the box, staple the cable to the side of a joist within 12 in. of the box, tighten the cable clamps; then strip the sheathing from the cable, and splice individual wires as described earlier. If the ceiling box is metal, it must be grounded with a ground wire screwed to the box. That done, you’re ready to attach the individual cable wires to the lead wires from the fixture and mount the fixture to the ceiling box.


![]()

 If the cavity above isn’t accessible, cut out a larger area of ceiling to expose the ceiling joists, so you can fish cable and mount the box. If the ceiling fixture’s location isn’t critical, use nail-in boxes with brackets, which have the smallest footprint to patch. If you use a hanger bar, cut a channel in the ceiling from joist center to joist center so you’ll have something to attach the patch ends to. If the ceiling is plaster, drill 18 in. holes to find the width of one piece of lath, usually 1 in. wide. You’ll reduce patching if you can remove just one lath strip. See Chapter 15 for more about patching plaster and drywall.


Leave a reply