CALCULATING PROPER FIXTURE SPACING AND PLACEMENT
|
S |
tandard fixture layouts are dictated by local plumbing codes. Plumbing codes require certain amounts of space to be provided in front of and beside plumbing fixtures. The rules for standard fixtures are different than those used to control the installation of handicap fixtures. We will use this chapter to cover the essentials of standard fixtures and address the topic of handicap fixtures in the next chapter. For now, just concentrate on typical fixture installations when you review the information in this chapter. Before we get into deep details, I want to remind you to consult your local plumbing code for requirements specific to your region. The numbers I give you here are based on code requirements, but they may not be from the code that is enforced in your area.
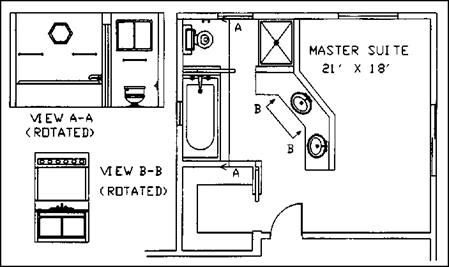
If you work mostly with new construction, you probably work from blueprints. When this is the case, fixture locations are usually indicated and approved before a job is started. But, remodeling jobs can require plumbers to make on-site determinations for fixture placement. A contractor might ask you to provide spacing requirements for small jobs. Knowing how to do this is important. For example, if a builder showed you a sketch, like the one in Figure 10.1, would you be able to assign numbers to the areas around the fixtures? How wide would the compartment where the toilet is housed be required to be? The answer is 30 inches. This is common knowledge for many plumbers, and codebooks define the distance. So, even if you don’t know the spacing requirements off the top of your head, you can always consult your local code for the answers.
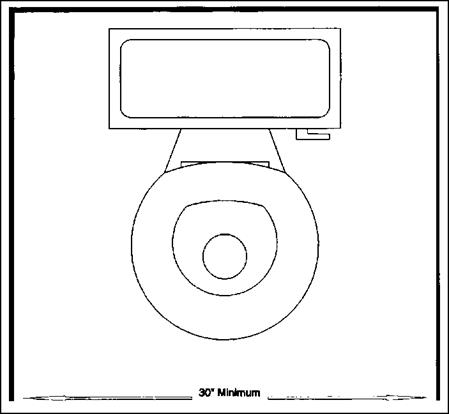
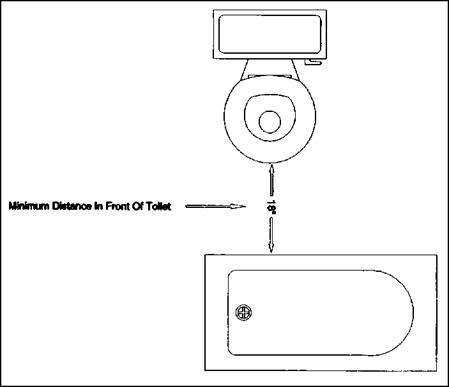
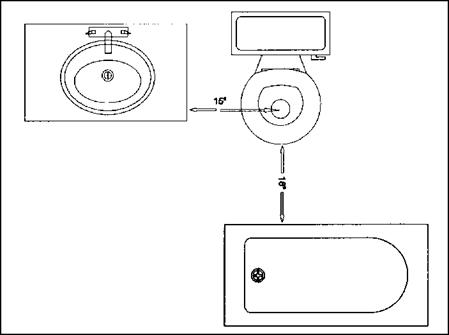
A general rule for toilets is that there must be at least 15 inches of clear space on either side of the center of the drain for the toilet. This equates to a total space of 30 inches (Fig. 10.2). Now, how much clearance is needed in front of a toilet? The normal answer is 18 inches (Fig. 10.3). Some bathrooms are small. This can create a problem for plumbers, especially if you are remodeling the bathroom with new fixtures or possibly different types of
187
|
FIGURE 10.1 ■ A typical bathroom layout. (Courtesy of McGraw-Hill) |
|
|
|

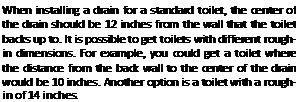
![]() fixtures. Getting your rough-in for the fixtures right is crucial to the job. If you install a drain for a toilet and find out when you go to set fixtures that there is inadequate space for the toilet to comply with the plumbing code, there could be a lot of work and expense required to correct the situation.
fixtures. Getting your rough-in for the fixtures right is crucial to the job. If you install a drain for a toilet and find out when you go to set fixtures that there is inadequate space for the toilet to comply with the plumbing code, there could be a lot of work and expense required to correct the situation.
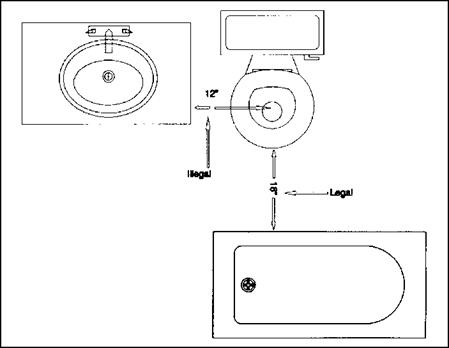
 When you are laying out plumbing fixtures, you should concentrate on what you are doing. Get to know your code requirements and check the fixture placement in all directions. Figure 10.4 shows how a legal layout might look. in contrast,
Figure 10.5 shows what would result in an illegal layout. Notice that the distance from the edge of the vanity is only 12 inches from the center of the toilet. To meet code, the distance must be at least 15 inches. A problem like this might be avoided by using a smaller vanity. If the potential problem is caught on paper, before pipes are installed, it is much easier and less costly to correct.
|
FIGURE 10.4 ■ Minimum distances for legal layout. (Courtesy of McGraw-Hill) |
|
|
Something else to consider when setting fixtures is their overall alignment.
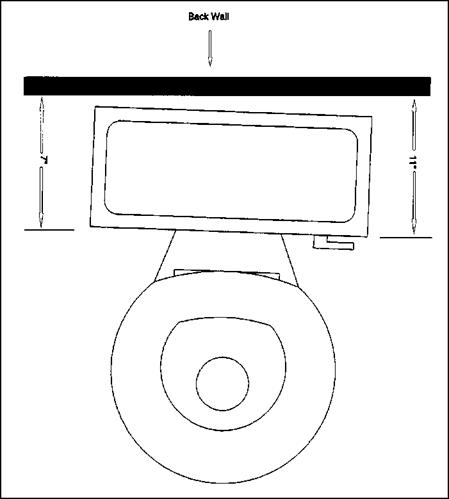
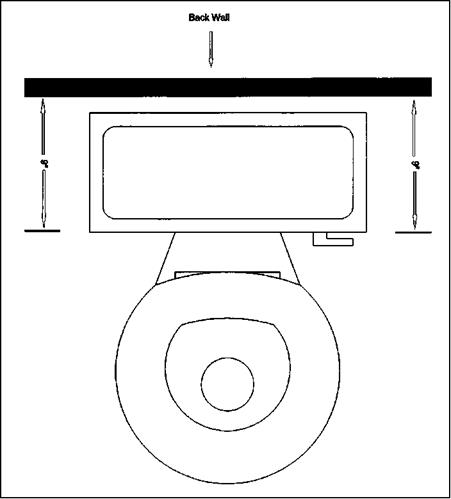
 The plumbing codes not only require certain defined standards, they also deal with topics such as workmanship. This means that a job could be rejected if the fixtures are installed in a sloppy manner. Figure 10.6 shows a toilet where the flush tank is not installed with equal distance from the
back wall. A proper installation would have the toilet tank set evenly, with equal distance from the back wall, as is indicated in Figure 10.7.
|
|||
|
|
||
|
|||
|


Leave a reply