USING DRYWALL CLIPS TO SECURE. THE ENDS OF DRYWALL SHEETS


![]() paper-faced insulation; it’s designed to affix drvwall to a wood surface. Follow the application and installation instructions on the label.
paper-faced insulation; it’s designed to affix drvwall to a wood surface. Follow the application and installation instructions on the label.
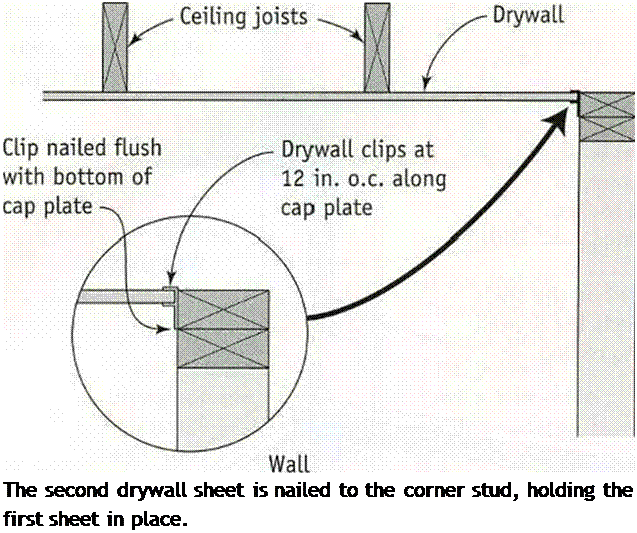
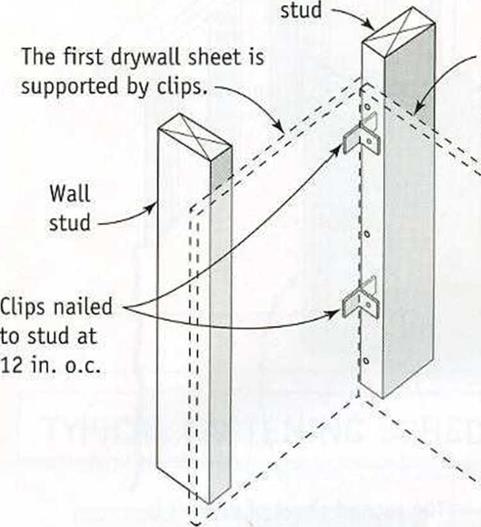
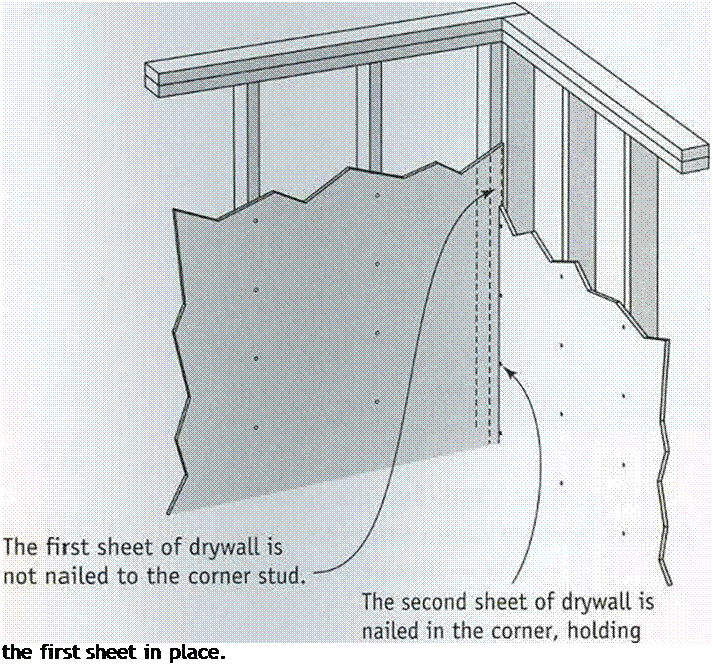
If you provided backing or deadwood while building interior walls (see chapter 4) and installing roof trusses (see chapter 5), you’ll be able to drive nails or screws along the walls to fasten drywall panels. But if solid backing material for drywall was not nailed to the tops of parallel walls or in the corners where walls intersect, metal drywall clips can be used instead. See the illustration at right for instructions on using these clips. Unlike a dry – wall corner secured with nails or screws, a corner secured with clips can be more resistant to cracking when the framing material moves in response to temperature fluctuations.
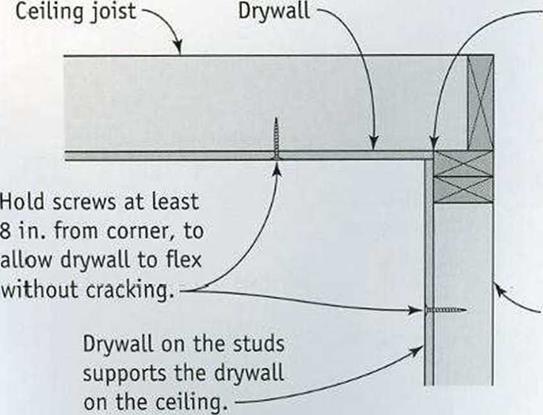
Another strategy is to let the corner “float,” eliminating nails where a ceiling panel meets the wall. The top edges of wall panels are then pushed snugly against the ceiling panels, holding them in place (see the illustration on p. 224). Again, this can help prevent corner cracks at the ceiling-wall juncture due to wood shrinkage or truss uplift. If you’re uncertain about how to handle drywall corners, check with experienced builders in your area.
Once all the ceiling panels are in place, run a bead of caulk where the ceiling panels butt

 |
 |
Cutting drywall isn’t difficult, once you learn how to score through the paper covering with a utility knife. . .
The panels have a gypsum core that makes them heavy and delicate. They create a lot of dust, too, especially when making cuts with a saw. . .
Covering the studs with drywall provides our first look at real rooms. . .
The metal corner bead looks ugly until it is covered with drywall compound, which we call mud.
|
|
CREATING A FLOATING DRYWALL JOINT
![]()
![]()
![]()
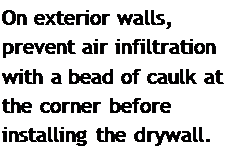
the exterior walls to reduce air infiltration (see the illustration above). I finish the ceiling by marking the location of wall studs with a small pencil mark on the ceiling drywall. These marks help when nailing drywall to the walls. Don’t use keel on drywall (unless it is covered with drywall tape) because it can bleed through paint.
STEP 3 Install the Wall Panels
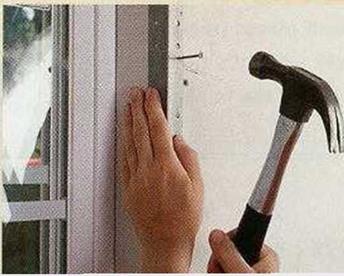
Hanging drywall on the walls is easier than hanging them on the ceiling. You have to work around window and door openings, and there are more electrical outlet openings to mark and cut, but you don’t have to work overhead. Its important to know that some electrical wires (for the thermostat, doorbell, range hood, and so on) will not be enclosed in a box. Electricians often wrap those wires around a nail to locate their position. All you need to do is make a small hole in the drywall and pull the wires through.


Leave a reply