Tool Talk MAKING A PLUMB STICK
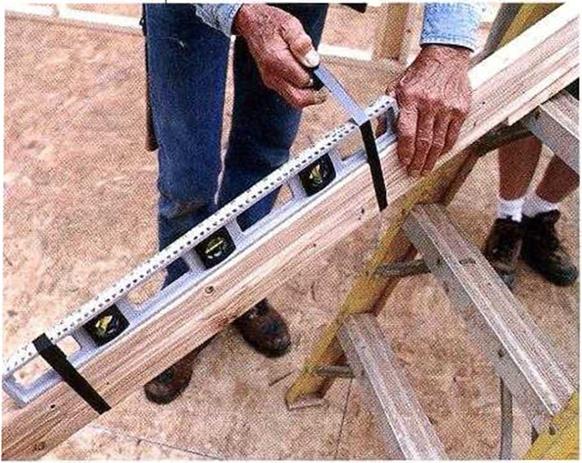
TO PLUMB WALLS, you can use a wall-high level that costs hundreds of dollars or you can make a plumb stick from any 2-ft. level and a straight 2×4 stud. Even a
battered, inaccurate level can be used. Select the straightest stud you can find and nail a 16-in. 1×2 strip onto each end, letting the strips overhang the stud ends by about 3 in. Use some duct tape to attach a 2-ft. level to the opposite edge of the 2×4 (near the center) and your plumb stick is nearly ready to use (see the photo above).
It’s important to check your plumb stick for accuracy. To do so, hold it veilical and flat against a wall. Keep the bottom end fixed in place as you move the top end back and forth until the bubble is exactly centered in the vial. Make pencil marks on the top and bottom of the wall along the lx extensions. Now turn the plumb stick side for side—not end for end—so that :he level is flat against the wall on the other side of ;he lines you marked. Carefully line up the extensions with the marks on the plates. If the bubble returns to the exact center of the vial, the plumb stick is accurate. (By the way, you can check the accuracy of any level with this method.)
If the bubble is not centered in the tube, the level needs to be adjusted. Stick a wooden shim, a “’olded piece of paper, or an 8d nail under one end of the level (between the level and the 2×4), and then check the plumb stick again. Keep adjusting the shim thickness until the bubble is centered both ways.
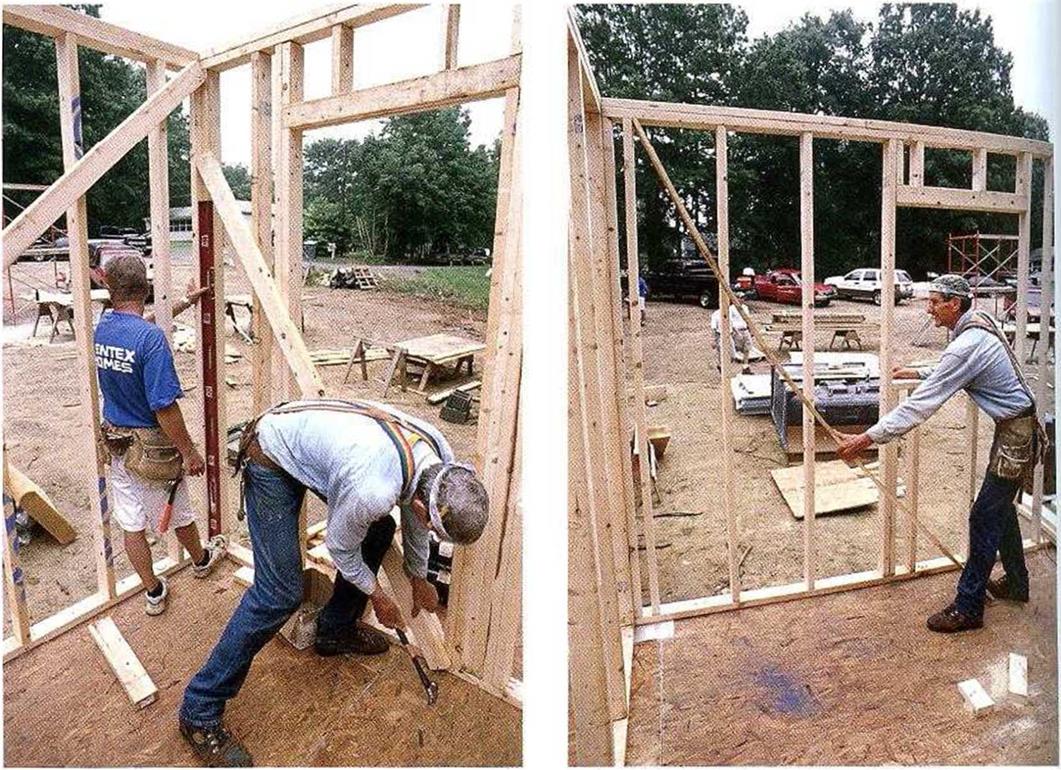 PLUMB THE WALLS. While one person holds the level, another person can nudge the wall to get it plumb, then nail off a diagonal brace to keep it that way.
EXERT EXTRA PRESSURE WITH A PUSH STICK. When a wall needs extra coaxing to get it plumb, wedge a 1×4 or 1×6 push stick against the top of a stud. Your foot can anchor the bottom end of the stick. Flexing the stick upward pushes the wall outward.
the facing page). If you need more force, use a push stick, as shown in the bottom right photo on the facing page. Cut a push slick from a 1×4 or 1×6, making it about 116 in. long. Use the natural flex in the push stick to exert force on the wall. Position the top of the stick under the top plate and against a stud. Diagonally extend the stick down to the floor, as parallel as possible to the wall. Bend the stick down, holding the bottom end against the floor with one foot. Now pull the middle of the stick up. As the board straightens, the wall moves.
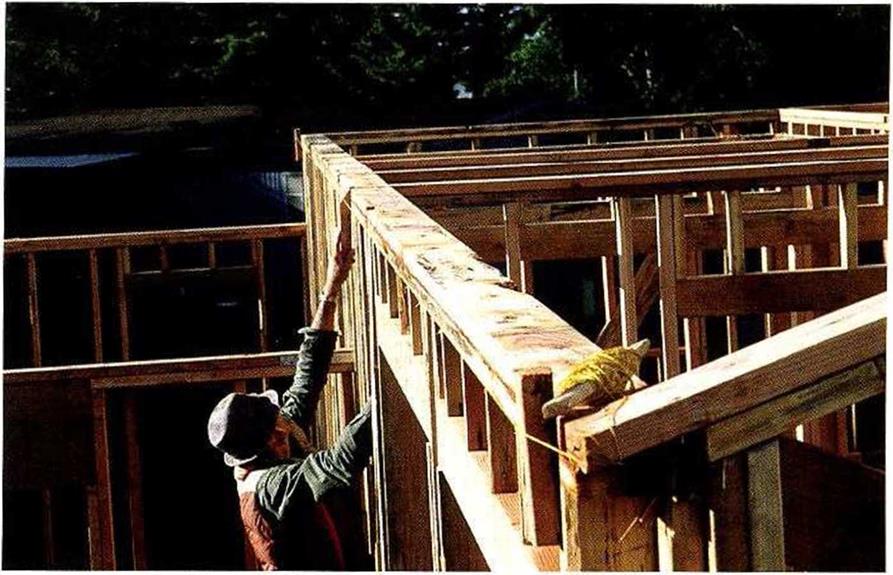
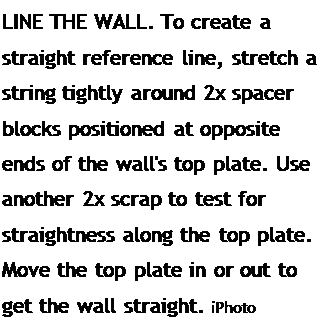
 After the wall is plumb, finish nailing in the metal braces or use temporary 2x stud braces nailed at an angle to hold the wall plumb until it is sheathed. When the exterior walls are plumb, proceed to the interior walls. You can’t straighten a wall until the walls that butt into it have been plumbed.


Leave a reply