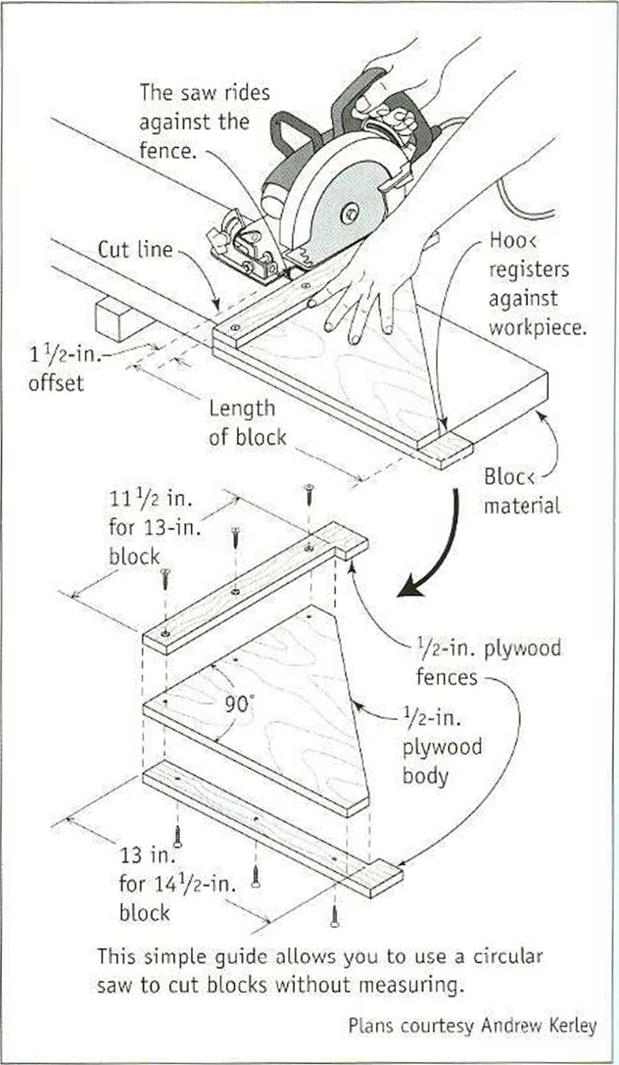
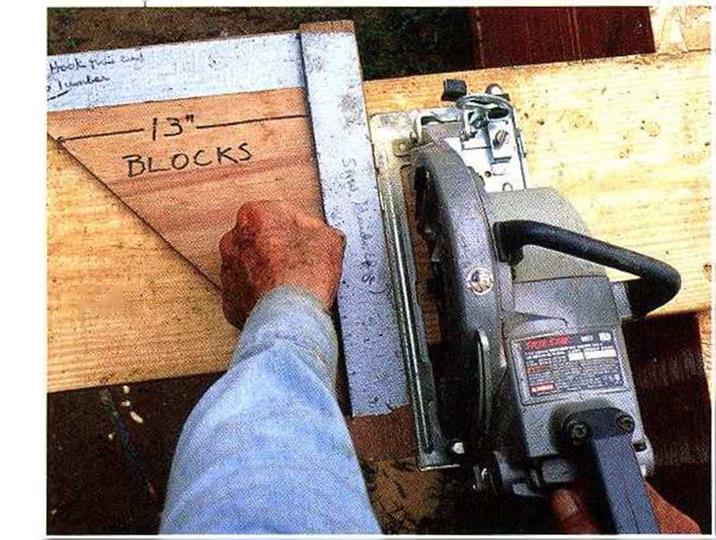
Tool Talk MAKING A BLOCK-CUTTING TOOL
|
|||||||
|
|||||||
|
|||||||
|


job site, as I-joist width varies from manufacturer to manufacturer. T he most common width for residential 1-joists is 9’/ in., so you can cut blocking from scrap pieces of I – joists or from 2×10 lumber. Cut the blocking to lit snugly between the chords of adjacent I – joists, and nail the blocking to the chords.
When nailing blocking between joists, it’s best to begin at one end of the house and sim – plv work your way toward the opposite end. Sight down the length of the first joist (the one closest to the rim joist) and make sure it is running straight. Measure the first joist space and cut the block to length. Set the block on edge over a girder or a crib wall. Drive two 16d nails through the rim ioist into the block and two 16d nails through the floor joist into the block. Next, angle a I6d toenail through both sides of the joist into the girder. Nail lapping joists together with two I6d nails. Sink one 16d toenail through each joist into the girder and angle a 16d toenail down
through the block at each end into the joists they span.
Once you have a few blocks nailed in place, use a tape measure to make sure the joists are maintaining an accurate o. c. layout so that the sheathing will land mid-joist. 11 necessary, cut the blocks a bit short or long to maintain accurate spacing.
In many parts of the country, rough plumbing and heating ductwork are installed before the floor is sheathed, so be sure to check with those contractors before sheathing. Also, find out whether you need a floor joist inspection before you install the floor sheathing.
STEP8 Install the Floor Sheathing
Before plywood and OSB were readily available, we sheathed floors with softwood 1x6s that were cut and nailed diagonally across the joists. To make the joints between the 1×6
boards, the ends of each board were cut at a 45-degree angle. Frequently, the 1×6 lumber was of poor quality and had large knots. I still have scars on my lower legs from breaking through subfloors while working on job sites decades ago. The sheathing panels we use todav are much better than 1×6 boards—vet
4 4
another improvement over how houses were built in "the good old days.”
Sheathing with 4xtS sheets of tongue-and – groove plywood or OSB is not difficult, though the sheets can be awkward to handle. Carry them with a partner, if necessary, and take care not to damage the tongues or the grooves, which can make X more difficult to fit the sheets together. Be sure to use exterior – grade, л-in.- or %-in.-thick sheathing.
Snap a line to lay out the first sheathing course

 When laying out long rows of 4×8 sheathing, its best to start from a control, or reference,


Leave a reply