Techniques SHEATHING A WALL
WHEN ALL THE walls have been raised, braced, and lined, it’s time to attach the sheathing. On this house, two types of sheathing are used.
1. To provide shear bracing, OSB panels are installed on all corners and every 25 ft. along exterior walls.
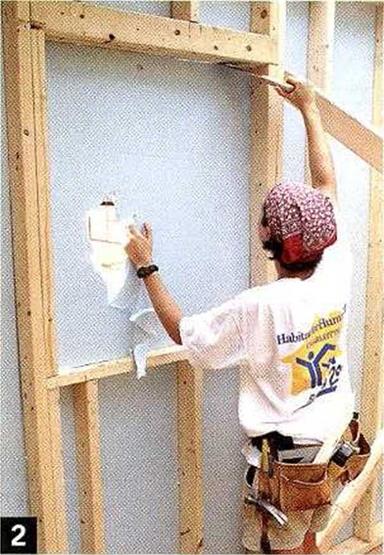
2• Foam board sheathing is nailed to the framing between wood panels. It’s easier to sheathe right over window and door openings, then cut out the openings from inside. Foam cuts easily with a handsaw.
|
|
FEW THINGS SCARE me more than working on a ladder. While they are frequently indispensable, ladders must be treated with the same respect as power saws. Here are a few tips to make working on a ladder safer:
ж Don’t buy a cheap ladder. I like the heavy-duty, fiberglass models. Look for one with a 1A rating (the best) on the label. When buying an extension ladder, be sure to select one that is long enough to extend 3 ft. above the height of your roof.
ж Aluminum and wet wood can conduct electricity. It’s best to use a fiberglass model when working near electrical wiring.
Don’t stand on the uppermost rungs. Get a longer ladder instead.
When working on a ladder, you can lose ycur balance by reaching too far to the side. If your reach starts to feel precarious, it probably is.
Get down and move the ladder.
Don’t leave tools sitting on top of an unattended ladder.
Make sure the ladder’s feet are firmly and securely planted on a solid surface before climbing up it. When using an extension ladder, tie it to the building at both the top and the bottom (this is particularly important if it’s a windy day).
Since sheathing panels will he covered with finished siding, they don’t need to be installed perfectly. Earthquake- and hurricane-country sheathing codes are often quite strict, so check with your local building department before you start covering walls. Again, remember to insulate corners, channels, headers, and behind tubs before you attach wall sheathing.
Install sheathing on the corners first
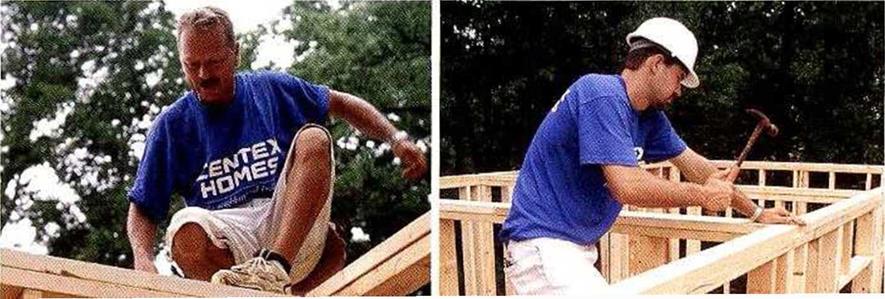
Whether I’m sheathing all the exterior walls with wood panels or just the corners (as we did on this house), I always install sheathing on the corners first (see the bottom left photo on p. 109). To hold a sheet in position while you get ready to nail it, try driving a couple of 16d nails near the bottom of the wall. Keep plywood and OSB ‘A in. away from a masonry
![]()

![]()

At first, we’re not worried about making sure the are plumb or straight—we just keep them up with dio braces. . .
foundation. If the stud layout is correct, the edge of the first panel should fall on a stud 4ft. from the corner. In humid areas, leave a! йі. expansion gap between sheets. If a sheet doesn’t break on the center of a stud, rip the sheet to fit, move the wall stud, or put in an extra stud.
You can sheathe right over windows and doors and cut them out later with a reciprocating saw. Use scrap pieces to fill in gable ends and underneath windows or to cover rim joists.
1 also sheathe various walls inside the house, though this goes beyond most codes. Ido this because 1 know that a lew extra sheets of OSB might save someone’s life during an earthquake or a tornado. Sheathing the back wall of a closet, bathroom, or utility room gives the frame extra lateral stability. In areas prone to serious tornadoes, you may be required to create an entirely sheathed and well-anchored safety room in which household members can gather during a storm (see Resources on p. 278).
The nailing schedule for sheathed walls often requires 8d or 1 Od nails at 4-6-12. This means that nails are spaced 1 in. around the perimeters of walls, 6 in. at the joints between sheathing panels, and 12 in. in the field.
Check with your building department for the required nailing schedule in your area.
There are many areas in the country where plywood or OSB sheathing is required only at exterior corners and everv 25 ft. along exterior walls. This allows you to install nonstructural sheathing material everywhere else. On this house, we used [2] -in. foam sheathing. The foam board is light and easy to handle, though it can be damaged by a stray hammer blow or
O j I
by someone stepping on it. Attach foam sheathing with roofing nails. Sheathe right over window openings, then go inside the house with a handsaw and cut out the loam from the openings (see the bottom right photo on p. 109).
If you’ve come this far, vou and vour con – struction crew deserve some heartv congra – filiations and a little time to rest before tackling the roof. Getting wa Is framed and sheathed is a huge step forward in the construction process, and it demands brainpower for accurate layout and lots of energy to pound nails and raise walls. Make sure you spend some time cleaning up the job site at this point in your project. There are bound to be plenty of offeuts, such as 2x stock, plywood or OSB scraps, and stray fragments of foam sheathing. Remove the debris and get set to raise the roof.
lien we start finding the exact positions with a level к soon as the exterior walls ore up, we start on the
|
|
|
|
 |
|

|


Leave a reply