Techniques LEARNING THE VOCABULARY OF STAIRS
|
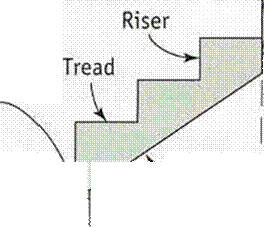
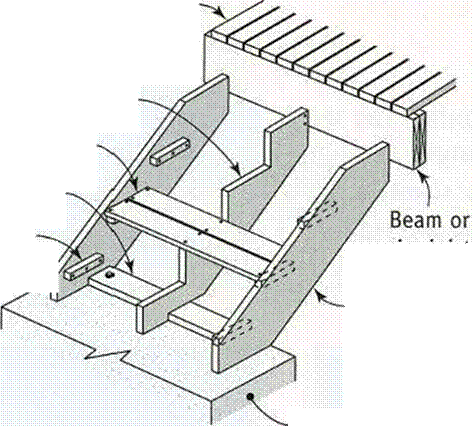
EVERY NEW ENDEAVOR COMES WITH a new vocabulary that you need to learn before you can get started. Building stairs is no exception. Once you learn the names of the different parts and how they relate to each other, you can begin to put together a set of stairs. Stringers: The diagonal members (here, PT 2x12s) that support the treads and risers. Three stringers are needed for a 36-in.-wide stairway, four for a 48-in.-wide stairway. A cut or open stringer has tread and riser cutouts and can be used in the middle of a stairway. An open stairway is framed with cut stringers. A closed stringer has no cutouts; instead, cleats are used to support the treads. Closed stringers can be used on only the sides of a stairway. Riser: The vertical part of a step. For safety’s sake, the height of risers should always be around 7 in. This measurement is also known as the unit rise. Tread: The horizontal portion of a step, or the place where you set your foot. Treads should be approximately 11 in. wide. Landing: The level space at the top and bottom of a stairway (and sometimes in the middle if a set of stairs changes direction). A 3-ft.-wide stairway should have a landing that is at least 3 ft. square. Total rise: The vertical distance that a stairway travels from the lower landing to the upper landing. This is always measured from finish floor to finish floor. |
|
Total run: The horizontal distance that a stairway travels from the leading edge of the first tread to the trailing edge of the last. Kicker board: The PT 2×4 or 2×6 that is secured to the bottom landing. The kicker board helps hold the stringers in place. |
|
STAIR VOCABULARY |
|
Landing |
|
*Z2* ns* ю к» *s» |
|
Kicker board, fastened to landing and stringers |
|
Total Plumb n*se cut |
|
Total run |
|
A stairway’s total rise is always from finish floor to finish floor. |
|
CUT AND CLOSED STRINGERS Deck or porch platform |
|
Cut stringer Tread board |
|
Kicker board |
|
Closed stringer |
|
Concrete landing |
|
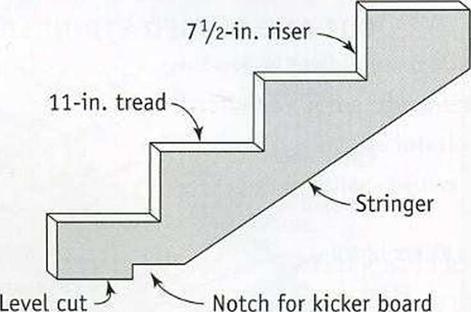
finish floor—in this case, from the concrete slab to the top of the porch decking. Let’s call it 30 in., a fairly typical porch height. Divide the total rise (30 in.) by 7 in., the standard riser height, for a total of 4.3 risers. Round that to the closest whole number (in this case, 4) and divide your total rise of 30 in. by that number. This gives you an individual |
|
riser height of 7.5, or 7И in. Now you have the riser height and the number of risers. You can also determine the total run of the stairs; this will tell you where the concrete landing or base for the stringers should be. Do a rough sketch of the stairs, then multiply the number of treads by the tread width (in this case, 11 in.). Keep in mind that you can either |


|
Seven is the magic number. When determining the number and measurement of risers in a stairway, always start by dividing the total rise of the stair (the vertical distance from landing to landing) by 7. The unit rise (the height of each step) should be between 7 in. and 73A in. |
 |
|
|
|
|
|
|
|
|
|
|
|
|
|
 |
|
![]()
![]()
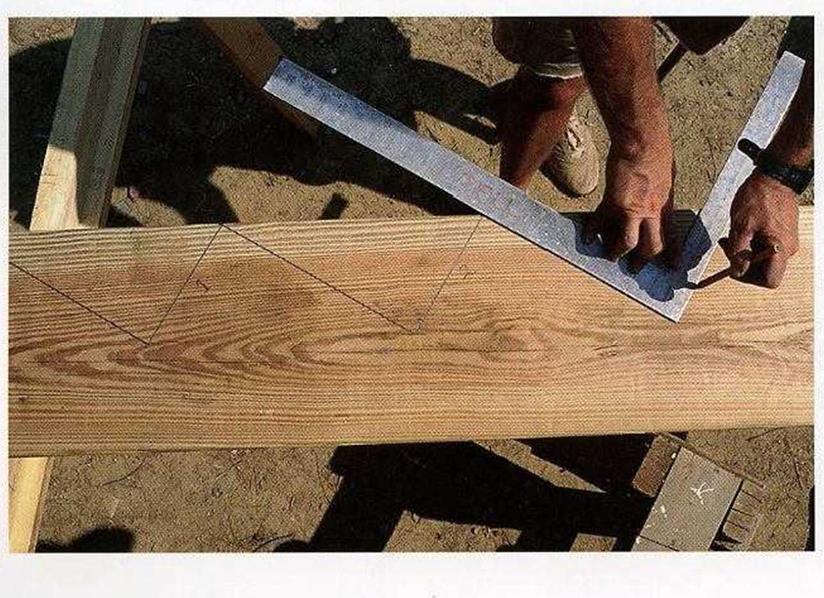
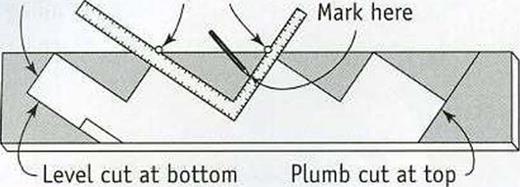
framing square (the tongue). Place the other gauge at the 11-in. measure (the tread width) on the wider part of the square (the blade). Now lay out the stringer, working from the bottom to the top. If you don’t use stair gauges on a framing square, simply align the 7/4-in. and 11-in. measurements over the edge of the stringer, as shown in the photo on the facing page. After marking the first tread and riser, move the square up, place the tread mark directly on the riser mark, scribe the second tread and riser, then do the third.
Then use the square to mark a level cut at the bottom of the stringer and a plumb cut at the top.
The bottom of the stringer must be “dropped” to allow for the thickness of the first tread. If you were to screw a VA-n.-thick tread on the first riser (7A in. tall), then the first step would be 9 in., which would cause a lot of people to trip every time they used the stairs. To make each riser the same height, cut 1/1 in. from the bottom of the stringer. Finish laying out this stringer by marking a notch for a2x4 kicker board. Its best to cut the kicker – board notch at the back of the stringer.
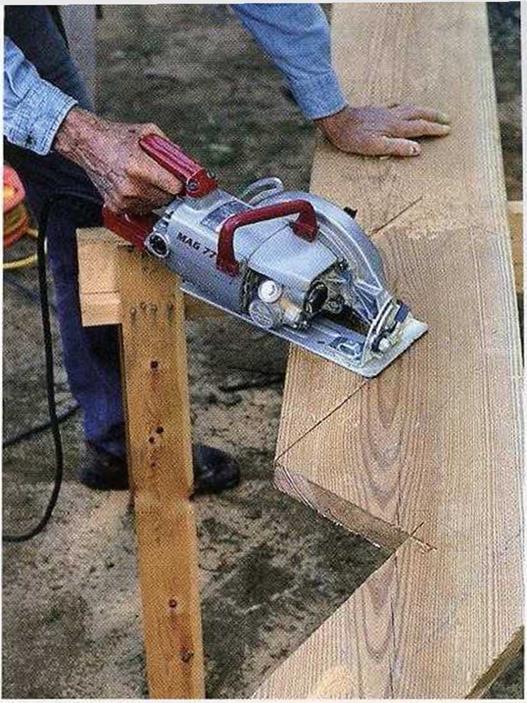
When the layout is complete, it’s time to cut the stringer. Start the cuts with a circular saw, closely following the lines (see the top photo at right). Then use a handsaw or a jigsaw to finish the cuts at the intersection of the tread and the riser so that you don’t ovcrcut and weaken the stringer.
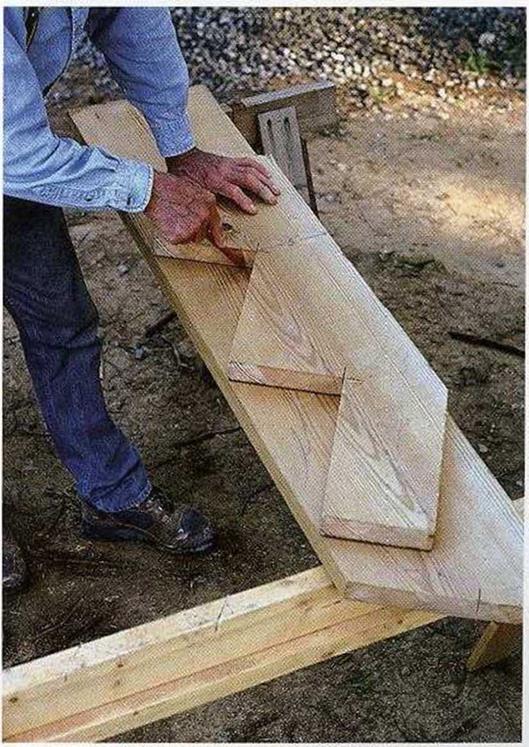
A CUT STRINGER SERVES AS A PATTERN FOR A I CLOSED STRINGER. Once you’ve completed a cut stringer, use it as a pattern for other cut and closed stringers in the same staircase (see the bottom photo at right). The plumb and level cuts at the top and bottom of the closed stringer are identical to those on the cut stringer, but they are the only cuts you need
to make on a closed stringer. Using the cut stringer as a pattern, mark the tread lines on the closed stringer to indicate where the cleats must be installed.
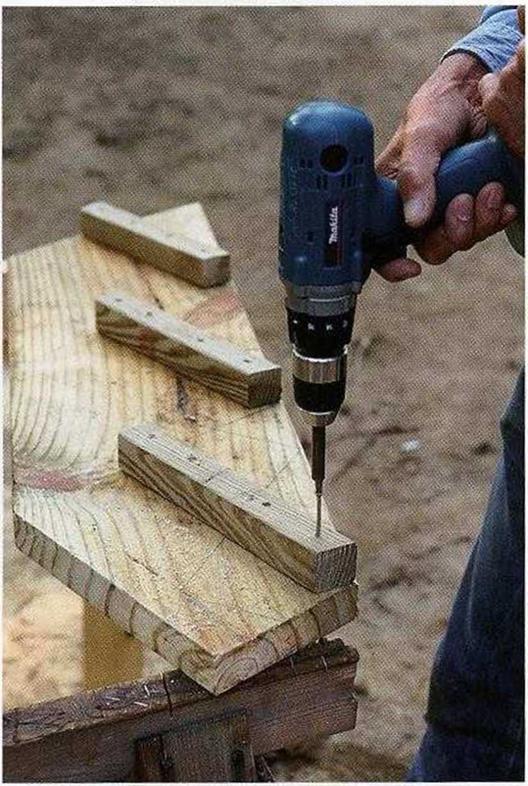
Fasten l/l-in.-square PT wood cleats below the tread lines on each closed stringer (see the top photo on p. 186). Drive four 2!4-in.-long deck screws to secure each cleat. Manufactured

 metal cleats are also available, if you prefer.
The treads will be screwed to the cleats after all the stair stringers have been installed.



Leave a reply