STEP5 Build the Walls
In addition to being a carpenter for the past 50 years, I’ve also been a gardener my entire life, and I see a lot of similarities between framing and gardening. If you take the time to prepare the ground, add lots of compost, plant good seeds, mulch well, and nurture young plants, you can’t help but grow outstanding vegetables. The situation is similar when you’re framing walls, if you take the time to lay out, cut, and correctly position every part of every wall, then the actual framing will go smoothly and you’ll produce a quality building.
A Habitat volunteer once said to me, “Now the fun starts,” as we began to nail together all the wall pieces. I guess everything in life is rel alive. If you have to stand out in the blazing sun building walls day in and day out, the joy of framing does eventually wear off. On the
О «■
other hand, when working as a team, a group of people building walls will see a lot of progress in one day, and that is satisfying.
Before I start building walls, I a ways begin by cleaning up the work area. Some scrap will have been generated as you cut the parts for the walls and there’s no need to leave it lying around for someone to trip over.
Begin with door and window assemblies
1 begin framing by building the door and window assemblies. All window headers and most door headers need top cripples (sometimes called jacks) and all rough sills need bottom cripples (see the illustration below). A chop – saw volunteer has probably already cut these to size, grouped them, and labeled them. Grab an armload and carry them to their proper locations. Check to see that the cripples match
 the lengths written on each header, livery header takes a cripple im each end and one on each layout mark. Pay close attention! Place bottom cripples perpendicular to the wall plates, exactly where they will be nailed in place. 1 also place a trimmer and a king stud next to each window opening before I do any nailing.
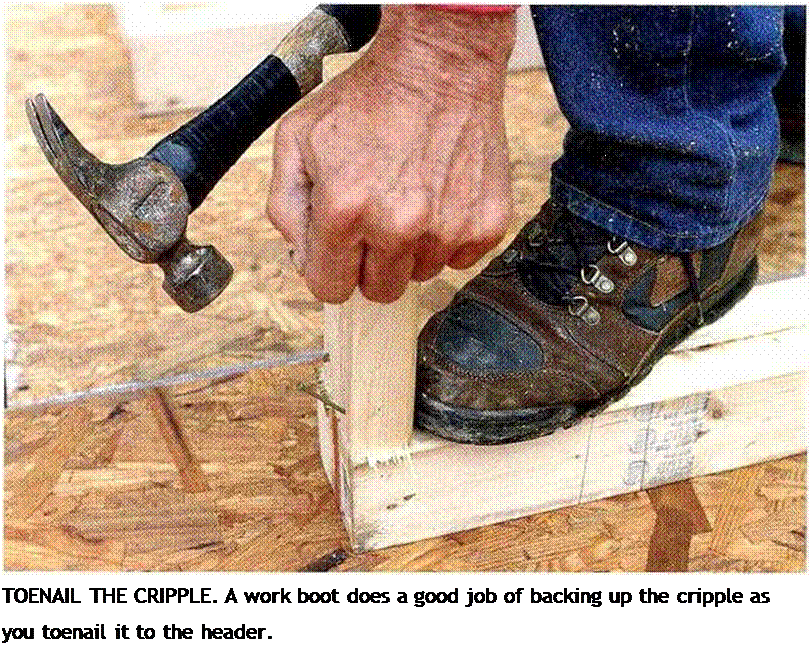
To make toenailing cripples to headers easier, back up the cripple with your foot before starting the first two 8d toenails (see the photo at right). Make sure each 2x cripple is on its layout mark and flush with the sides of the header, then drive the nails home. After nailing off one side, toenail two more <8d nails into the other side. Repeat the process until all the top cripples for each wall have been nailed to their headers.
Attaching the bottom cripples to rough windowsills is easier. Move the rough sill to the upper ends of the cripples placed against the plates. There should be one cripple at each end of the sill and one at each layout mark. Drive two 16d nails about 4 in. from each edge of the rough sill into each cripple. When nailing near the end of 2xs, set the nail back from the end and drive it at an angle or blunt the nail point to reduce your chances of splitting the board.
Finish the window-frame assemblies bv
/
nailing on the trimmers and king studs. This is easy to do now because y ou are working flat on the floor. Don’t move these units around. Keep them in place where they will be nailed to the plates. Nail the window trimmers flush with the ends of the bottom cripples. Secure the trimmers to the rough sill with just two 16dnails each. Then nail the king studs alongside them so they are flush with the top of the Hop cripples and with the bottom of the trimmers. Secure the king studs on each side bv driving two 16d nails into a 2x header or four or five 16d nails into a larger header. Finally,
drive a nail near the top of the trimmer into the king stud. T he trimmers will be permanently nailed later, before you install the exterior sheathing or set the windows. As for door trimmers, wail to install them until after the walls have been raised.
![STEP5 Build the Walls Подпись: A FULL DECK OF DOOR AND WINDOW ASSEMBLIES. These assemblies are nailed together and ready to be installed between the top and bottom wall plates. [Photo Larry Наші.]](/img/1312/image348_0.gif) With all the walls plated and the window and door frames nailed together, you’re ready to frame the walls. At tins stage, its smart to check vour work. Make sure that the framing members are flush with each other and nailed tightly together. Keep the door and window
With all the walls plated and the window and door frames nailed together, you’re ready to frame the walls. At tins stage, its smart to check vour work. Make sure that the framing members are flush with each other and nailed tightly together. Keep the door and window


Leave a reply