STEP4 Secure the Trusses to the Interior Walls
On small houses, trusses are generally engineered to obtain their support from exterior walls without needing further support from interior walls. Still, its not uncommon for trusses to cross over and bear on interior walls. Inmost regions, these trusses can usually be nailed directly to the interior wall with two 16d toenails on one side and one on the opposite side. T his is not the case, however, if you live in a part of the country where the weather may be freezing one day and boiling the next. In areas with extreme temperature fluctuations, trusses must be able to expand and contract freely. Otherwise, drvwall ceilings
nailed to these trusses tend to crack. Check with your building department for the code requirements in your town or city. In addition, ask area builders what the local practice is.
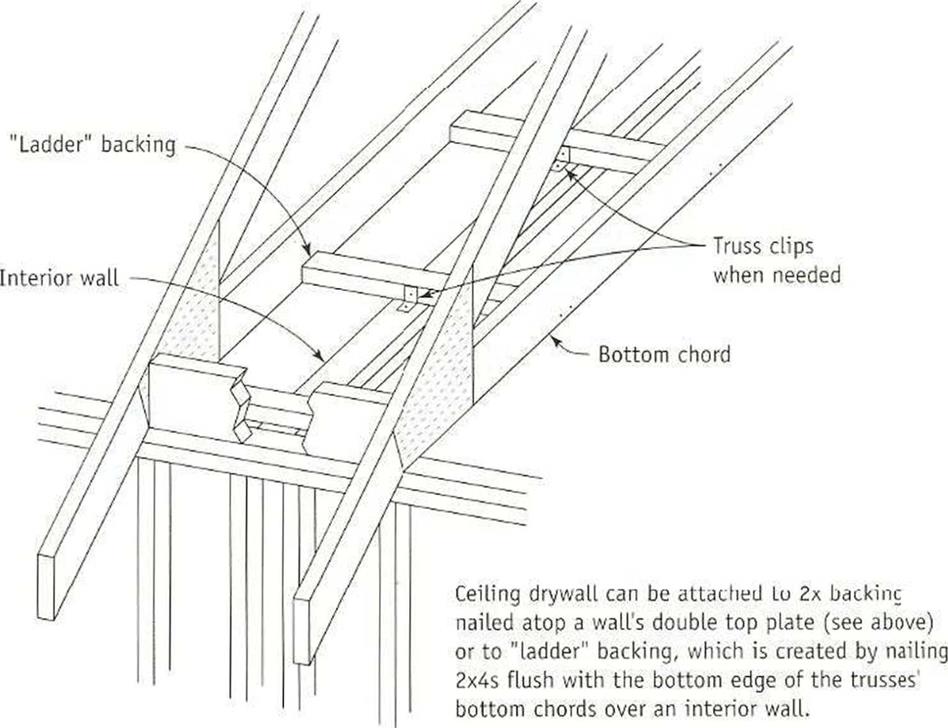
To secure a truss to a wall while still allowing it to adapt to fluctuations in temperature and humidity, use a truss clip, as shown in the illustration above. These clips, which are nailed both to the wall plates and to the truss, feature a slot that allows the truss to move up and down as it expands and contracts— just make suie (lie nail is slightly loose in the joist chord.
|
|
Ceiling joists or joist chords
|
|
|
|


![]()

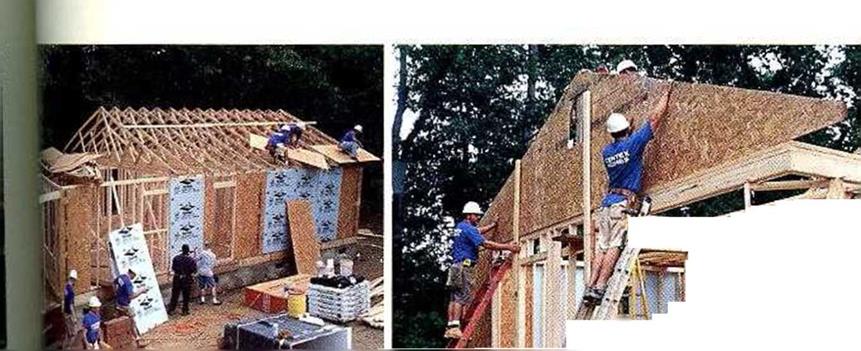
Doing carpentry on the ground is easier than doing carpentry on top of the house. . .
You really have to watch your step. . .
We handle the trusses carefully. . .
Plenty of bracing is required to tie the trusses together and to the rest of the house. . .
When all the trusses are up, the house looks like an upside-down ship with the hull removed.
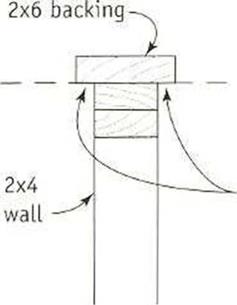
At this point, you need to add backing (sometimes called deadwood) to walls that run parallel to the joist chords. The backing provides a nailing base lor ceiling drywall (see the illustration on the facing page). It’s easier to put the backing in now rather than after the roof is complete and hampered by sheathing. This is a good place to use knotty, crooked 2x stock. Nail the stock, one 16d nail every 16 in., to the double top plate of parallel walls so that the 2x backing overhangs the double top plate by at least 1 in. on both sides. Some builders use drywall clips instead of solid backing, but I like to fasten nails into something solid. (Details on drywall installation are covered in chapter 9.)
This process is different for trusses that are allowed to expand and contract. In this case, nail flat 2×4 “ladder” hacking between the joist chords on a parallel wall. Use truss clips to attach the backing to the double top plate of the wall, as explained on p. 127. This allows the trusses to expand and contract without stressing the drywall.
STEP6 Install the Barge Rafters and the Fascia Boards
As explained earlier in this chapter, barge rafters extend beyond the end of a building, creating an overhang at the gable ends. The rafters are supported by 2×4 lookouts that fit into notches cut in the gable-end rafters. The lookouts run back to the first inboard rafter (or roof truss). At the bottom corner of the roof, a barge rafter meets a gutter or fascia board, which extends along the eave and is fastened to the ends of the rafter tails.
There are a few tricks to making sure that these exterior trim details are done correctly. If you plan to cover the trim with aluminum cladding, as we did on this house (see chapter 7), the culling and installation work is a little easier. On the other hand, if the barge rafter and fascia will be exposed as finished trim, youTl need to cut tight-fitting miter joints where the boards meet. Both types of installation will go more smoothly if you follow the order of the steps described below.
I like lo install lookouts long, then snap a line from eave to ridge and cut the lookouts in place. If you’re framing with rafters rather
|

![]()
![]()


Leave a reply